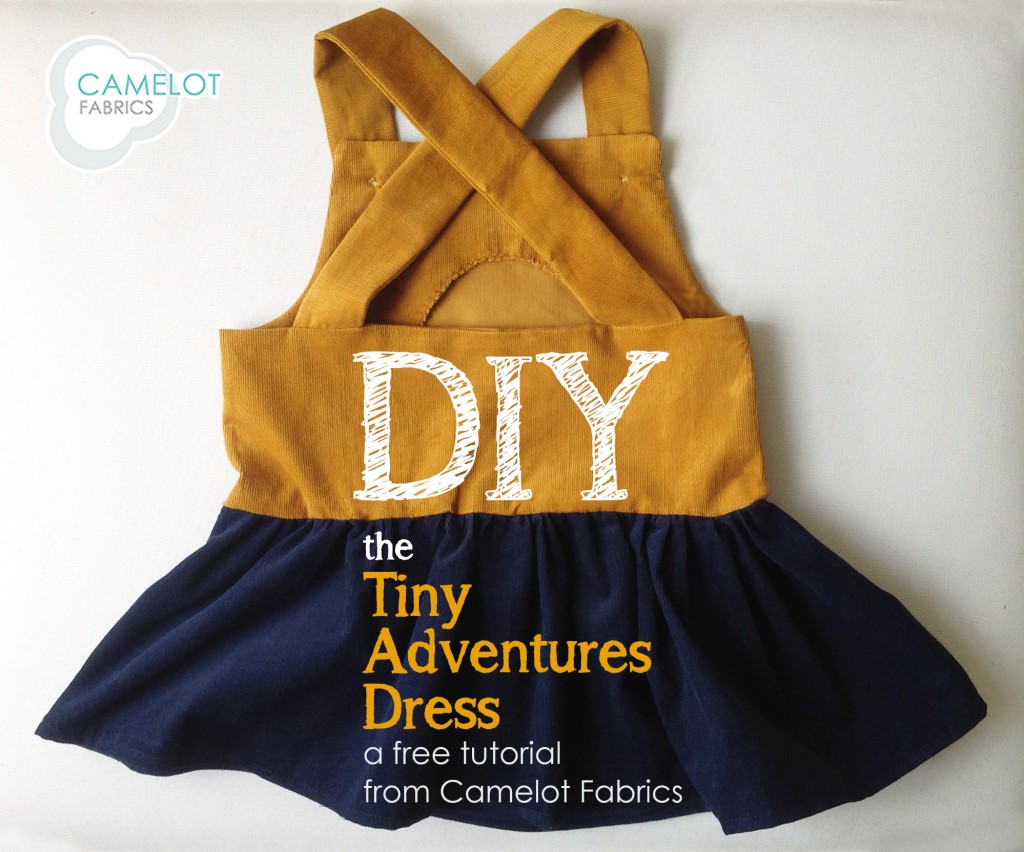
How To’s Day: Tiny Adventures Dress
March 18th, 2014 by Camelot Fabrics
Hi everyone!
Happy Tuesday! We hope you are doing well. With the hype of St. Patty’s Day slowly fazing out now, it only gives us more reason to start conjuring up fun ideas for Easter. Yup, we are super into the holidays if you haven’t already noticed (hehe). One of our latest How To’s days was an informative how-to tutorial on sewing on a button (the easiest of ways!) – if you haven’t seen it yet, be sure to here (It will also help with today’s tutorial!).
This week’s How To’s Day is for the most adorable corduroy, overall dress that we like to call our Tiny Adventures Dress. This dress is perfect for any little girl who loves to explore and venture to places of great imagination, who believes in fairytales and following their dreams. That is why the name of this dress if exceptionally fitting, because wearing our overall dress can only lead to the wildest and most magical of adventures! :)

How super sweet is this dress? And what makes it all the more special is that we have used our corduroy, so adventurous and curious little girls can play all day long in it! To see the full tutorial of this darling Tiny Adventures Dress, click more!
Tiny Adventures Dress Tutorial
Supplies
– 1 yd Corduroy (58” wide) from Camelot Fabrics in 8018/B #02 Golden
– 1/4 yd Corduroy (58” wide) from Camelot Fabrics in 8018/B #03 Navy
– 2 buttons in coordinating color (See our sewing a button how-to here!)
– Paper printer
– Basic sewing supplies:
– Sewing machine with buttonhole foot
– Iron & pressing surface
– Scissors & fabric shears
– Measuring tape
– Fabric marker
– Straight pins
– Needle & coordinating thread
*Notes
– Please wash, dry & iron your fabric before beginning.
– Unless otherwise noted, sew all seams with a 1/4” seam allowance.
Cutting
1. Print the Tiny Adventures Dress Template PDF at 100% scale and cut out the template pieces. Tape the two halves of the Strap piece together, matching up the triangles.
2. Trace & cut out the dress pieces as indicated on the pattern templates, taking care to line up the grain line on the templates with the corduroy’s vertical ribbing.
3. Cut a strip from the Navy corduroy, 8” tall and the full width of the fabric. Trim the selvages.
Sewing the Bodice
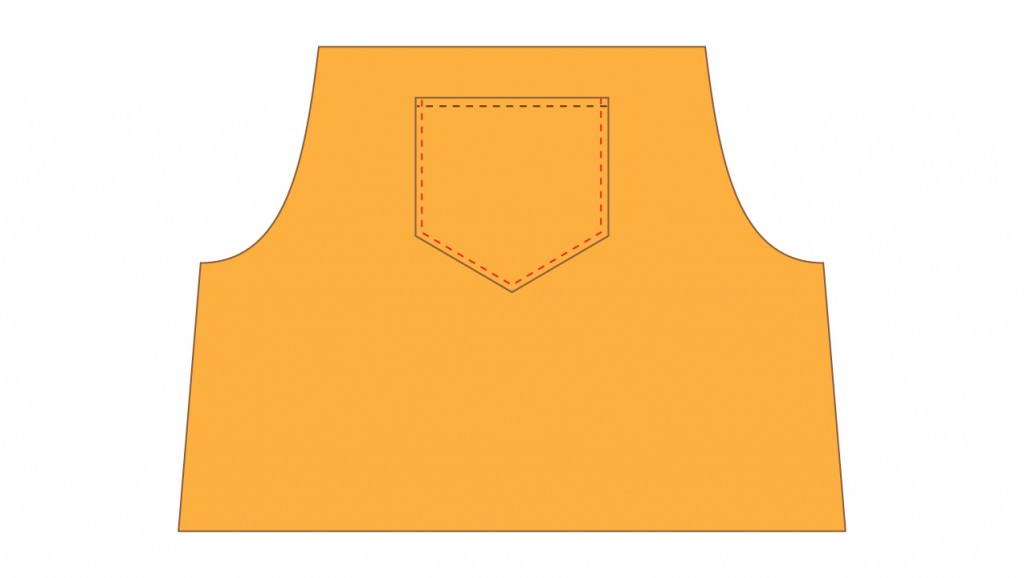
1. Fold the top edge of the Pocket over by 1/4”, Wrong Sides facing, and press the crease. Fold in each side by 1/4” and press, then do the same with the two bottom edges. Fold the top edge over by another 1/4”, press and stitch in place.

2. Position the Pocket at the center of the Bodice Front so it is two inches from the Bodice’s top edge. Topstitch the Pocket in place with a 1/8” seam allowance around both sides and bottom, leaving the top open. Backstitch at the beginning and end of this seam.
3. Sew the Front & Back Bodice pieces, Right Sides together, at the side seams and press the seam open (Seam #1).
4. Sew the Front & Back Facing pieces, Right Sides, at the side seams and press the seam open (Seam #2).
5. Edge-stitch a line of zig-zag stiching around the inner edge of the Facing to stabilize it, backstitching at the end (Seam #3)
Sewing the Straps
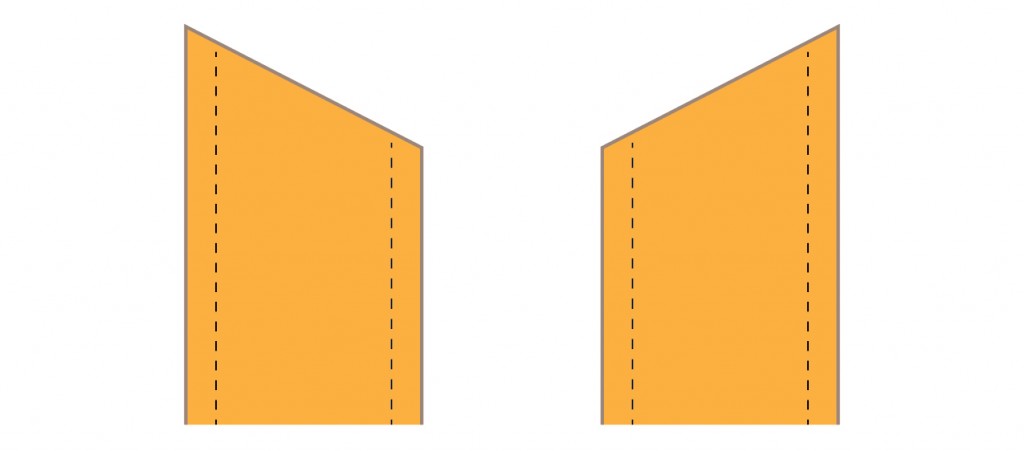
1. Sew each pair of Strap pieces, Right Sides together, around the long sides and pointed ends. Leave the slanted end open. Clip your corners, press the seams open and turn the Straps Right Side out through the open end. A knitting needle or pencil will make this part easier.
2. Lay the Straps flat on your work surface so that the open ends are slanted in opposite directions, as shown.
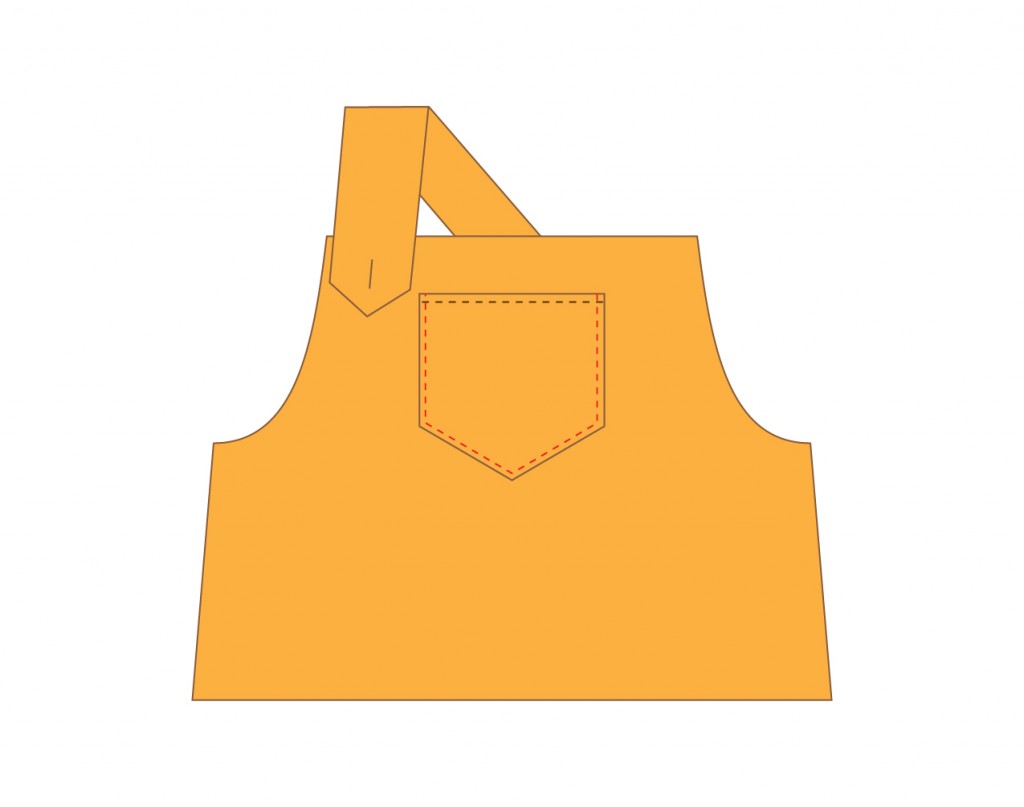
3. Draw a vertical line on the pointed end of each Strap, a tiny bit longer than the diameter of your buttons.
4. Using this line as your guide, sew a buttonhole in each Strap as directed by your sewing machine’s user’s manual.

Assembling the Bodice & Straps
1. Place the Front & Back shell unit on your work surface, with the Right Sides outward and the Back piece on top. Position the Straps as shown, two inches inward from the side seams and angling toward the center of the Back. The Right Side of the Straps (ie. Right Side of their buttonholes) should be against the Right Side of the Back. Baste the Straps in place at their short slanted ends.
2. Fit the Facings unit over the shell unit, Right Sides together with the Straps sandwiched between them, and pin in place around the top edges. Sew all the way around, backstitching at the end of the seam. Clip your corners, press your seam open and turn the Bodice Right Side out.
3. Press your seam again, using the iron on the Facing side and rolling the seam very slightly toward the inside of the dress. This will help to keep the Facing tucked neatly inside the Bodice.
4. Position the end of one Strap at the top corner of the overalls bib as shown. The Straps criss-cross in the back, so if the Strap is anchored to the left side of the Back, its end should now rest on the right-hand Side of the bib.
5. Mark a dot on the bib through the center of the Strap’s buttonhole and sew on one of your buttons. We have a tutorial for sewing buttons here.
6. Repeat Steps 4 & 5 with the second Strap
Sewing the Skirt
1. Sew the two short ends of your Skirt pieces, Right Sides together, and press the seam open.
2. Sew a rolled hem along one long edge of the Skirt. To do this, first press the edge up by a 1/4” all the way around, Wrong Sides together. Fold it over once more so the raw edge is hidden, press again, and stitch the hem in place, backstitching at the end of the seam.
3. Sew a line of basting stitches around the raw edge of the Skirt, but do not backstitch or overlap the ends of this seam. Pull gently on the threads at one end and slide the fabric toward the middle of the seam to gather it. Continue gathing the skirt, working from both ends of the seam, until it is smaller around than the bottom of the Bodice.
4. Pin the Skirt to the Bodice, Right Sides together, easing out the gathering on the Skirt as needed so that it fits the Bodice with equal gathering all the way around. Sew the two units together with a 1/2” seam allowance. Press the seam toward the Skirt to increase its fullness.
5. Slip the Overalls Dress onto your tiny adventurer over a T-shirt or long-sleeved top.
We hope you have enjoyed today’s How To’s Day post! If you decide to give this tutorial, or any of our free projects, a try – we would love to see! You can send all your crafty projects to info@camelotfabrics.com and you could be featured in a future Fan Friday! Have a fantastic day :)
Happy Sewing!
June 10, 2014 at 2:35 pm, Bree said:
What a sweet dress. Thanks for the free pattern and tut! I may well have missed it, but I didn’t see the size indicated. Can you tell me what size child this is intended to fit?