How To’s Day: Plus Sized Quilt Tutorial
March 11th, 2014 by Camelot Fabrics
Hi everyone!
Happy Tuesday everyone! We hope you are having a terrific day so far. We are getting excited for Saint Patrick’s Day next week, lots of crafty and green ideas stirring in the office :)
Today we’ve got a new project to share with you; it’s time for this week’s How To’s Day! We have been sharing lots of incredible quilts from our quilt designers on our website. All the quilts are beautiful, featuring our fabric collections perfectly, and they are free projects (including detailed instructions, diagrams, and patterns!). Be sure to check out all of our recent quilt designs!
This week’s How To’s Day is sharing with you a tutorial on a simple, but modern quilt design! This tutorial is such a great one for the beginner quilters because there aren’t too many pieces, the instructions are clear & concise, and the end result is a stunning quilt to call your own! :)
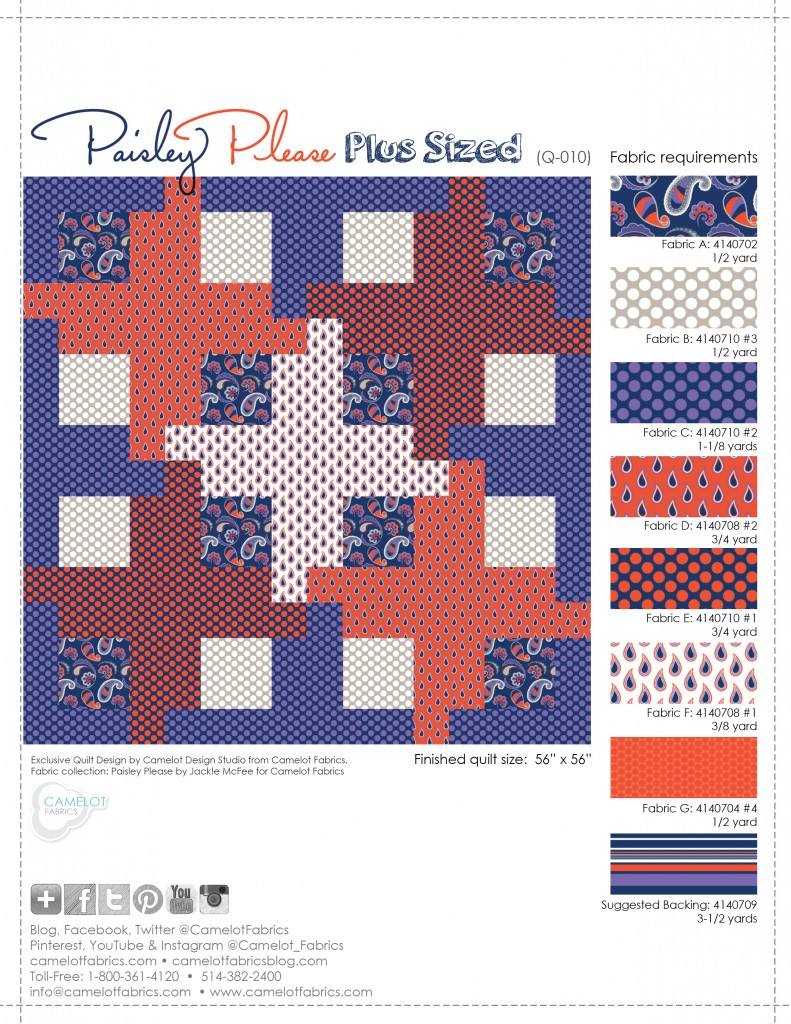
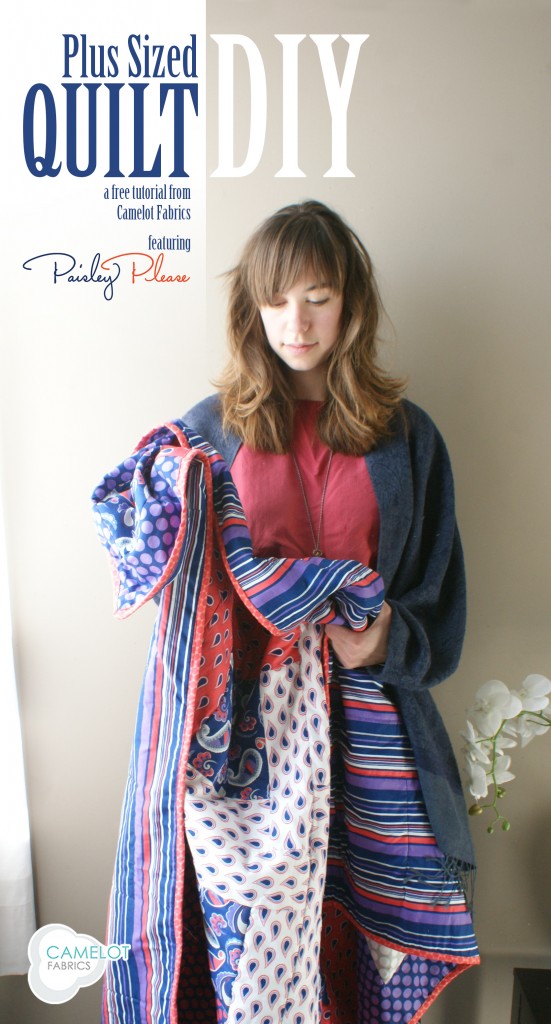
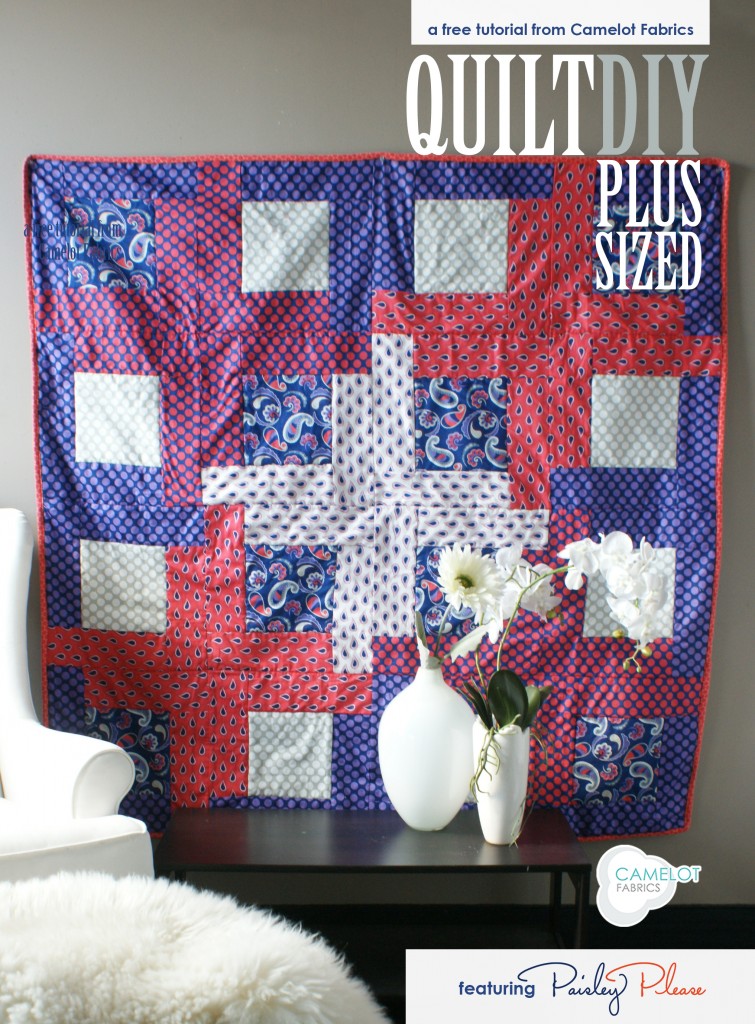
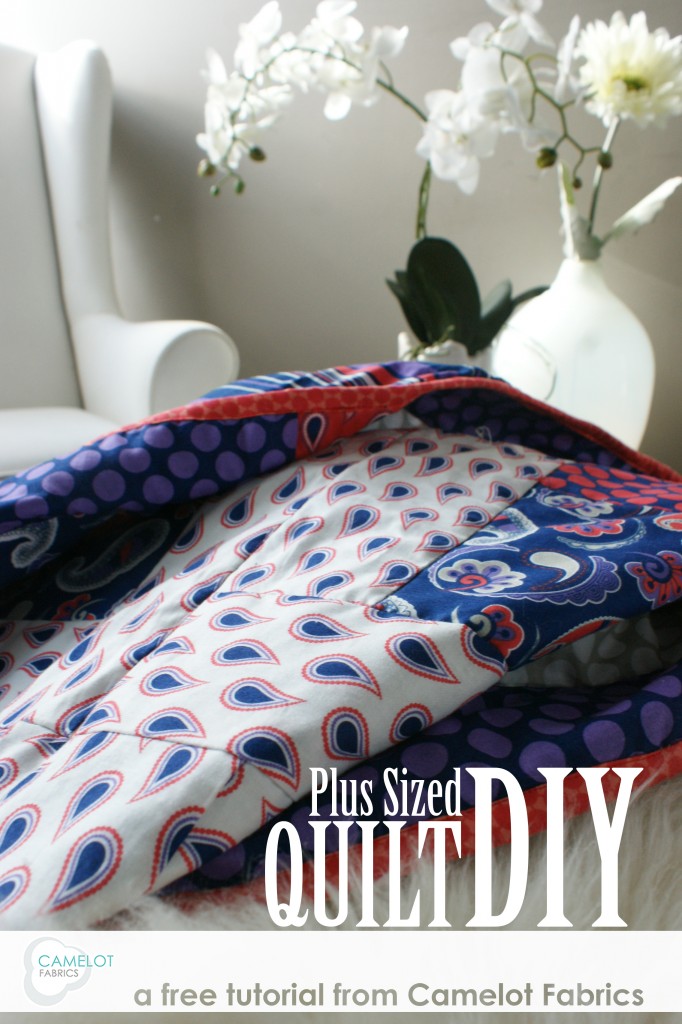
We used our Paisley Please by Jackie McFee Collection for this quilt, which makes it very fresh, vibrant, and pretty. This would be the perfect quilt for snuggling up with a book on those cooler nights, to use as an esthetic piece to vamp up a room, or even as wall décor!
Are you ready to create your own modern quilt? Click more to see the full tutorial!
Plus Sized Quilt Tutorial
Tools & Supplies:
– Sewing machine & coordinating thread
– Iron & pressing surface
– Fabric shears
– Measuring tape
– Straight pins
Notes:
– WOF = width of fabric.
– Please wash, dry & iron your fabric before beginning, and trim your selvages; fabric requirements allow a slight margin for shrinkage & human error.
– Unless otherwise noted, sew all seams with an accurate 1/4” seam allowance and the fabrics’ Right Sides together.
– Press the Small Block seams as you go, pressing away from the center of the block.
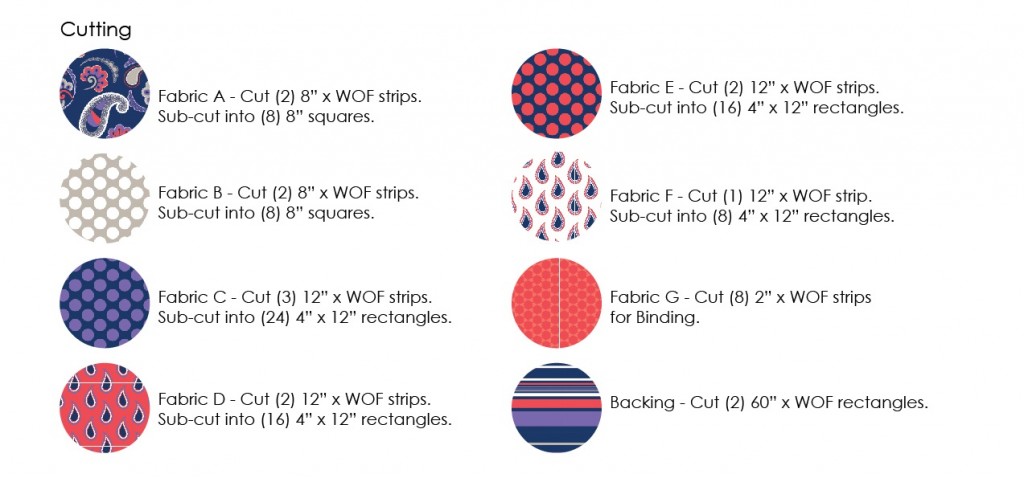
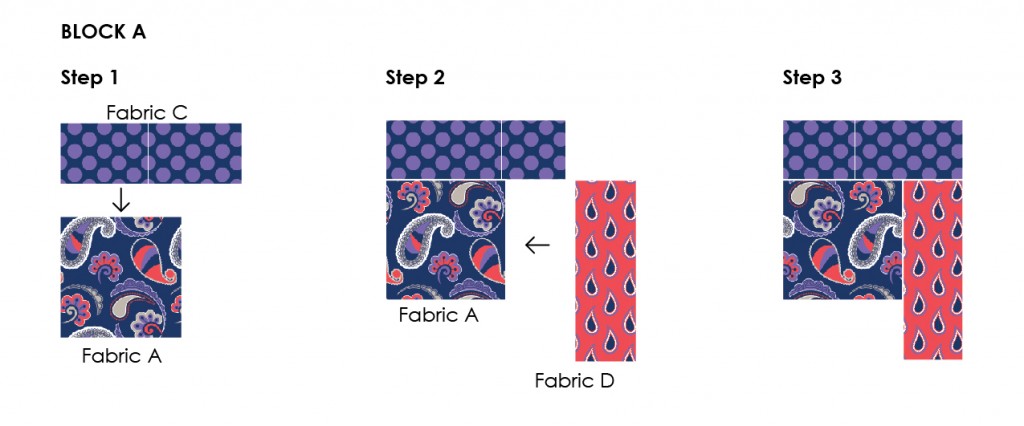
Assembling the Small Blocks:
1. Sew a the long edge of a Fabric C rectangle to the top of a Fabric A square.
2. Sew the long edge of a Fabric D rectangle to the right side of the Fabric A square. The short end of the rectangle should overlap the edge of the Fabric C rectangle by about 3/8”. For best results, begin the seam exactly at the intersection with the seam from Step 1.
3. Sew the short edge of the Fabric D rectangle to the bottom edge of the Fabric C rectangle where it extends beyond the top of the Fabric A square. Before sewing, make sure that the corner of the Fabric D rectangle is toward the block’s Wrong Side and will not be caught in the seam.
4. Sew the long edge of a Fabric D rectangle to the bottom of the Fabric A square.
5. Sew the short edge of the Fabric D rectangle to the left edge of the first Fabric D rectangle where it extends beyond the side of the Fabric A square.
6. Sew the long edge of a Fabric C rectangle to the left side of the Fabric A square.
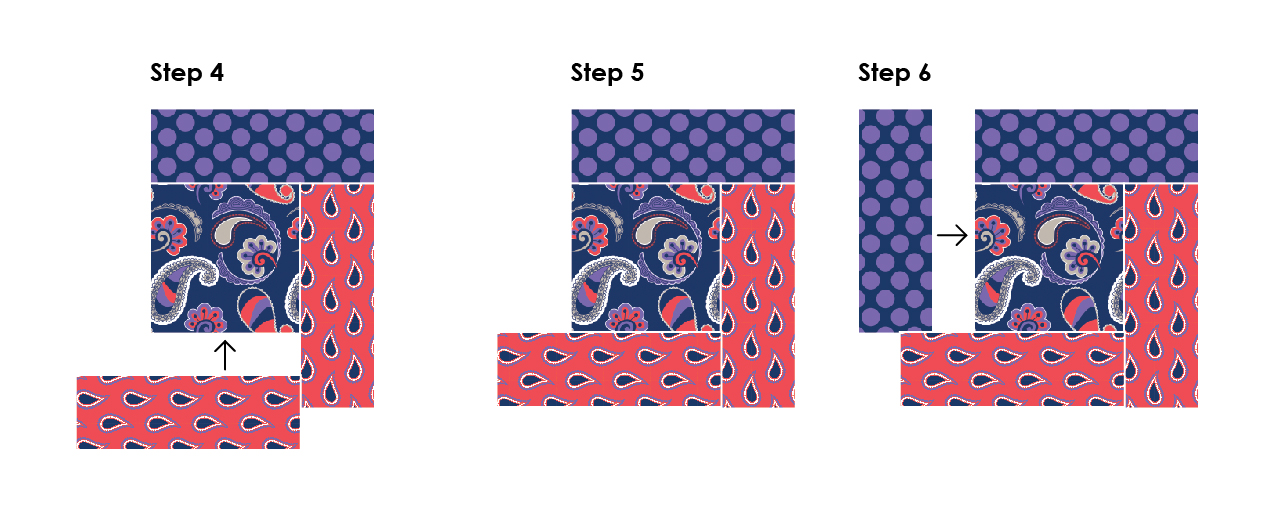
7. Sew the short edge of the Fabric C rectangle to the bottom edge of the first Fabric C rectangle where it extends beyond the top of the Fabric A square.
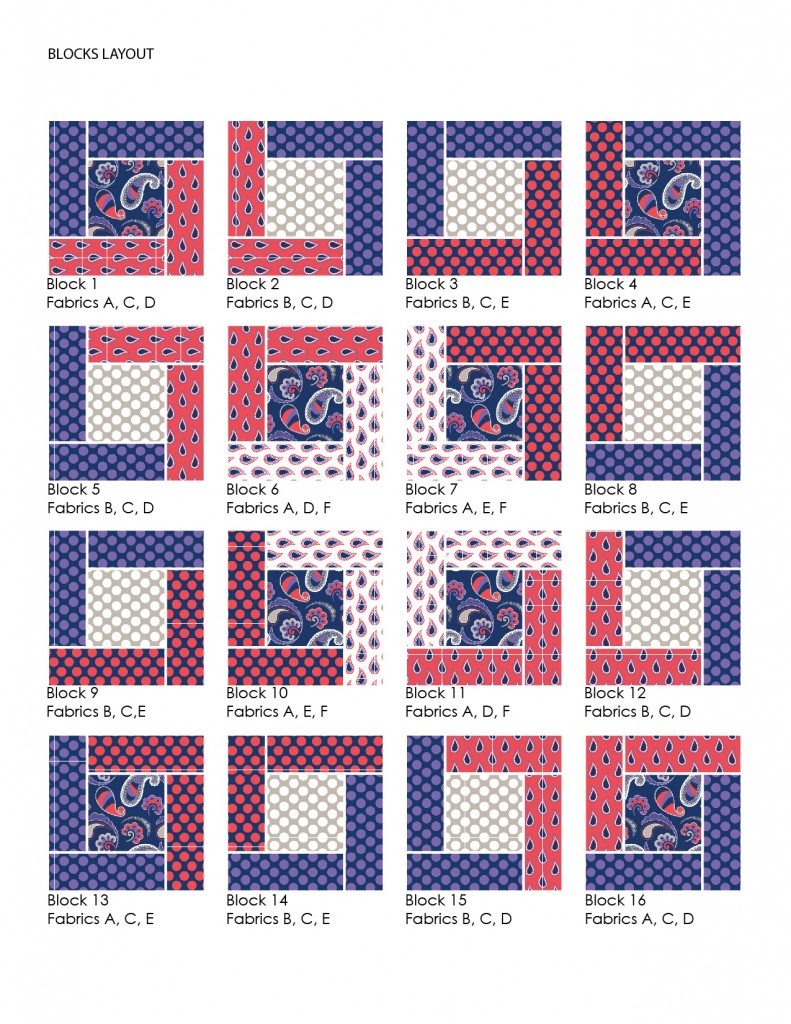
Repeat Steps 1 – 7 for the Blocks 2 -16, using the Blocks Layout as a reference for which fabrics to include in each one.

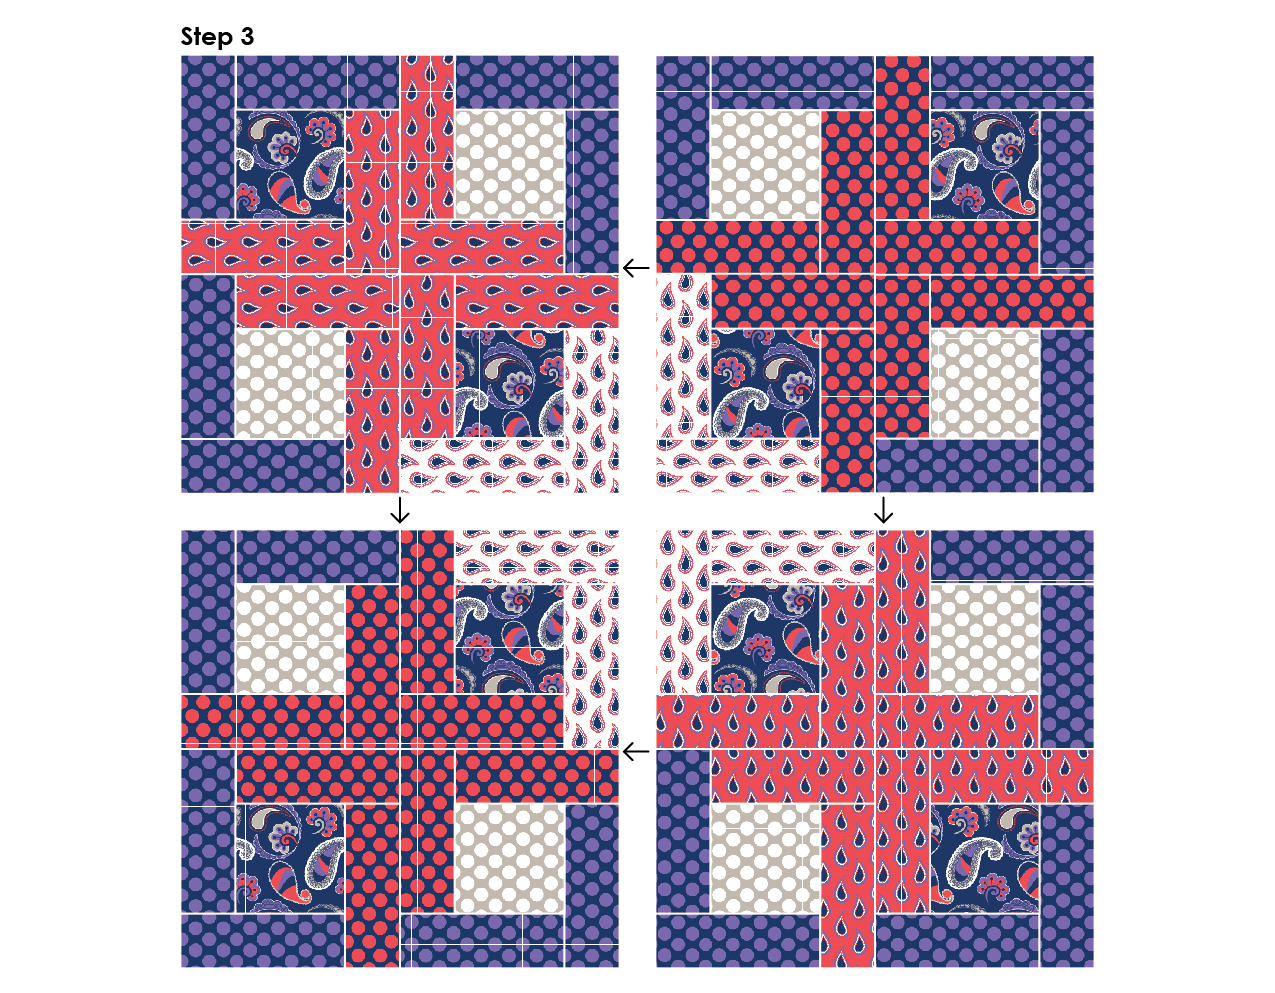
Assembling the Quilt Top
1. Sew the Small Blocks together in pairs left to right as shown, using the Block Layout as a reference.
2. Sew the pairs of Small Blocks together top to bottom as shown, again using the Block Layout as a guide.
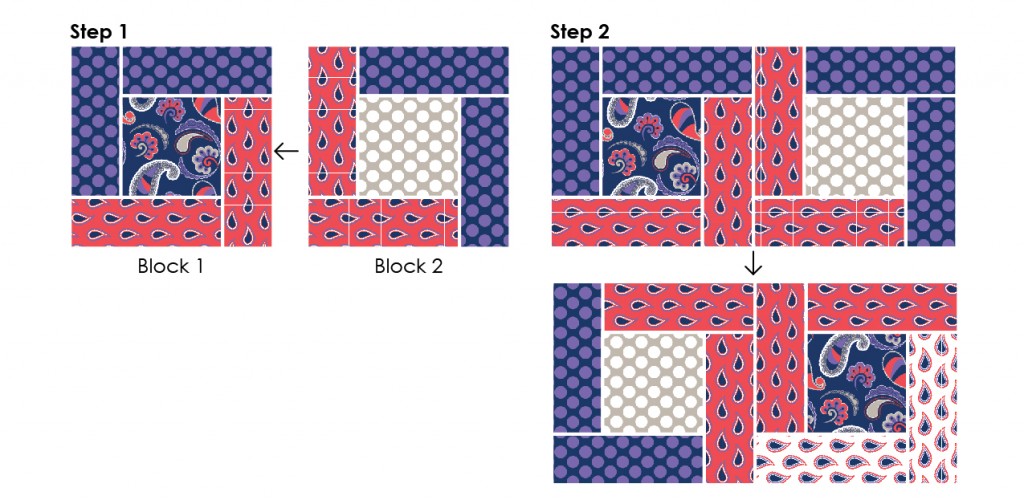
3. Sew the (4) resulting large blocks together as shown to complete the quilt top.
Finishing the Quilt
1. Pin the (2) backing rectangles together along their long edges, taking care to line up the pattern. Sew the pieces together with a 1/2” seam allowance.
2. Sandwich your batting between the quilt top & backing, with the cotton layers facing outward. Pin all layers together, beginning at the center and moving outward, then quilt as desired. Trim off the excess backing & batting.
3. Sew the binding strips together end to end and press the seams open. Fold the binding in half along its length and press, then use it to bind to quilt as desired.
We hope you have enjoyed today’s How To’s Day!! Such a magnificent and lovely quilt, for any home décor esthetic. If you decide to give this tutorial a try, be sure to tweet us a picture or you can email us at info@camelotfabrics.com. We always love seeing your projects, and you can be featured in a future Fan Friday post! Have a great day everyone!
Happy Sewing!
Comments are closed.