How To’s Day: How to Sew a Button
March 4th, 2014 by Camelot Fabrics
Hi everyone!
Happy Tuesday! We hope everyone is having a terrific day. The countdown to St Patrick’s Day is on, and we are pretty excited for all the fun things to come! We’ve also got one of the most adorable dress tutorials ever coming up today.
Get excited, because we are sure you will agree on its ultimate cuteness factor!! For now, we are sharing with you our simple tutorial on how to sew a button, with a sneak peak on what’s to come later today…
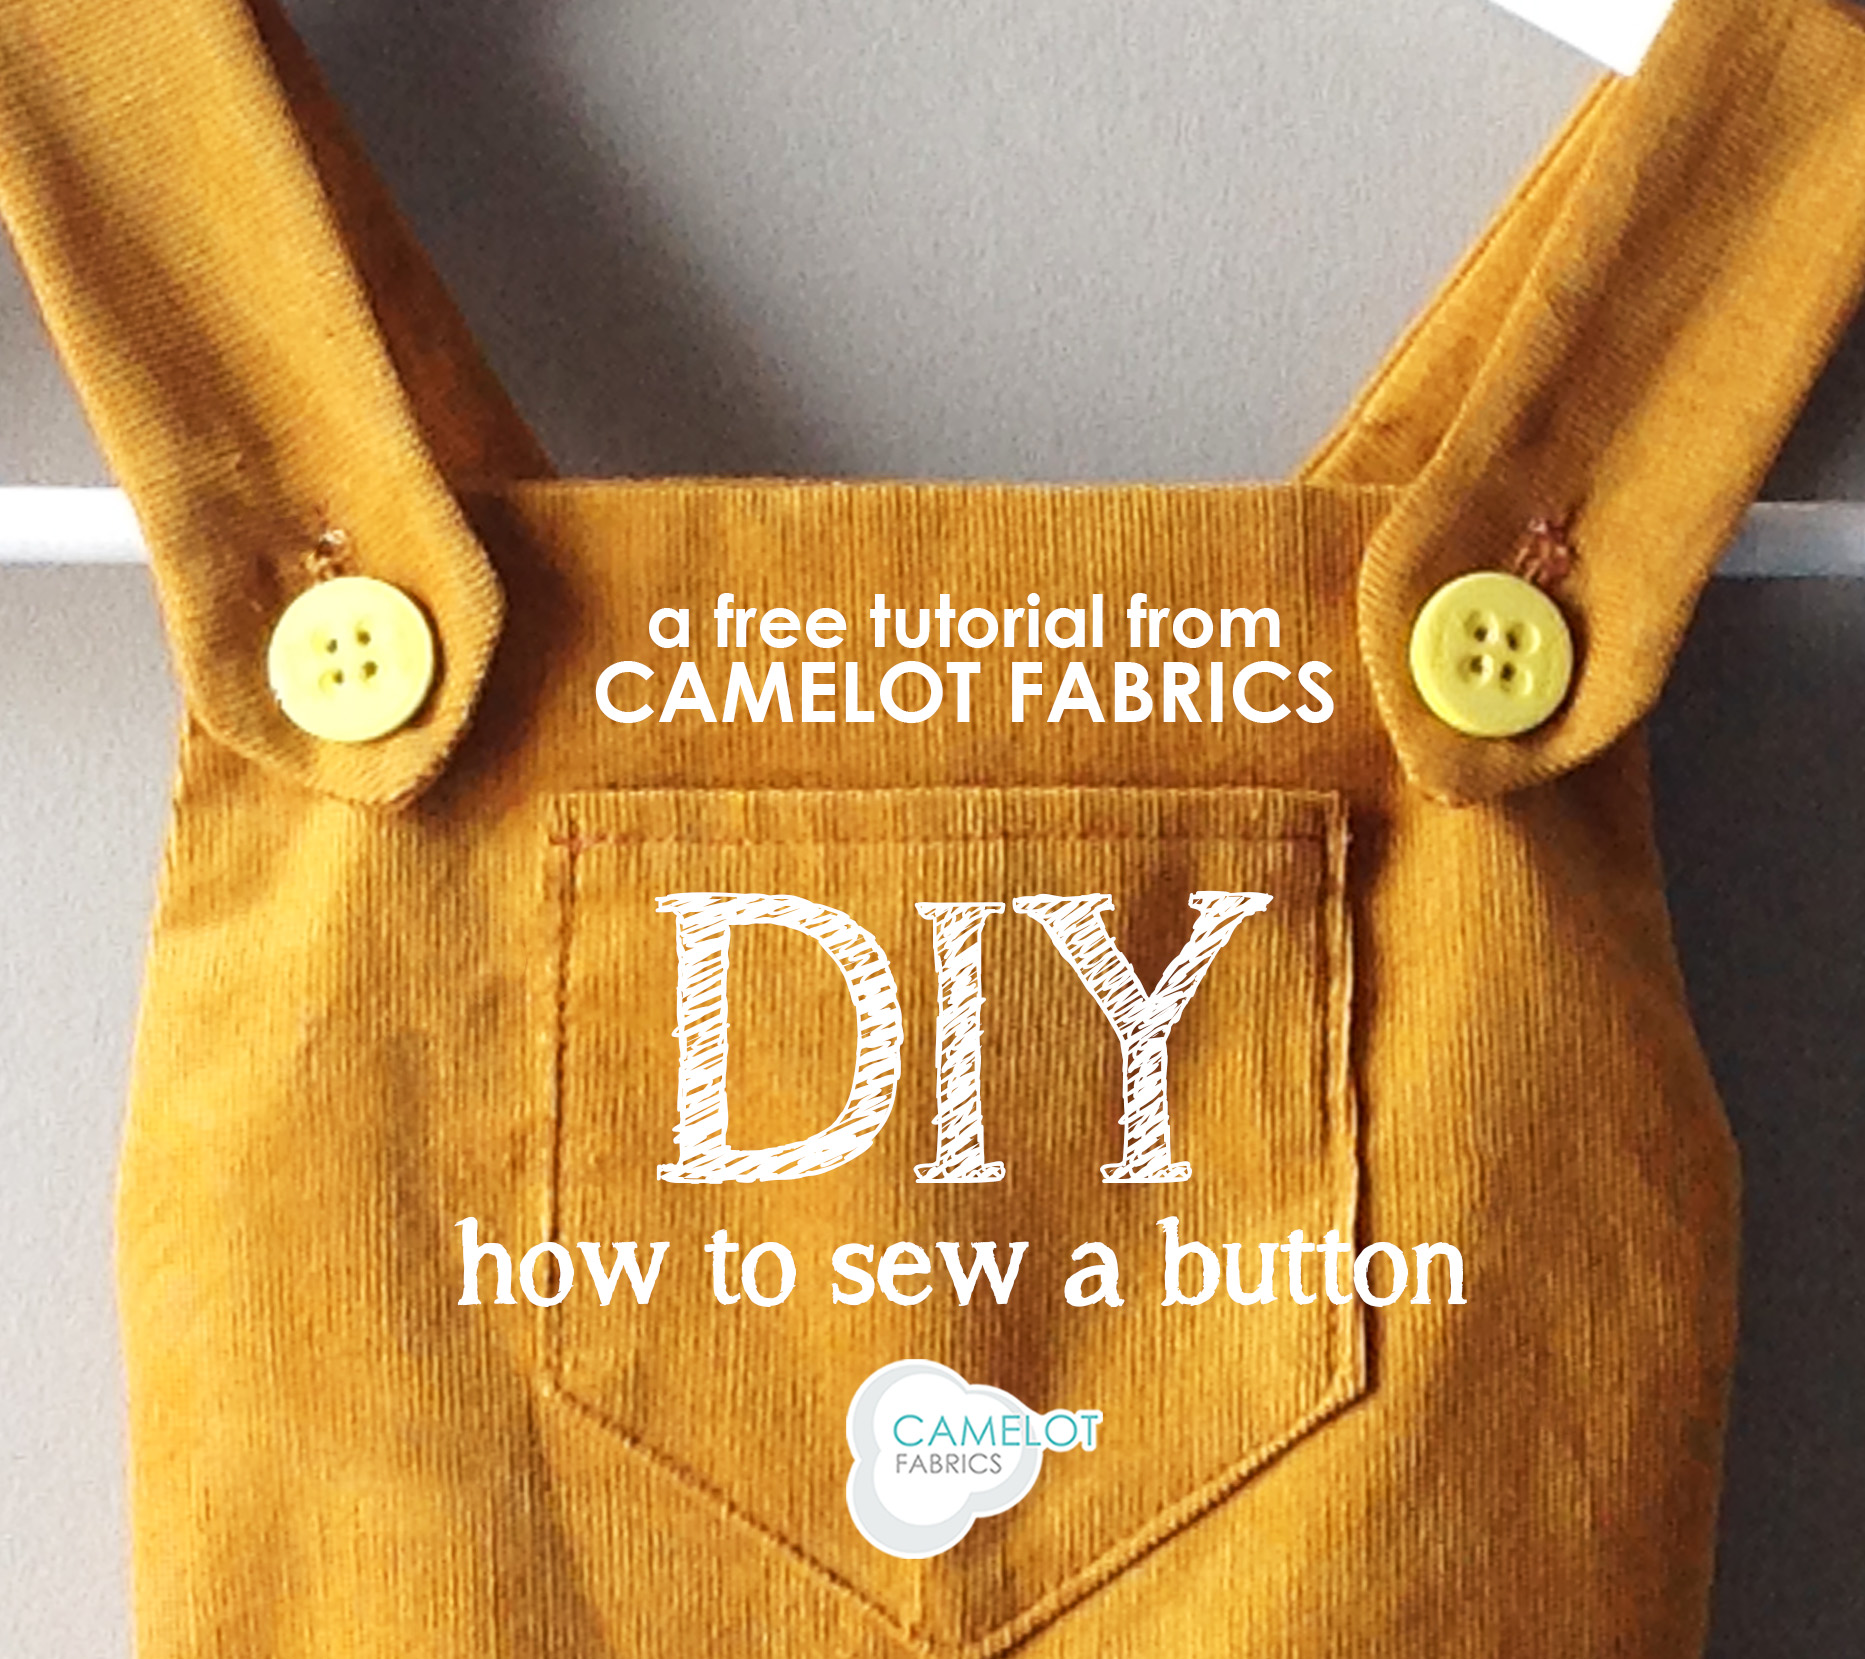
Yup, that’s an overall dress…in corduroy! Sewing on a button may seem like the easiest thing to do, and it can be if done correctly and with a couple of pointers. Today we share with you our tips and tricks for making sewing on a button super easy! Click more to see the full tutorial.
Sewing a Button Tutorial | Camelot Fabrics
Supplies
– Project in need of a button
– Needle & coordinating thread
– Scissors/embroidery scissors
– Toothpick
– Fabric marker
Instructions
1. Position the appropriate buttonhole as it should sit when the button is done up. Mark a small dot through the center of the buttonhole to indicate where the center of the button will be.
2. Tape the toothpick to your work, directly on top of the dot. Make a dot on the toothpick directly over the one on the fabric.
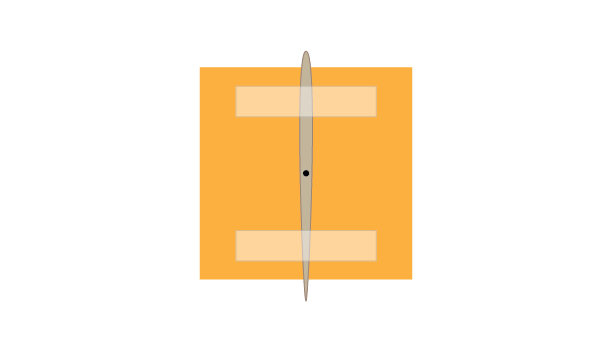
3. Thread you needle and knot the end of the thread.
4. Center the button on the dot and hold it in place between the thumb & forefinger of your non-dominant hand.
5.
– For a 4-hole button:
Feed the needle from the Wrong Side of the work, up through the top right hole of the button. Pass the needle down through the bottom right hole, then up again through the bottom left hole, down through the top right and up through the top left. Repeat this process several times.

– For a two-hole button:
Feed the needle from the Wrong Side of the work, up through the right-hand hole in the button, then down through the left hole. Repeat several times.
– For a Shank button:
Omit the toothpick; simply sew from the Wrong Side of the work, through the hole in the button’s shaft and back several times.
6. Remove the toothpick, if any, and wind the thread around the button’s shank 6-10 times to strengthen it. Pass the needle through to the Wrong Side of the work and tie off.
And that’s it! Now you will know how to sew on a button with our easy tips and tricks from this tutorial. Be sure to stay tuned today, because we’ve got the sweetest corduroy overalls tutorial coming up!
Happy Sewing!
Comments are closed.