How To’s Day: Quilted Bucket Bag
July 7th, 2015 by Camelot Fabrics
Hi everyone,
Happy Tuesday! I hope you all are having a fantastic day. We’ve been launching our Summer 2015 collections this week, so be sure to check them out here. It’s also Chocolate Day... Don’t need to give us another reason to have our daily dose of chocolate ;)
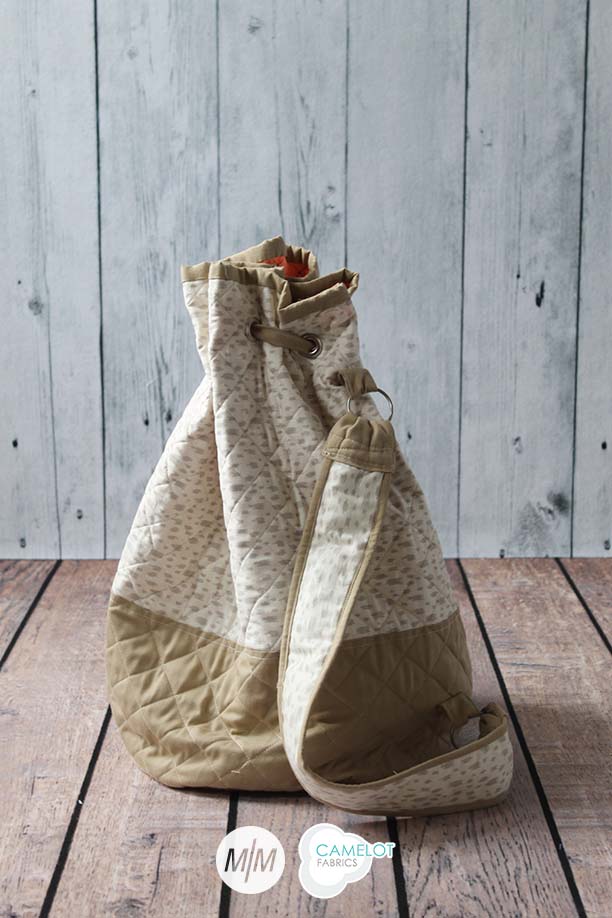
Time for this week’s How To’s Day! Today we are sharing a tutorial for a stunning Quilted Bucket Bag, created by Marion of Made by Marion. With summertime, it’s also official vacation season! Whether it be a vacation to the tropics, a fun road trip, or even a day adventure to an undiscovered area – the quilted bucket bag will be your new, favorite companion. The bag is quite large, and has a comfortable strap, so you can put all of your favorite essentials into one – great as a carry-on or weekender bag!
The drawstring closure allows for you to easily find any loose items in your bag, such as a passport or pair of sunnies. The color blocking and quilt details add to this modern bucket bag, and it looks fantastic with our Zoey Collection. The taupe prints keep the bag fresh and neutral, but the coral interior is such a fun pop of color!

We are obsessed with this bucket bag, and cannot wait for our next adventure to use it! Want to make your own Quilted Bucket Bag? Click MORE to see the full tutorial.
QUILTED BUCKET BAG
Pattern By: Marion of Made by Marion
Fabric Featured: Zoey by Camelot Design Studio
TOOLS & SUPPLIES:
– Upper Shell – 2/3 yd of Zoey quilting cotton (44” wide) from Camelot Fabrics in 2142502 #1
– Lower Shell – 1 yd of Poly/Cotton twill (58” wide) from Camelot Fabrics in 7052/A #52
– Lining – 1-1/4 yds of Zoey quilting cotton in 2142506 #3
– 1 yd of quilt batting (58” wide)
– (2) 1-1/2” to 2” metal rings
– (10) 7/16” metal grommets
– Paper printer
– Basic sewing supplies: sewing machine with even feed foot, needle & coordinating thread, iron & pressing surface, scissors & fabric shears, straight pins, and fabric marker
NOTES:
1. Please wash, dry & iron your fabric before beginning.
2. Unless otherwise directed, sew all seams with a 1/2” seam allowance.
3. RST = Right Sides Together.
4. WOF = Width of Fabric.
CUTTING:
1. Print the Quilted Bucket Bag Template at 100% size. Measure the Test Square to make sure your pattern was printed at the correct scale.
2. Trim the pattern pieces along the marked borders, and join them according to the numbered triangles. Cut out the pieces.
3. Pin/trace the patterns to your fabric and cut out the pieces as indicated on the template.
Draft & cut the following additional pieces:
Upper Shell:
– (1) WOF x 15” rectangle for the bag’s upper body.
– (2) 24” x 3” rectangles for the strap.
Lower Shell:
– (1) WOF x 8” rectangle for the bag’s lower body.
– (5) WOF x 2” strips for binding.
Lining:
– (1) WOF x 22” rectangle for the inner body.
– (2) WOF x 2” strips for binding.
Batting:
– (1) 43” x 24” rectangle.
– (1) 15” square.
– (1) 26” x 4” rectangle.
MAKING THE BINDING:
You’ll make:
– (1) pieced Binding from your (5) Lower Shell strips.
– (1) pieced Binding from your (2) Lining strips.
1. Pin & sew the ends of (2) strips RST as shown, with the seam running at 45º to the fabrics’ edges.
Lower Shell: repeat with the remaining strips to form (1) continuous strip.

2. Press the seams open and trim the seam allowances to 1/8”.

3. Fold & press the Binding in half lengthwise, Wrong Sides facing, and unfold.

4. Fold each long edge to the center crease, and press.

5. Fold the strip in half lengthwise, so the folded edges are together, and press.

ASSEMBLY:
1. Sew the upper and lower body pieces together top-to-bottom as shown. Press the seam open.

2. Sandwich your 43” x 24” batting rectanlge between the Lining body and outer pieced body, with the fabrics’ Right Sides facing outward and their edges lined up. Baste & quilt as desired, and trim any excess batting.
3. Repeat Step 2 using your 15” batting square and the (2) Bottom circles.
4. Repeat Step 2 once more, using the 26” x 4” batting rectangle and the (2) strap pieces.
5. Sew the Ring Tabs together in pairs, RST, with a 1/4” seam allowance. Leave a gap in (1) long side for turning. Clip your corners, press the seams open, and turn the Tabs Right Side out.

6. Topstitch 1/8” from the Tabs’ edges, including the gaps.
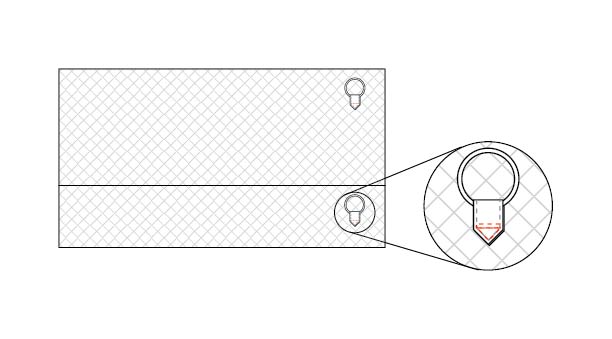
7. Fold each Tab around a metal ring and sew the ends together as shown.

8. Topstitch both Tabs to the bag’s body with an 1/8” seam allowance as shown, roughly 3” from the body’s nearest edges.
9. Sew the short sides of the body together, RST. Trim the seam allowance to 1/4”.
10. Bind the seam’s edges with your Lining Binding. Here’s how:
a) Align (1) long edge of the Binding with the edge of the seam allowance, with the Right Side of the Binding against the work`. Pin & sew in place along the crease line nearest to the raw edge.
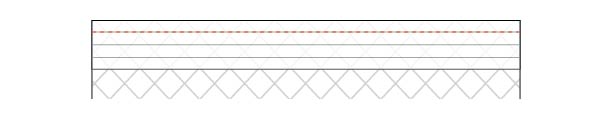
b) Wrap the Binding around the seam allowance and tuck its remaining raw edge in toward the seam allowance’s raw edge. Pin in place and topstitch the Binding 1/8” from its folded edge.
11. Pin & sew the Bottom to the bottom raw edge of the Body, RST. We like to use a lot of pins for this part, and we find it’s easiest to sew with the Bottom facing upward as we work.
12. Trim the seam allowance to 1/4” and bind it with the remaining Lining Binding. The method is slightly different from binding the straight edge in Step 10.
a) Leave a 2” “tail” of Binding at the beginning of your seam.
b) Sew around the circumference of the seam, the same way that you attached the Binding to the straight seam in Step 10.
c) Once you’ve circled around the work, sew precisely up to the beginning of the seam and cut off the excess Binding, leaving a 2” tail.
d) Sew the tails RST, as closely as possible to the work.
e) Flip the Binding to the Right Side; pin and topstitch as you did the Binding in Step 10.
13. Bind the top raw edge of the bag with the Lower Shell Binding, the same way that you bound the body/bottom seam.
14. Bind the (2) long edges of the Strap with the Lower Shell Binding, the same way that you bound the straight edge in Step 10.
15. Sew the Strap Tabs together in pairs with a 1/4” seam allowance, RST, leaving (1) short end open. Clip the corners, press the seams open, and turn Right Side out. Fold the open edges to the inside of the Tabs and press.

16. Feed each of the Strap’s raw ends into the open edge of a Strap tab and topstitch in place.

17. Fold each Strap Tab around a metal ring and topstitch, the same way that you attached the Ring Tabs to the bag in Step 8.
18. Cut a 50” – 60” length from the remaining Lower Shell Binding, fold the raw ends to the inside, and topstitch the edge closed.

19. Mark (10) points approximately 4” apart around the top of the bag, 1” – 2” from the top edge. Install a grommet at each point, according to the manufacturer’s directions.
20. Feed the long Binding length through the grommets, going alternately in and out of the bag. Pull the ends and tie them in a bow to close the bag.

We hope you have enjoyed this week’s tutorial! We’d love to know what you think. If you decide to give this tutorial a try, we’d love to see! You can always send your photos to info@camelotfabrics.com or tag us on Instagram. And, find more from Marion at her blog. Have a great day!
Happy Sewing!
Comments are closed.