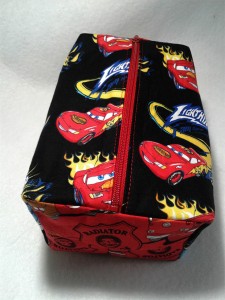
HOW TO TUESDAY: BACK TO SCHOOL PENCIL CASE FEATURING CARS
August 16th, 2016 by Camelot Fabrics
If you’ve read my Moody Monday blog featuring our Disney•Pixar Cars Collection last June than you know how much I love the movies. Now you were probably wondering why it wasn’t followed by a How To Tuesday right? That’s simply because I had to make it! It’s now ready and the timing couldn’t be more perfect since we have to get these kids ready for back to school! So without further ado, here is a cute pencil case!
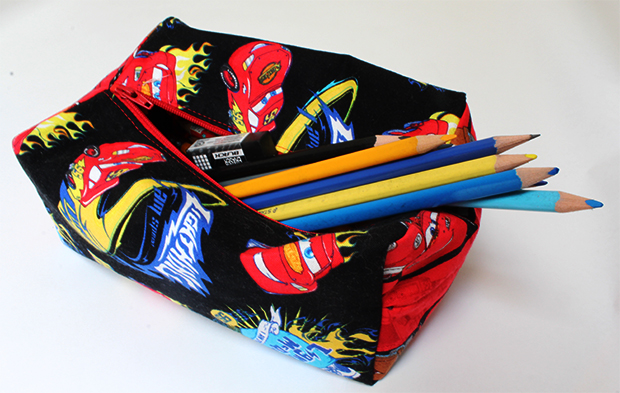
How did I make it? I started by printing the Essentials case pattern available on our website and I made some small changes that I hope you will enjoy. It still remains a project that can be made in three (3) hours. Why did I make some changes? I wanted to add a lining but still wanted the project to remain simple… so you might want to add binding in some areas to have a nice finish but if that scares you… don’t bother as your kids won’t notice.
You will need:
- Two (2) Fat Quarters: the main and accent fabrics.
- One matching zipper (7” closed-end)
- ¼ yard of one-sided fusible interfacing. I prefer the medium weight but you can go with what you like, simply check the cutting chart to ensure that you get enough according to the width of the interfacing.
- Basic sewing supplies.
I recommend washing your fabrics before you start so you can wash the pencil case during the school year. That’s the main reason why I LOVE making them.
Step 1:

Cut the main and accent fabrics and interfacing as follow:
- Two 8” squares (A);
- Two 16” x 2 ½” rectangle (B).
Step 2:
Iron on the interfacing to the wrong side of:
- Two 8” squares of main fabric
- Two 16” x 2 ½” rectangle of accent fabric
Step 3:
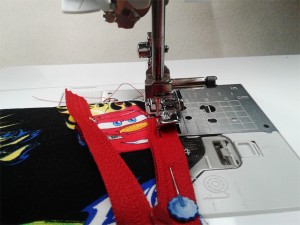

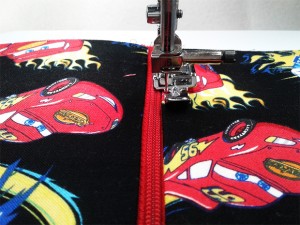
With the zipper foot mounted, pin and sew the right side of the zipper to the right side of the A square of the main fabric. You can read the instructions in the DIY essential case if you’ve never done this before as it is well explained.
Repeat with the other A square of the main fabric on the other side of the zipper (still the right side).
Press the seams.
Step 4:
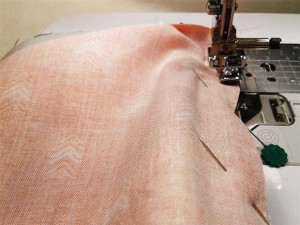
Align the A square accent fabric, right side, on the wrong side of the zipper and sew together.
Now I really hate myself right now as I didn’t take a picture of that step… so I made another pencil case just to take the shot, so I apologize in advance as it’s not the same fabrics.
Repeat with the second A square accent fabric on the other side of the zipper.
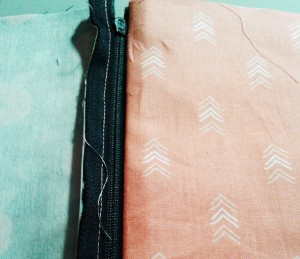
Press the seams and turn over to face the main fabric.
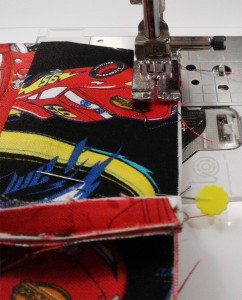
Sew a straight stitch as close to the zipper’s teeth without running over them.
Stitch the edge of your project at 1/8” to ensure that the accent fabric stays in place with the main fabric and interfacing during the next steps.
Step 5
Sew your B rectangles from the accent fabric at 3/8” to the top and bottom of your work, right sides together. (Ensure that you sew outside of the zipper area).
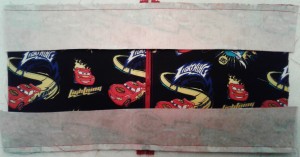
On the reverse side of the project, sew your B rectangles of the main fabric at 1/2” to the top and bottom of your work.

Press and trim any excess fabrics on the edges.

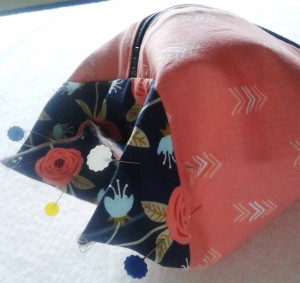
Step 6
Fold the project with the main accent fabric facing each other (you will see the accent A square fabric and the zipper will be right on the fold). Sew the opposite side of the zipper together.
Step 7
Fold the project again, this time the zipper should be in the center and aligned below with the seam from step 6.
You might want to pin the project in place.
Sew both ends together. But before you do, ensure that you zipper is slightly open to help you in the last step.
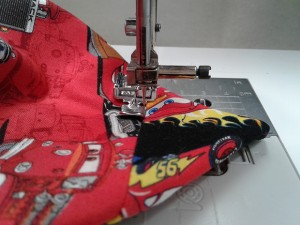
Step 8
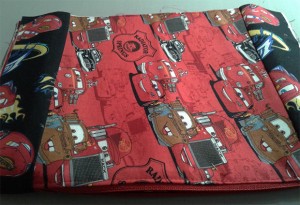
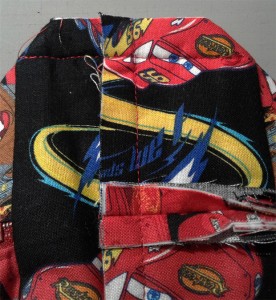
We now have to box the corners.
Again, I apologize as I didn’t take a picture when I was boxing up my corners. But here it is with the other fabric:
You need to flatten out the project in the other direction while maintaining your seam from step 7 centered. Your ends will form a triangle. Do you see the white line on my fabric in the picture? That’s the center of my triangle which needs to be aligned to the seam on the other side. Once you are sure it’s all in place, pin in place!
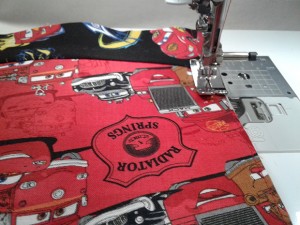
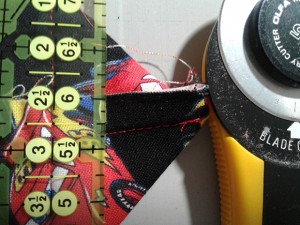
You need to sew directly where the main and accent fabrics join.
Trim the corner ½” away from the seam.
Repeat on both corners of each end.
Step 9
You might want to write a special note inside the pencil case!
Once done, turn the project right side out through the open zipper, poke out the corners and you’re done!
I hope you’ve enjoyed making this project!
Don’t forget to tag us using #camelotfabrics on Instagram or @camelotfabrics on facebook!
Comments are closed.