How To’s Day: Elevation Pillow by Kristy Daum
July 28th, 2015 by Camelot Fabrics
Hi everyone,
Happy Tuesday! I hope you all are having a great day!! Today is National Milk Chocolate Day. Milk chocolate is delicious in pretty much any form – milk chocolate bars, milk chocolate cake, milk chocolate ice cream…and the dreamy list goes on and on!
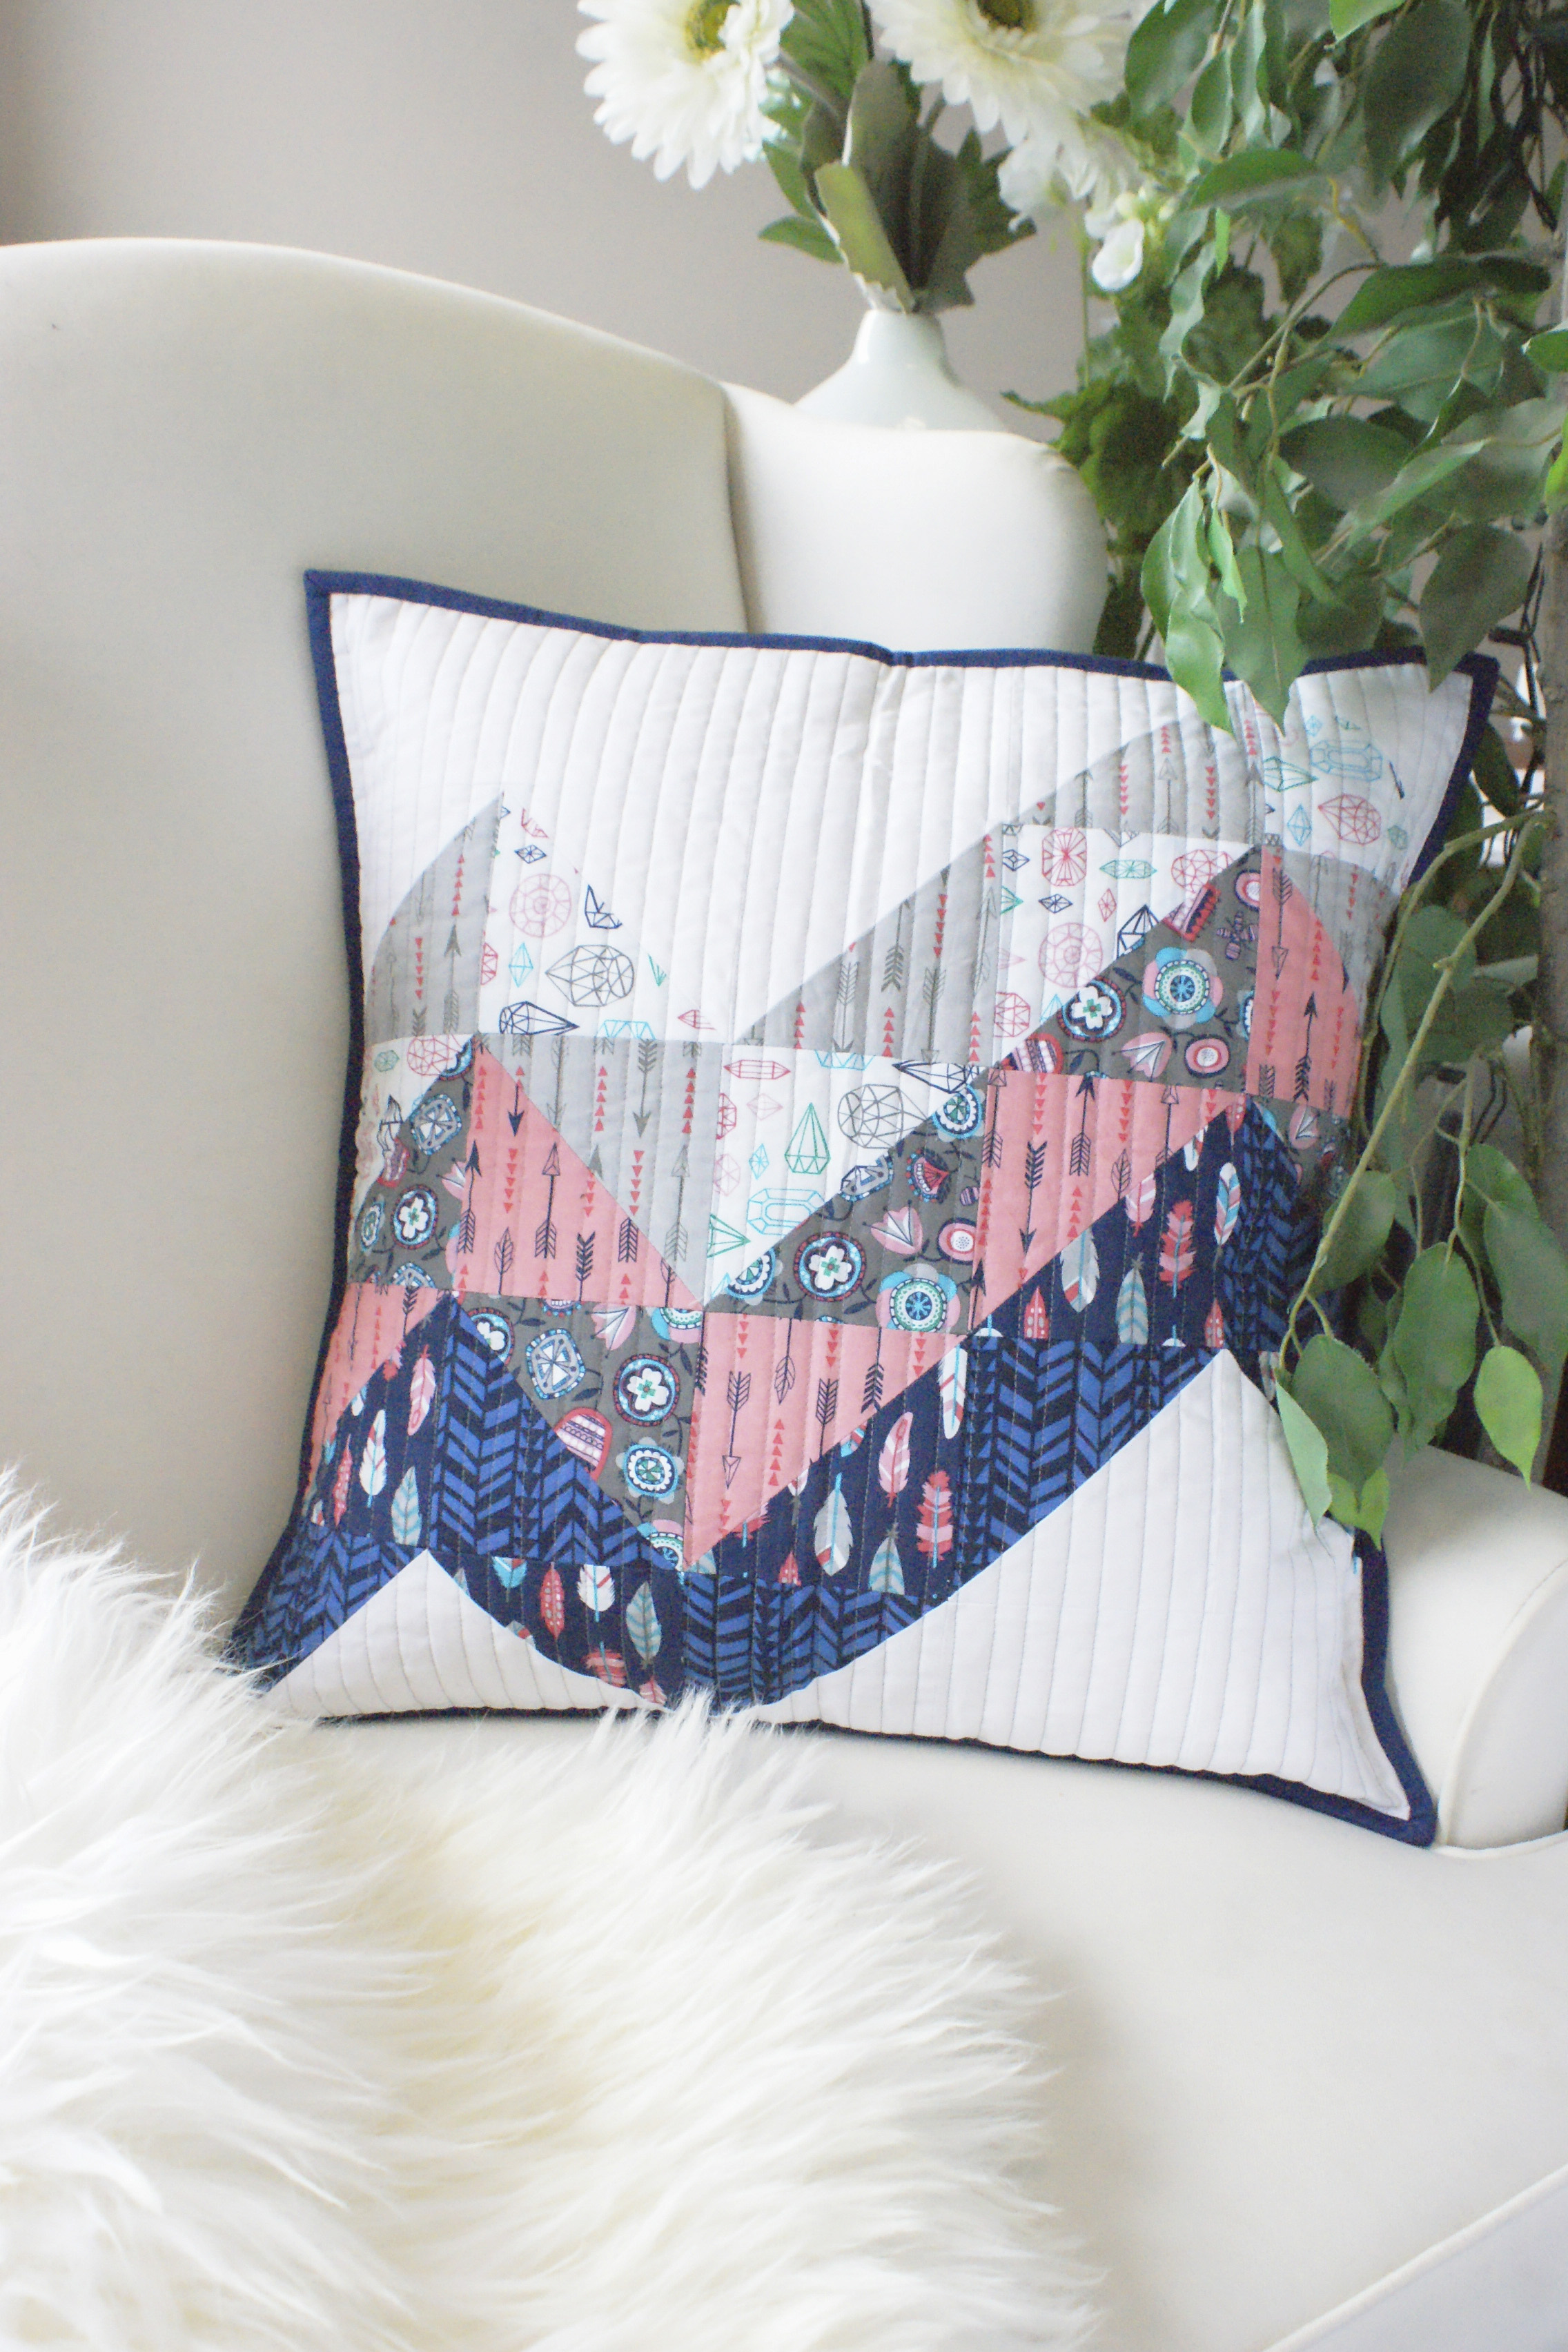
It’s How To’s Day! Today we are featuring one of our beloved free pillow patterns on our website, the Elevation Pillow by Kristy Daum. Elevation is a beautiful modern pillow that creates a super cool “graph-like” design, while keeping the rest clean space. This pillow pattern allows for the sewer to mix-and-match different fabrics together, as the design is made up of smaller triangles. We love keeping each etched “line” more uniform in color, to separate the three individual lines, which creates a really cool feel.
We’ve had Elevation sewn up quite a few times, but we thought we’d share a classic favorite – with our What a Gem by Allison Cole collection. We adore how the whimsical prints look together in this one!
Want to make your own Elevation Pillow? Click MORE to see the full tutorial.
ELEVATION PILLOW
Designed By: Kristy Daum
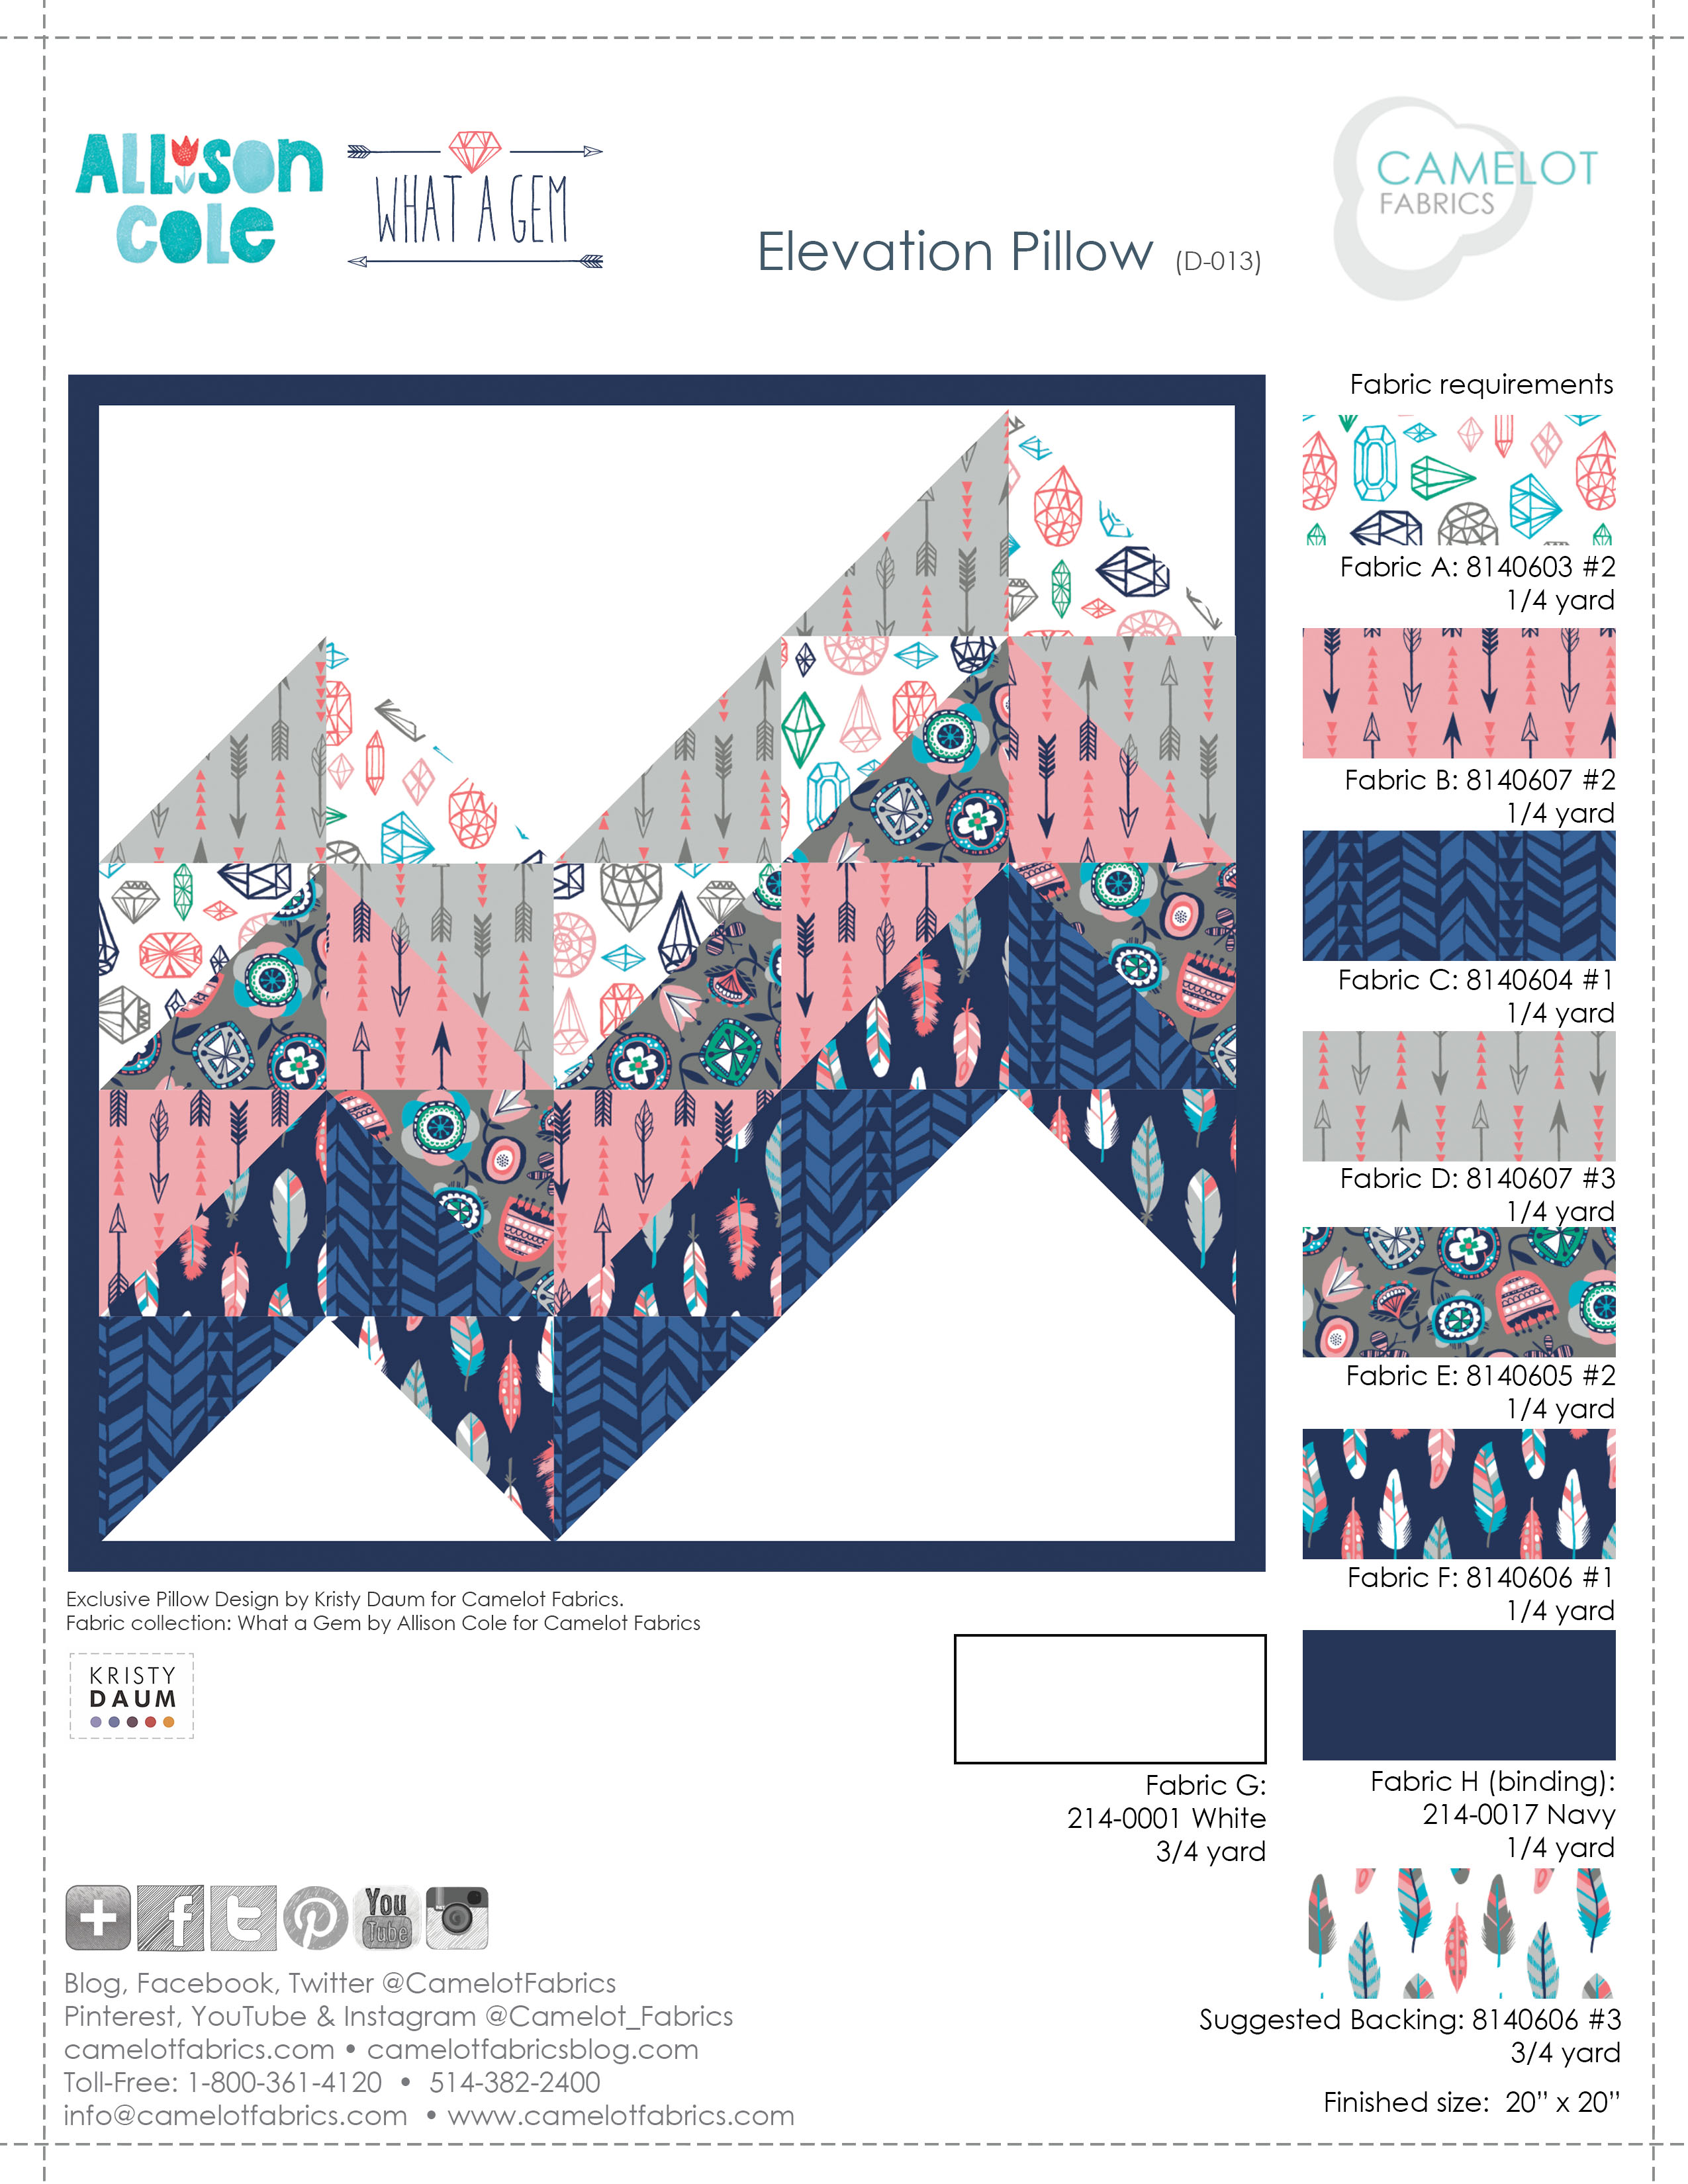
Fabric Featured: What a Gem by Allison Cole
OTHER TOOLS & SUPPLIES:
– 20” square pillow form
– Sewing machine
– Needle & coordinating thread
– Measuring tape
– Straight-edge ruler and right-angle / L-square
– Fabric shears / rotary cutter & cutting mat
– Iron & pressing surface
– Pencil
NOTES:
– Please wash, dry & iron your fabric before beginning, and trim the selvages.
– WOF = “Width of Fabric” (42”).
– HST = “Half-Square Triangle”.
– RST = “Right Sides Together”.
– Unless otherwise noted, sew all seams RST with a scant 1/4” allowance.
– Press all seams open as you go.
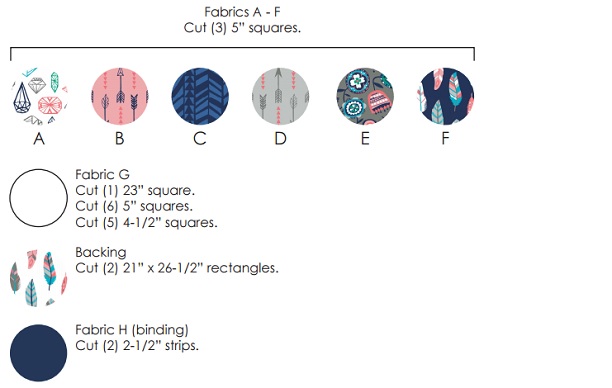
CUTTING:
PIECING THE BLOCKS – MAKING THE HSTS
1. Take (1) Fabric G 5” x 5” square and (1) Fabric A 5” x 5” square, and place them RST.

2. With a pencil, mark a diagonal line between opposite corners.

3. Sew a scant 1/4″ away from the pencil line on both sides.

4. Cut on the line, separating the two halves; this creates (2) HST units.


5. Repeat the process above using the following fabric combinations to yield all the HST units you need for this pillow. Note: each pair of squares yields (2) HST units, so make (4) HST units from each pair although you will only use (3). If you are using directional fabric, pay attention to the direction of your diagonal line.
Make (4) Fabric G & D HST units.
Make (4) Fabric G & C HST units.
Make (4) Fabric G & F HST units.
Make (4) Fabric A & E HST units.
Make (4) Fabric B & D HST units.
Make (4) Fabric B & F HST units.
Make (4) Fabric C & E HST units.
6. Trim all HST units to 4-1/2” square.
ASSEMBLING THE PILLOW TOP
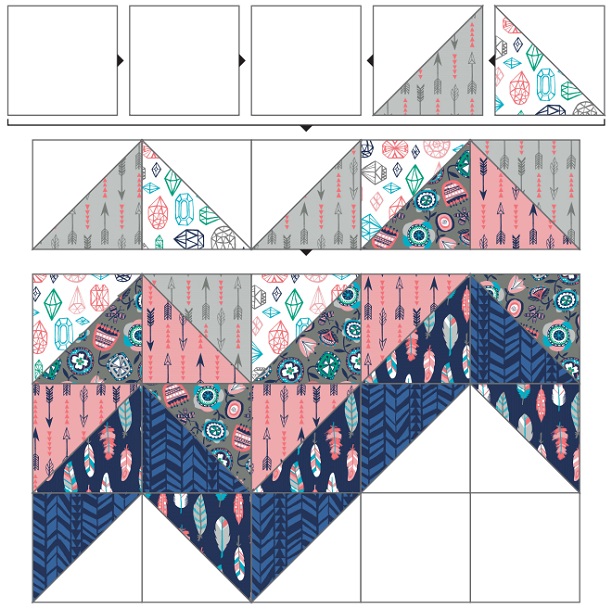
1. Arrange the HST units & Fabric G 4-1/2” squares according to the Assembly Layout diagram. Pay special attention to the orientation of each unit.
2. Piece the blocks/squares together in rows, then join the rows to complete the pillow top. Press the top flat.
ASSEMBLY LAYOUT
3. Quilt the Pillow Top as desired, and square it up.
FINISHING THE PILLOW:
1. Fold each 21” x 26-1/2” Backing rectangle in half, Wrong Sides Together, to create (2) 13-1/4” x 21” rectangles.
2. Topstitch (2) seams, 1/2” and 1” from the rectangles’ folded edges, for a decorative finish.
3. Trim the Backing rectangles to match the width of the Pillow Top.
4. Place the Pillow Top face down on your work surface.
5. Line up the Backing rectangles with the outer edges of the Pillow so that their folded edges overlap at the center of the pillow. They should be Right Side up.
6. Baste the Backing rectangles to the Pillow Top, Wrong Sides together, around all (4) edges.

7. Join your Fabric H strips end-to-end and use to bind your pillow.
8. Insert the 20” square pillow form and relax!
Hope you enjoyed today’s tutorial! You can also find the full, free PDF of Elevation on our website. If you decide to give this pillow pattern a try, we’d love to see. You can send all your project photos to info@camelotfabrics.com. Have an awesome day!!
Happy Sewing!
Comments are closed.