How To’s Day: DIY Halloween Costume – Fleece Fox Hat & Tail
October 23rd, 2013 by admin
Hi everyone!!
It’s time for another How To’s Day! Halloween is quickly approaching (in 8 days!!), and we wanted to share with you a fun and easy DIY project that you can make in time for the spooky holiday. This DIY project is absolutely delightful and would be the perfect costume for any youngster (but it can be modified for adults too, of course!!).
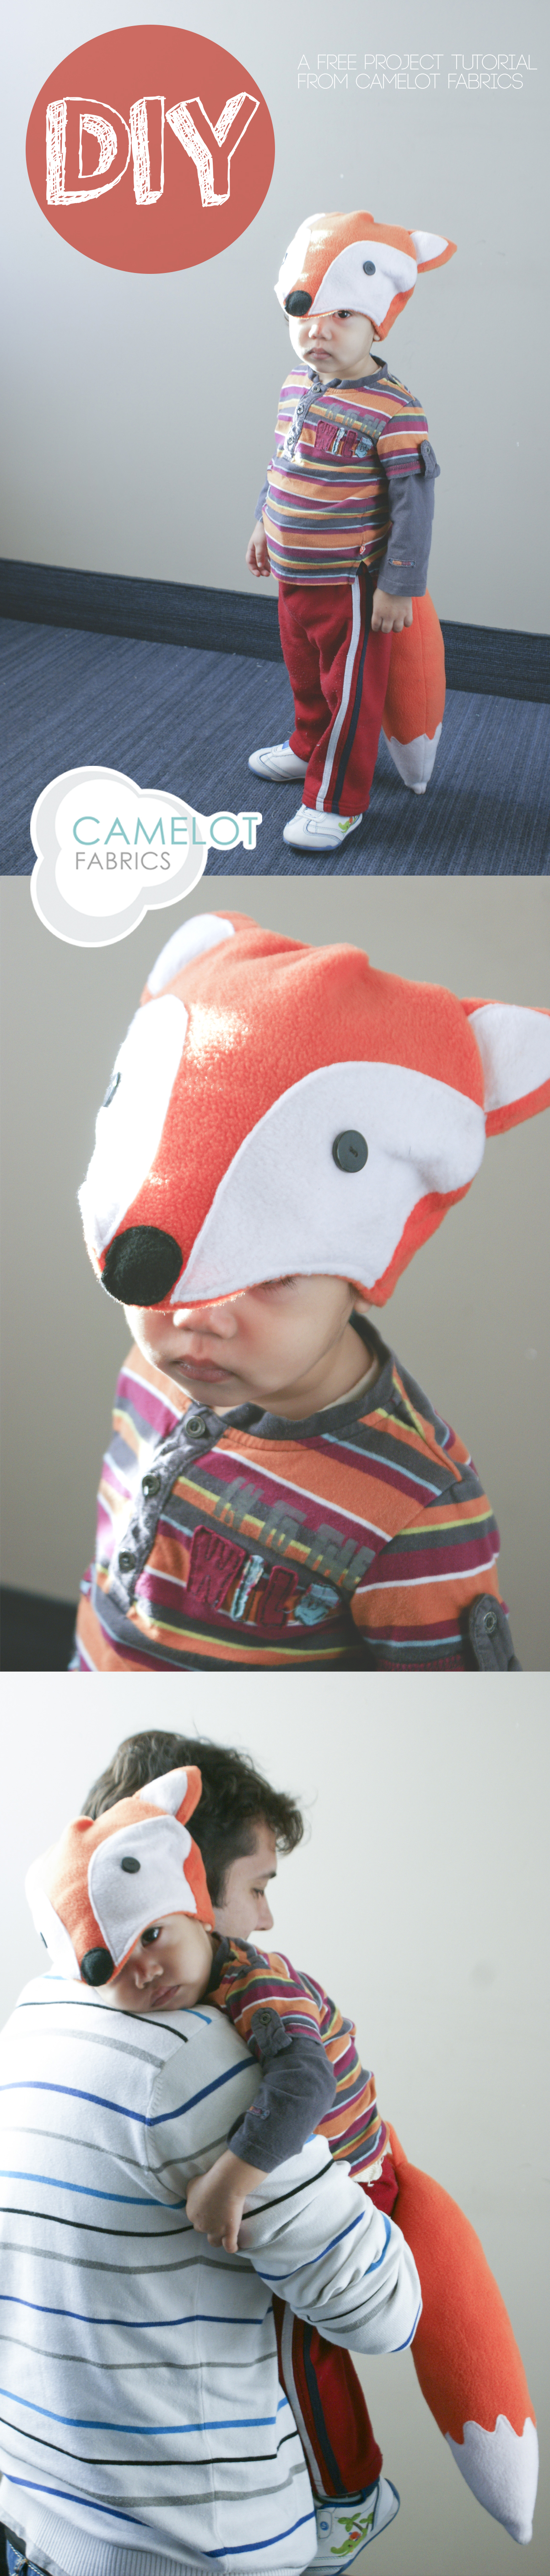
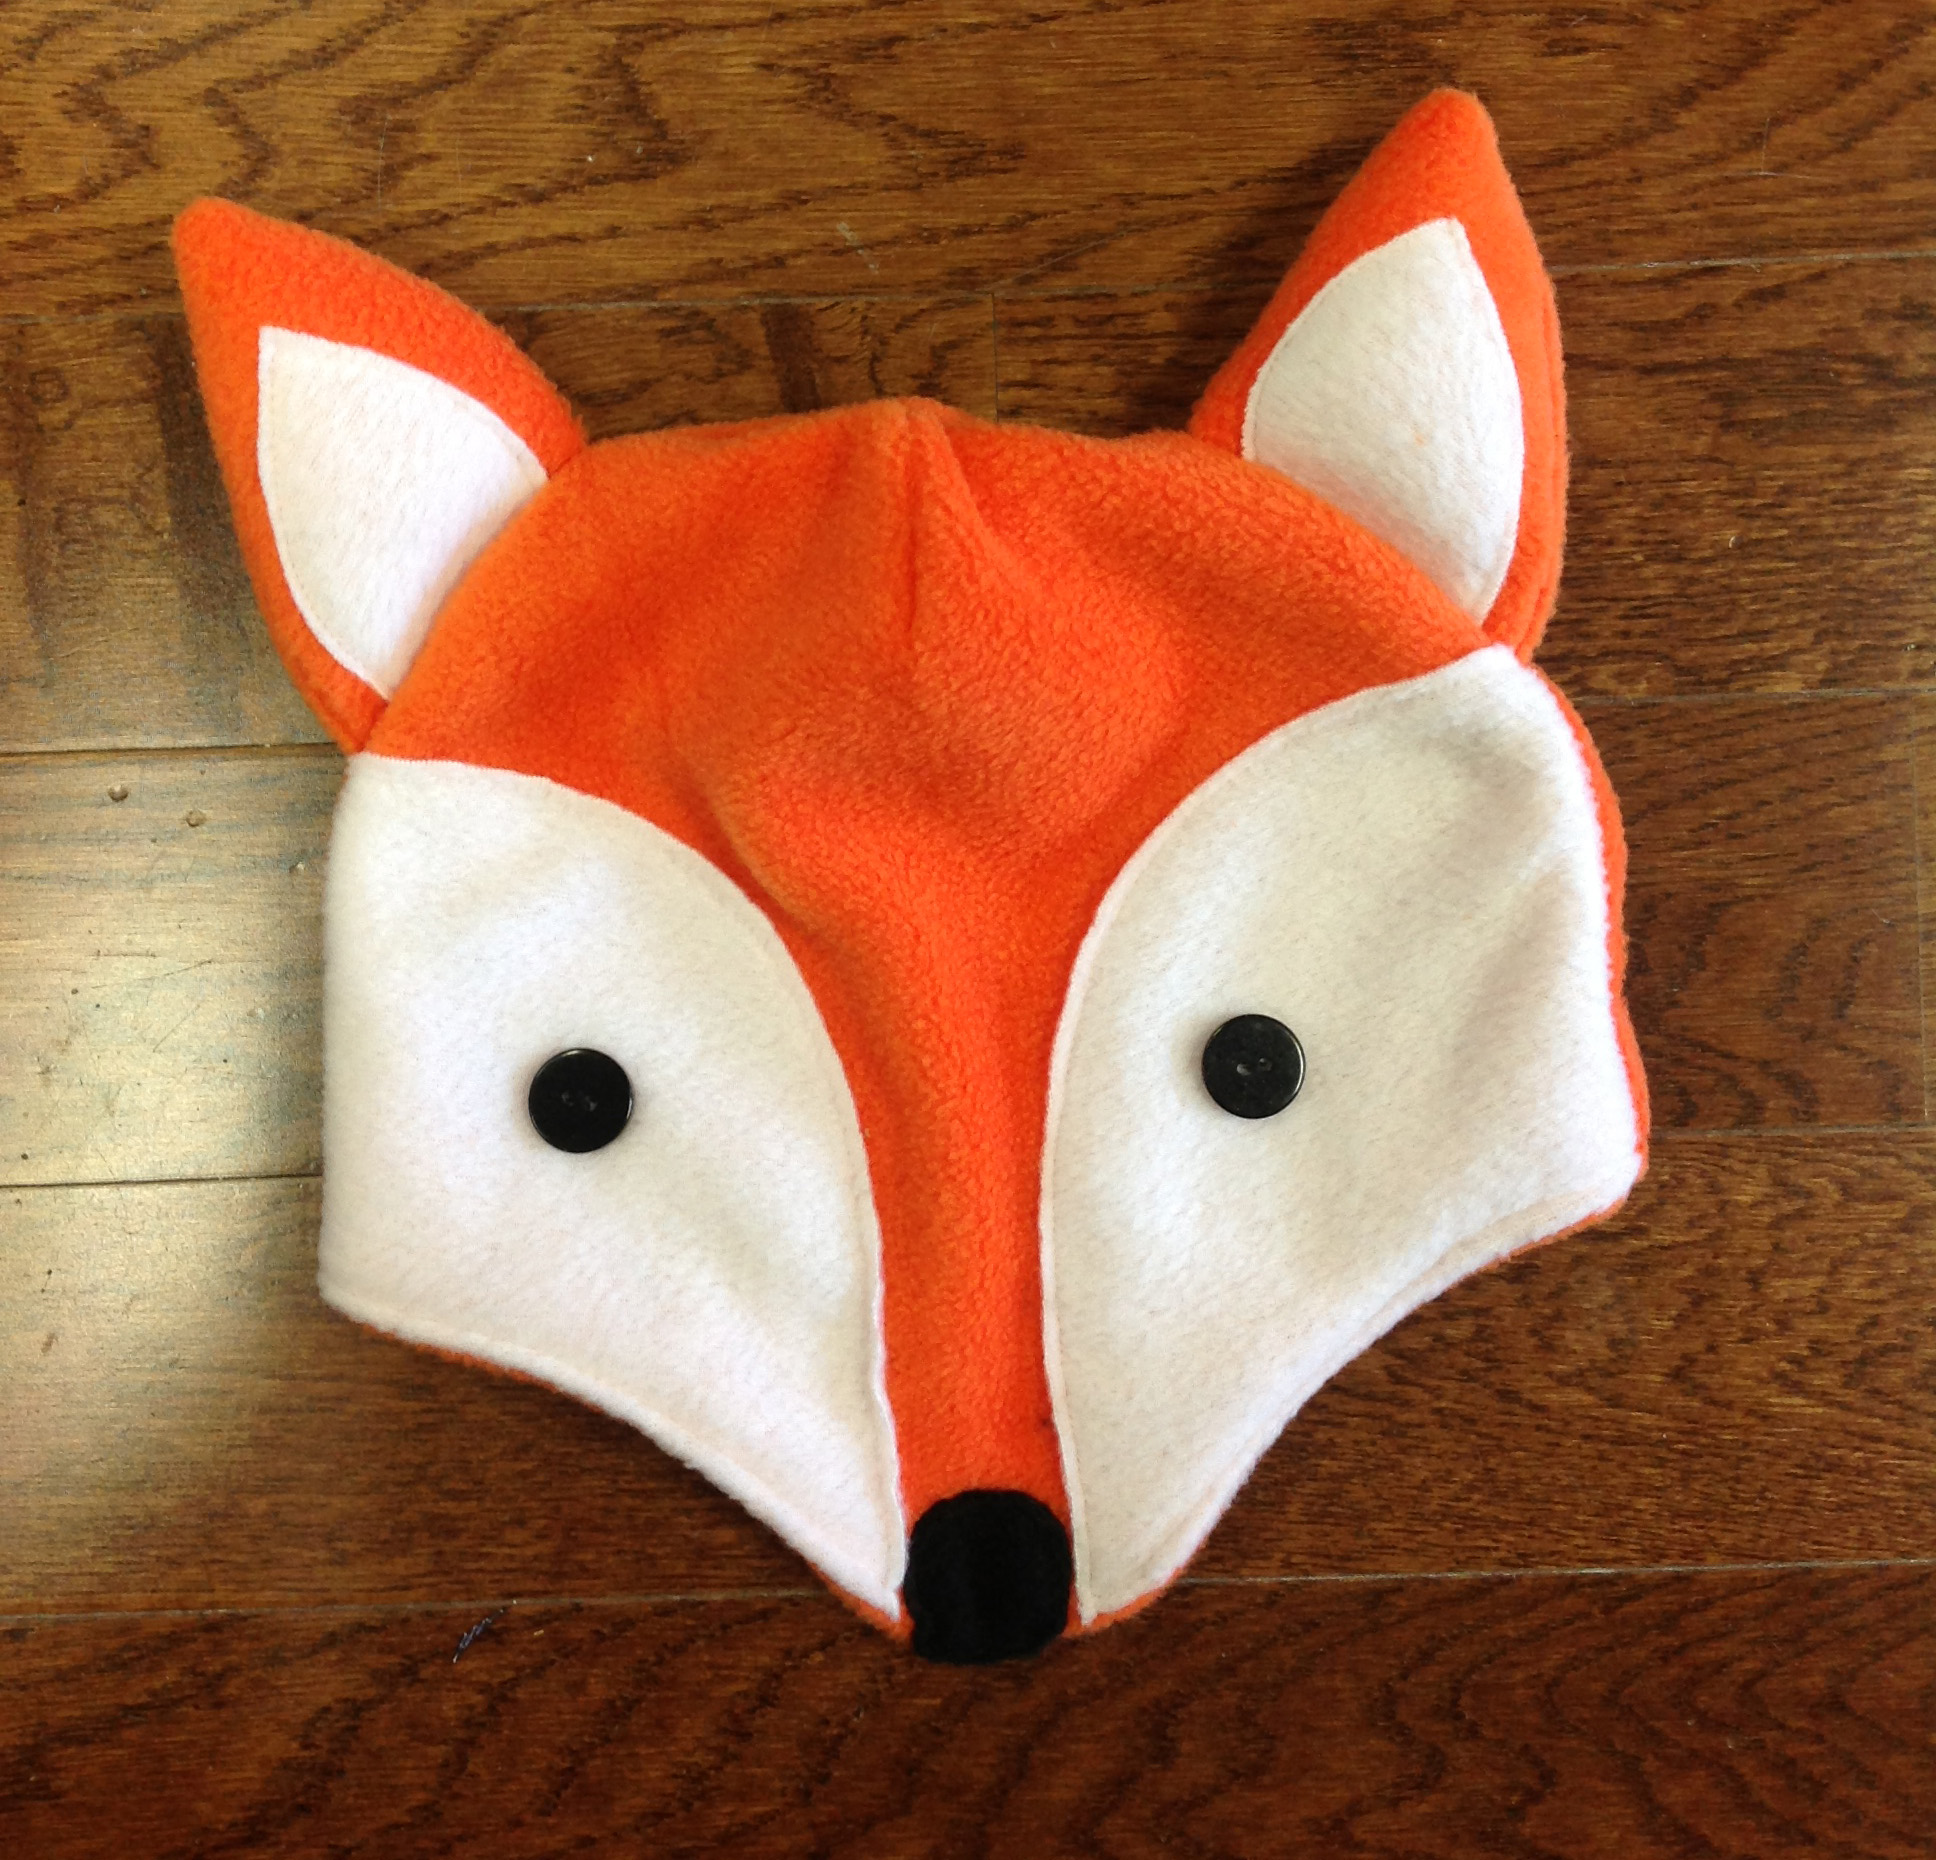
This DIY Halloween tutorial will show you how to make a fantastic fox hat and tail using our fleece, which is perfect for this costume (psst: our Fleece and Flannel catalogues are out; you can check them out online here and here respectively!). What does the fox say? Who really knows…but if we did, we are sure they would approve of our DIY fox costume!
Now take a gander at these dashing foxes below. They are looking pretty adorable in their fox costumes…all ready to go Trick or Treating!!

Alright, let’s get sewing!! Click to see the tutorial after the jump

Supplies & Tools:
– 3/4 yard of orange fleece
– Fat quarter of white fleece
– 1″ x 1″ of black fleece (for nose)
– 2 black buttons (for eyes)
– One bag of fiber stuffing
– Basic sewing supplies: sewing machine, coordinating thread, straight pins, fabric shears, and fabric marker
(Note: Please wash & dry your fabric before starting. Unless otherwise stated, all seams at 1/2″ wide)
*Finished dimensions:
Hat: 6″ high (does not include nose) x 9″ wide (18″ circumference)
Tail: 15″ high x 6″ wide
FOX HAT INSTRUCTIONS:
Cutting:
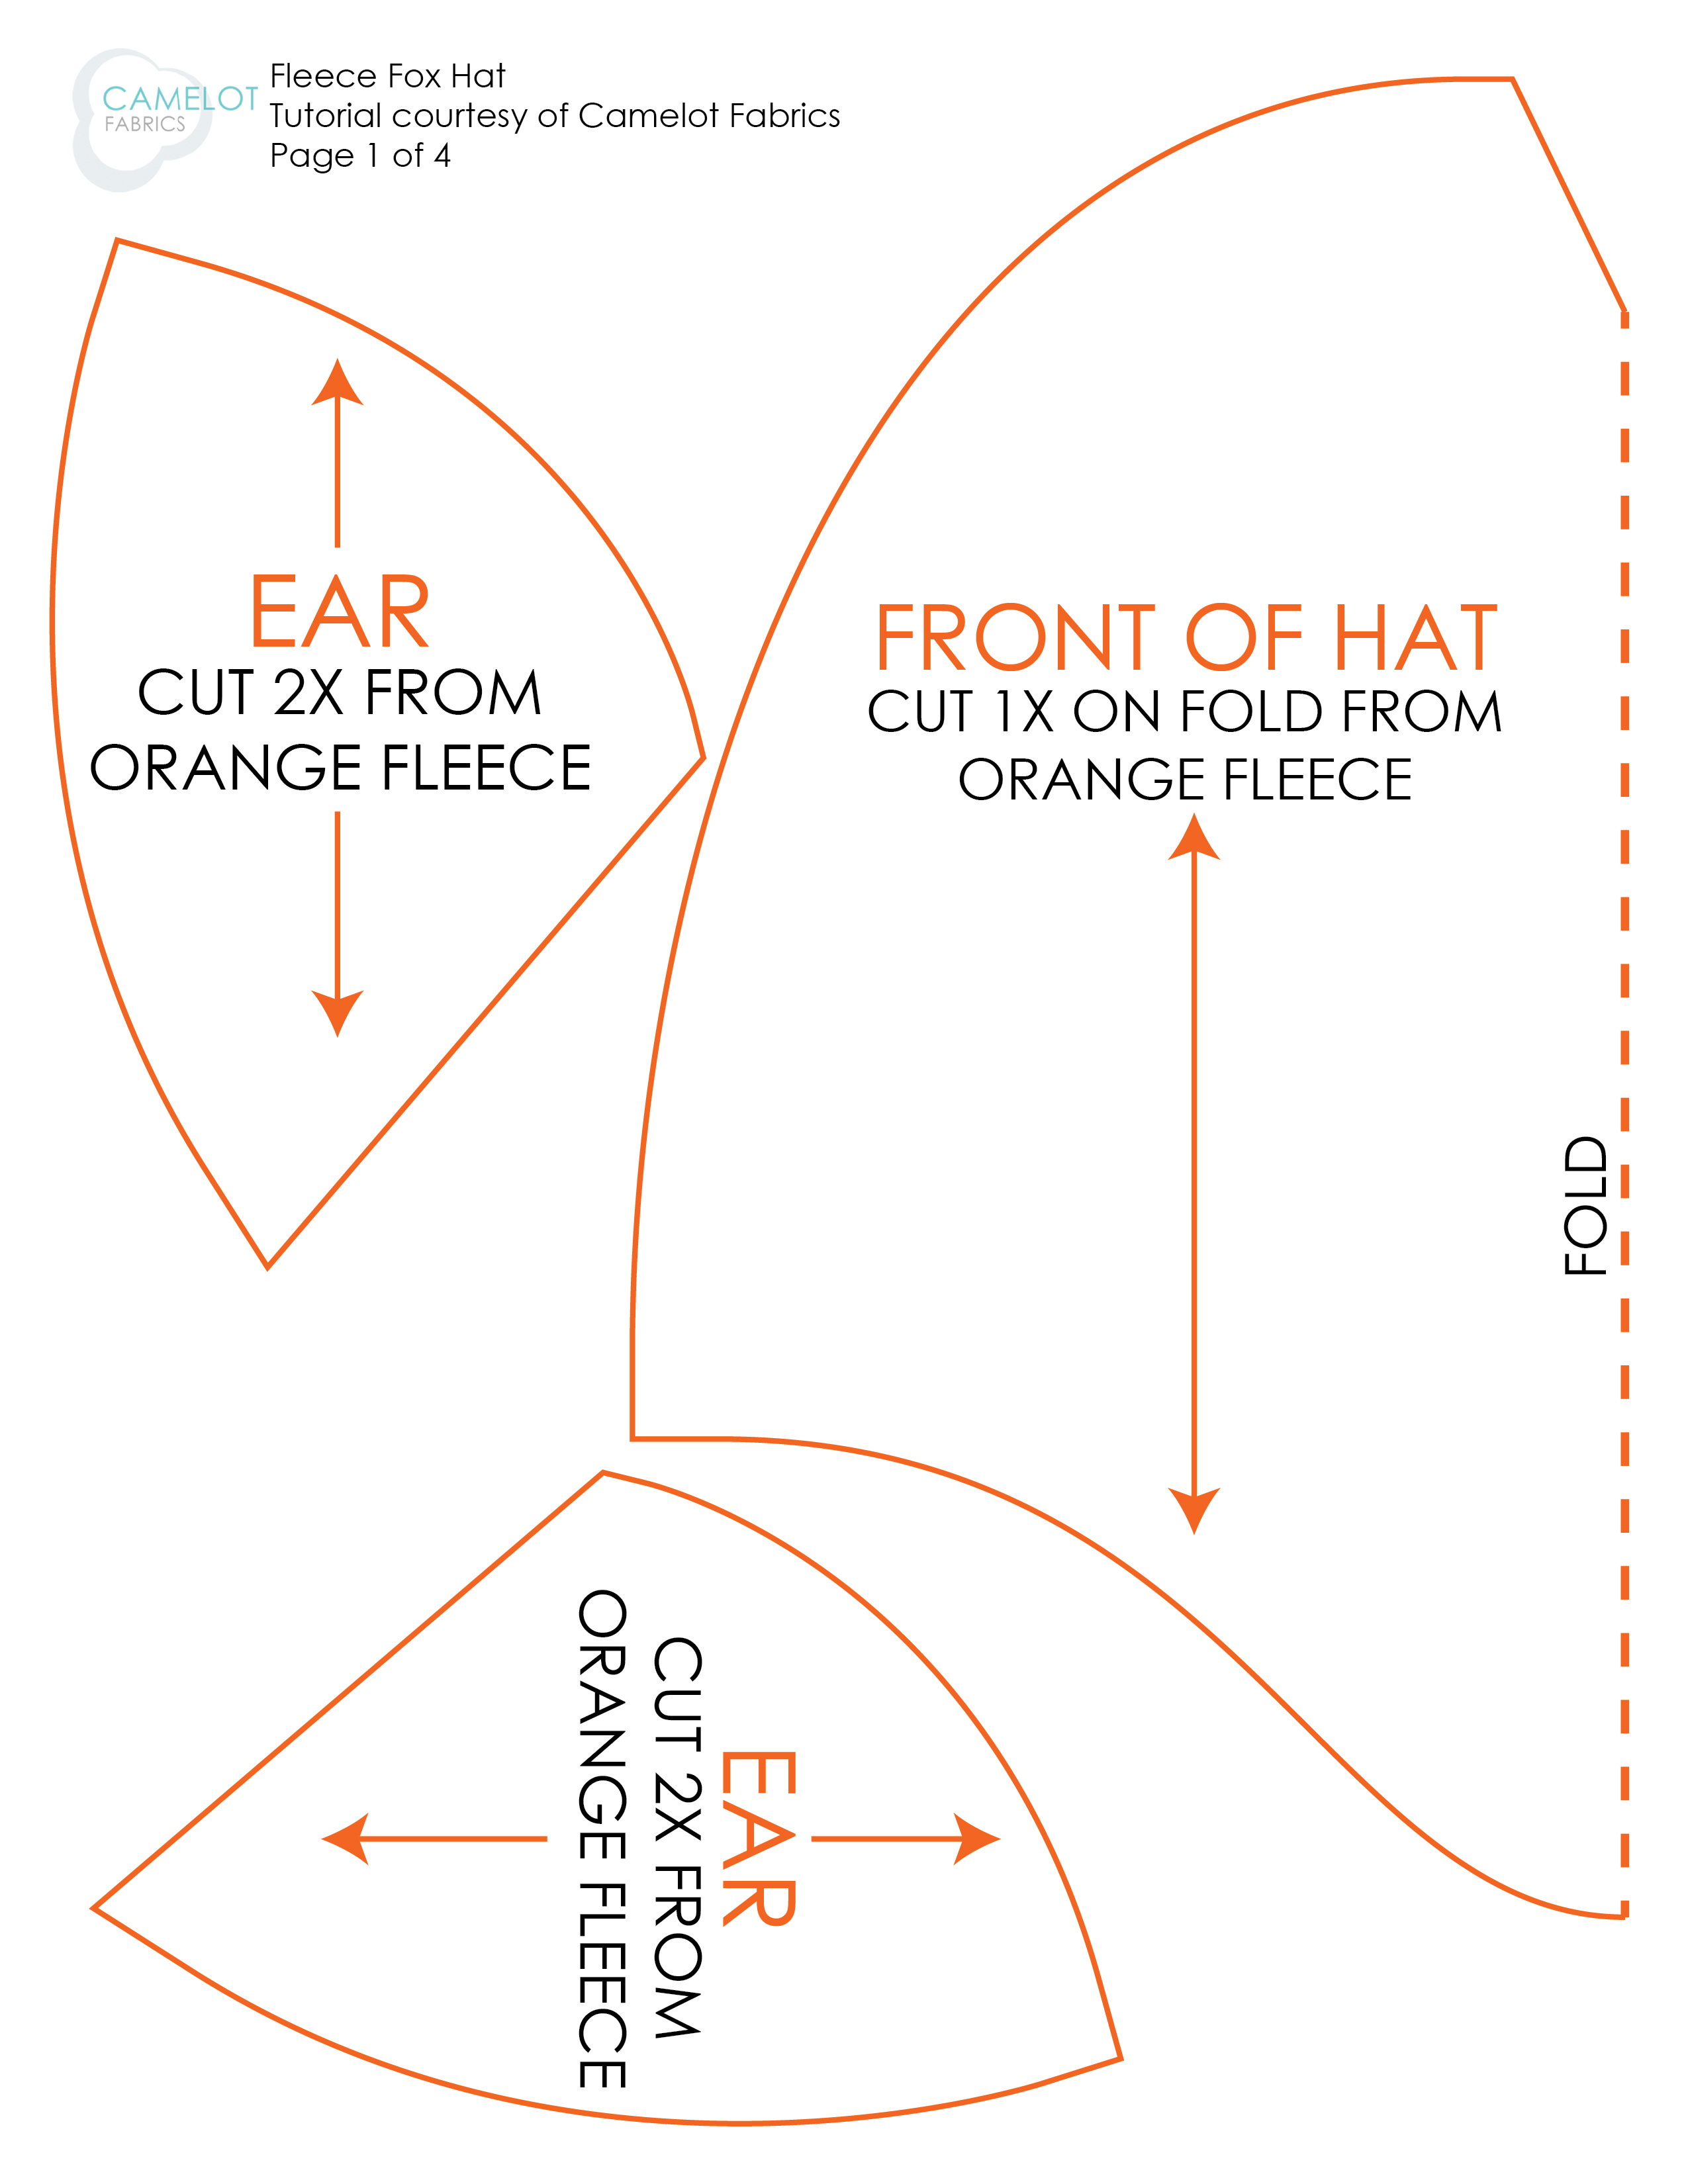
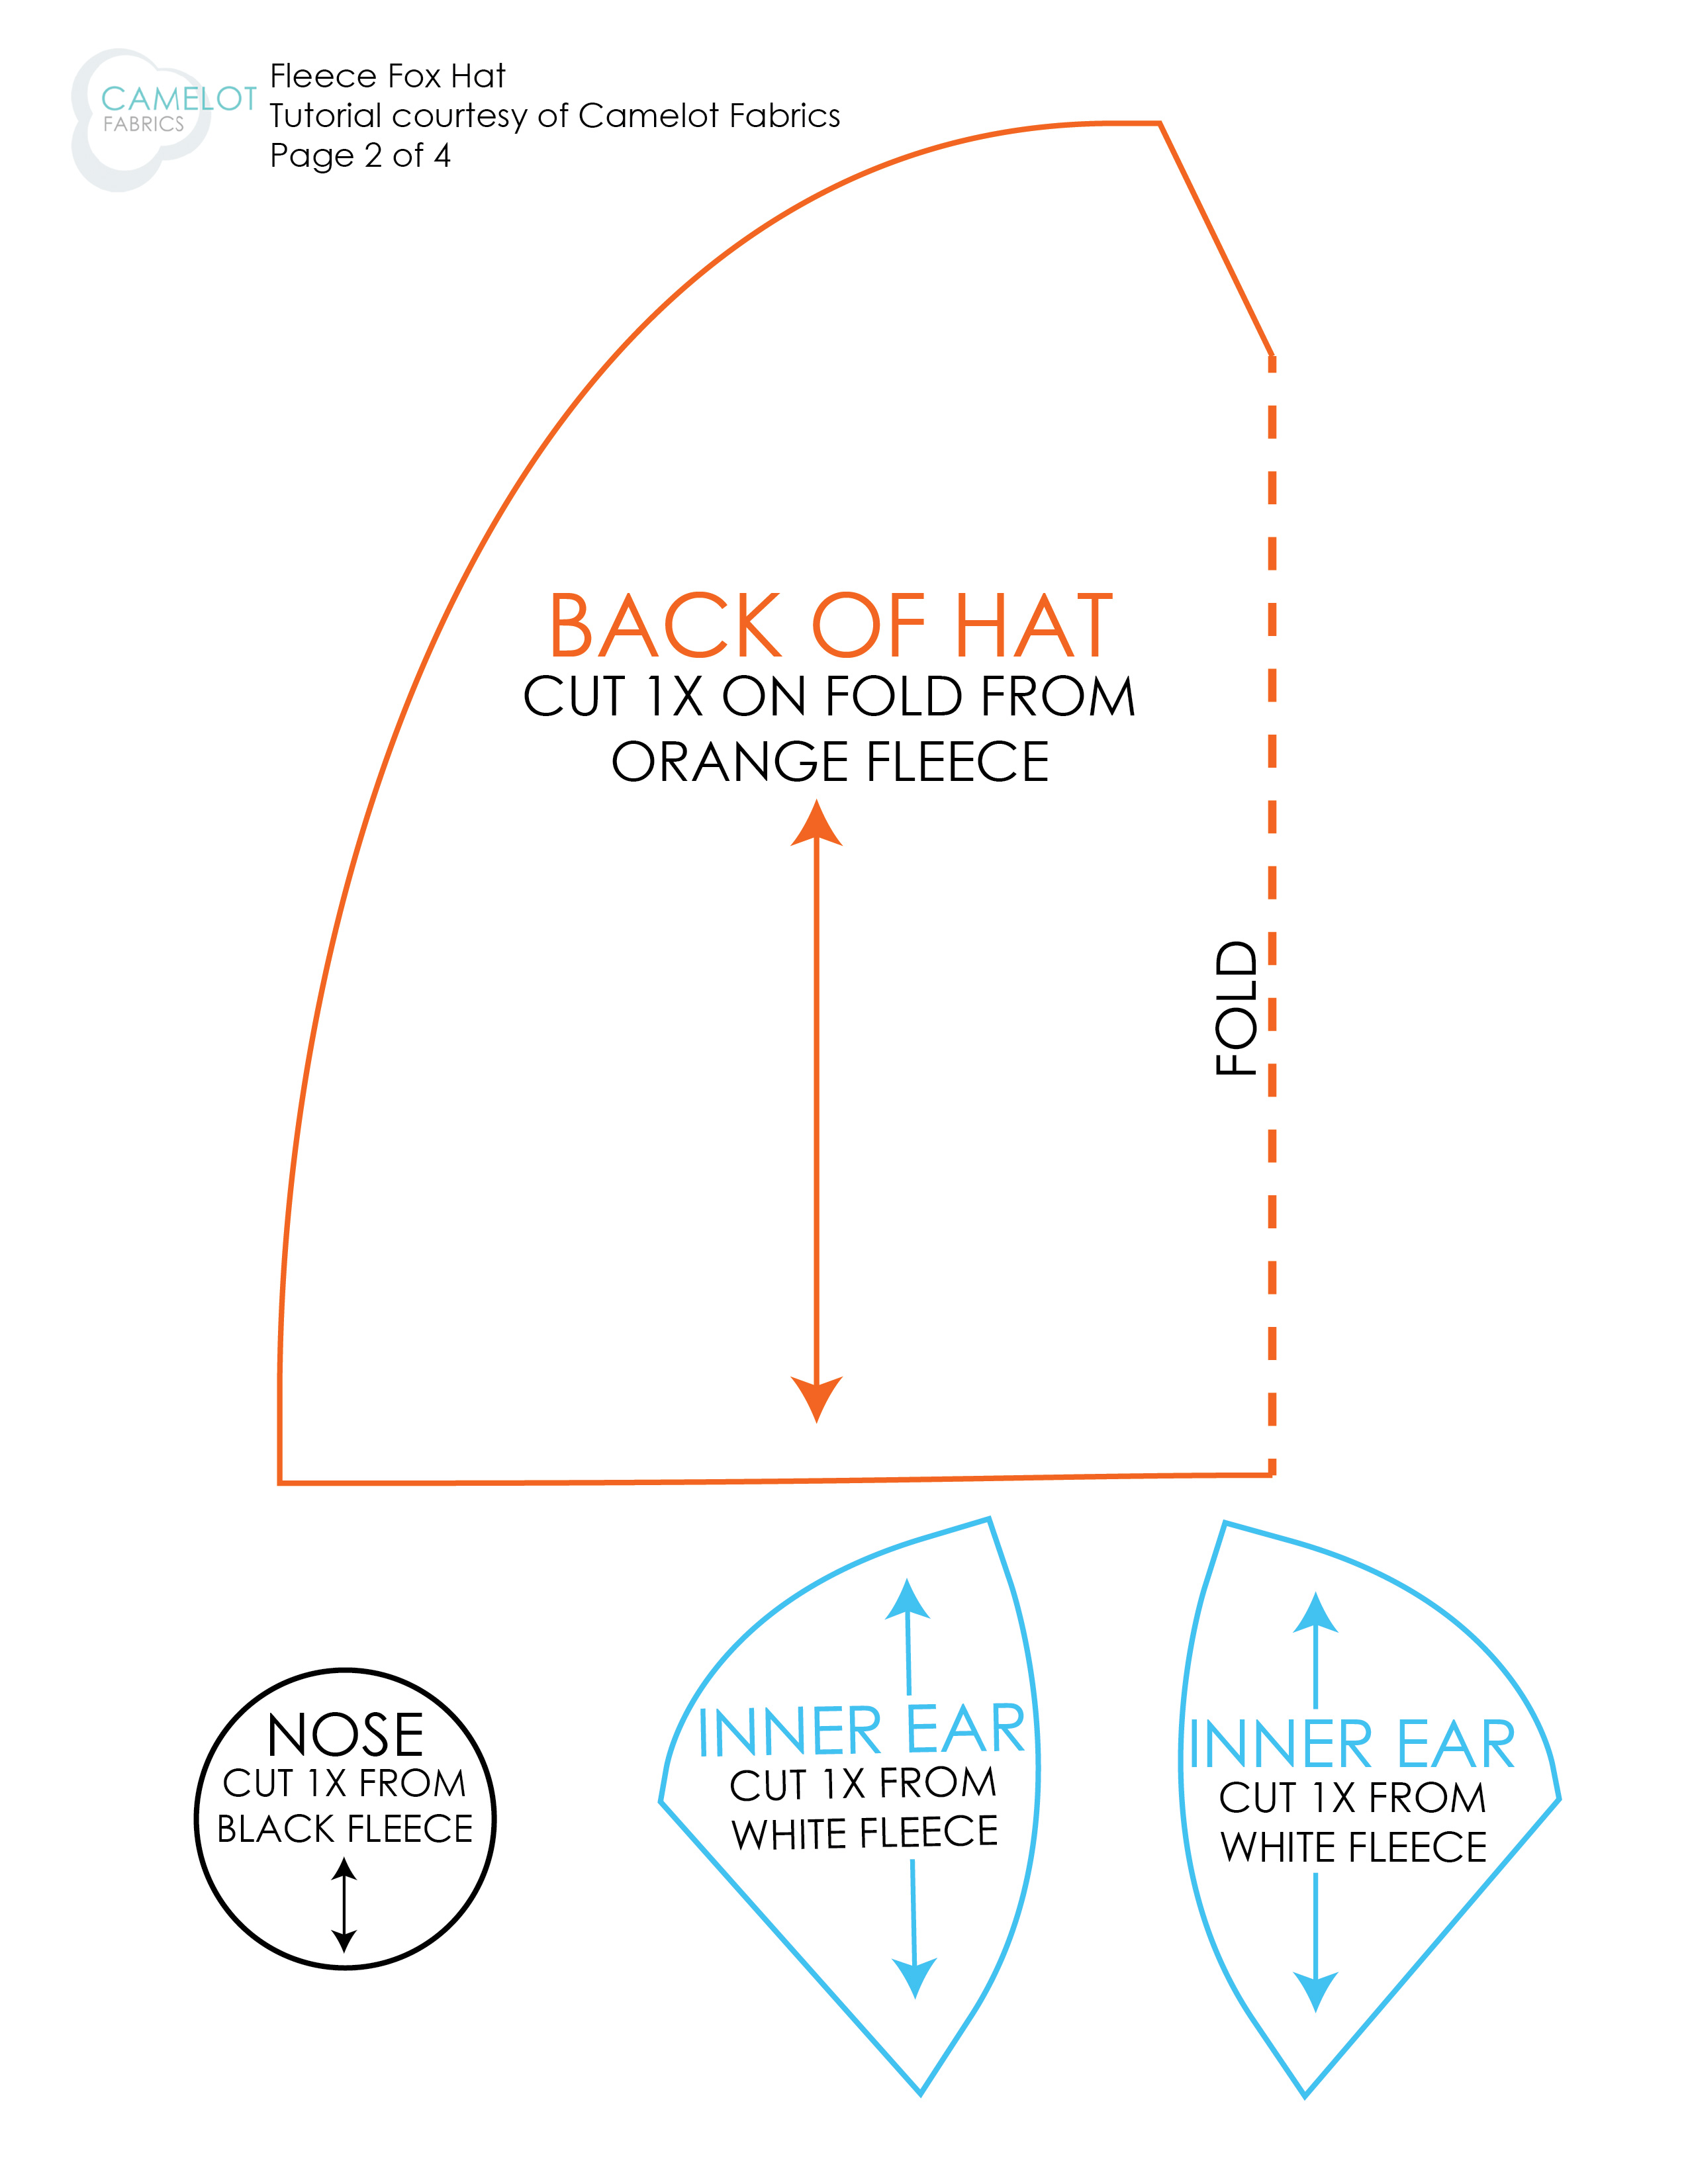
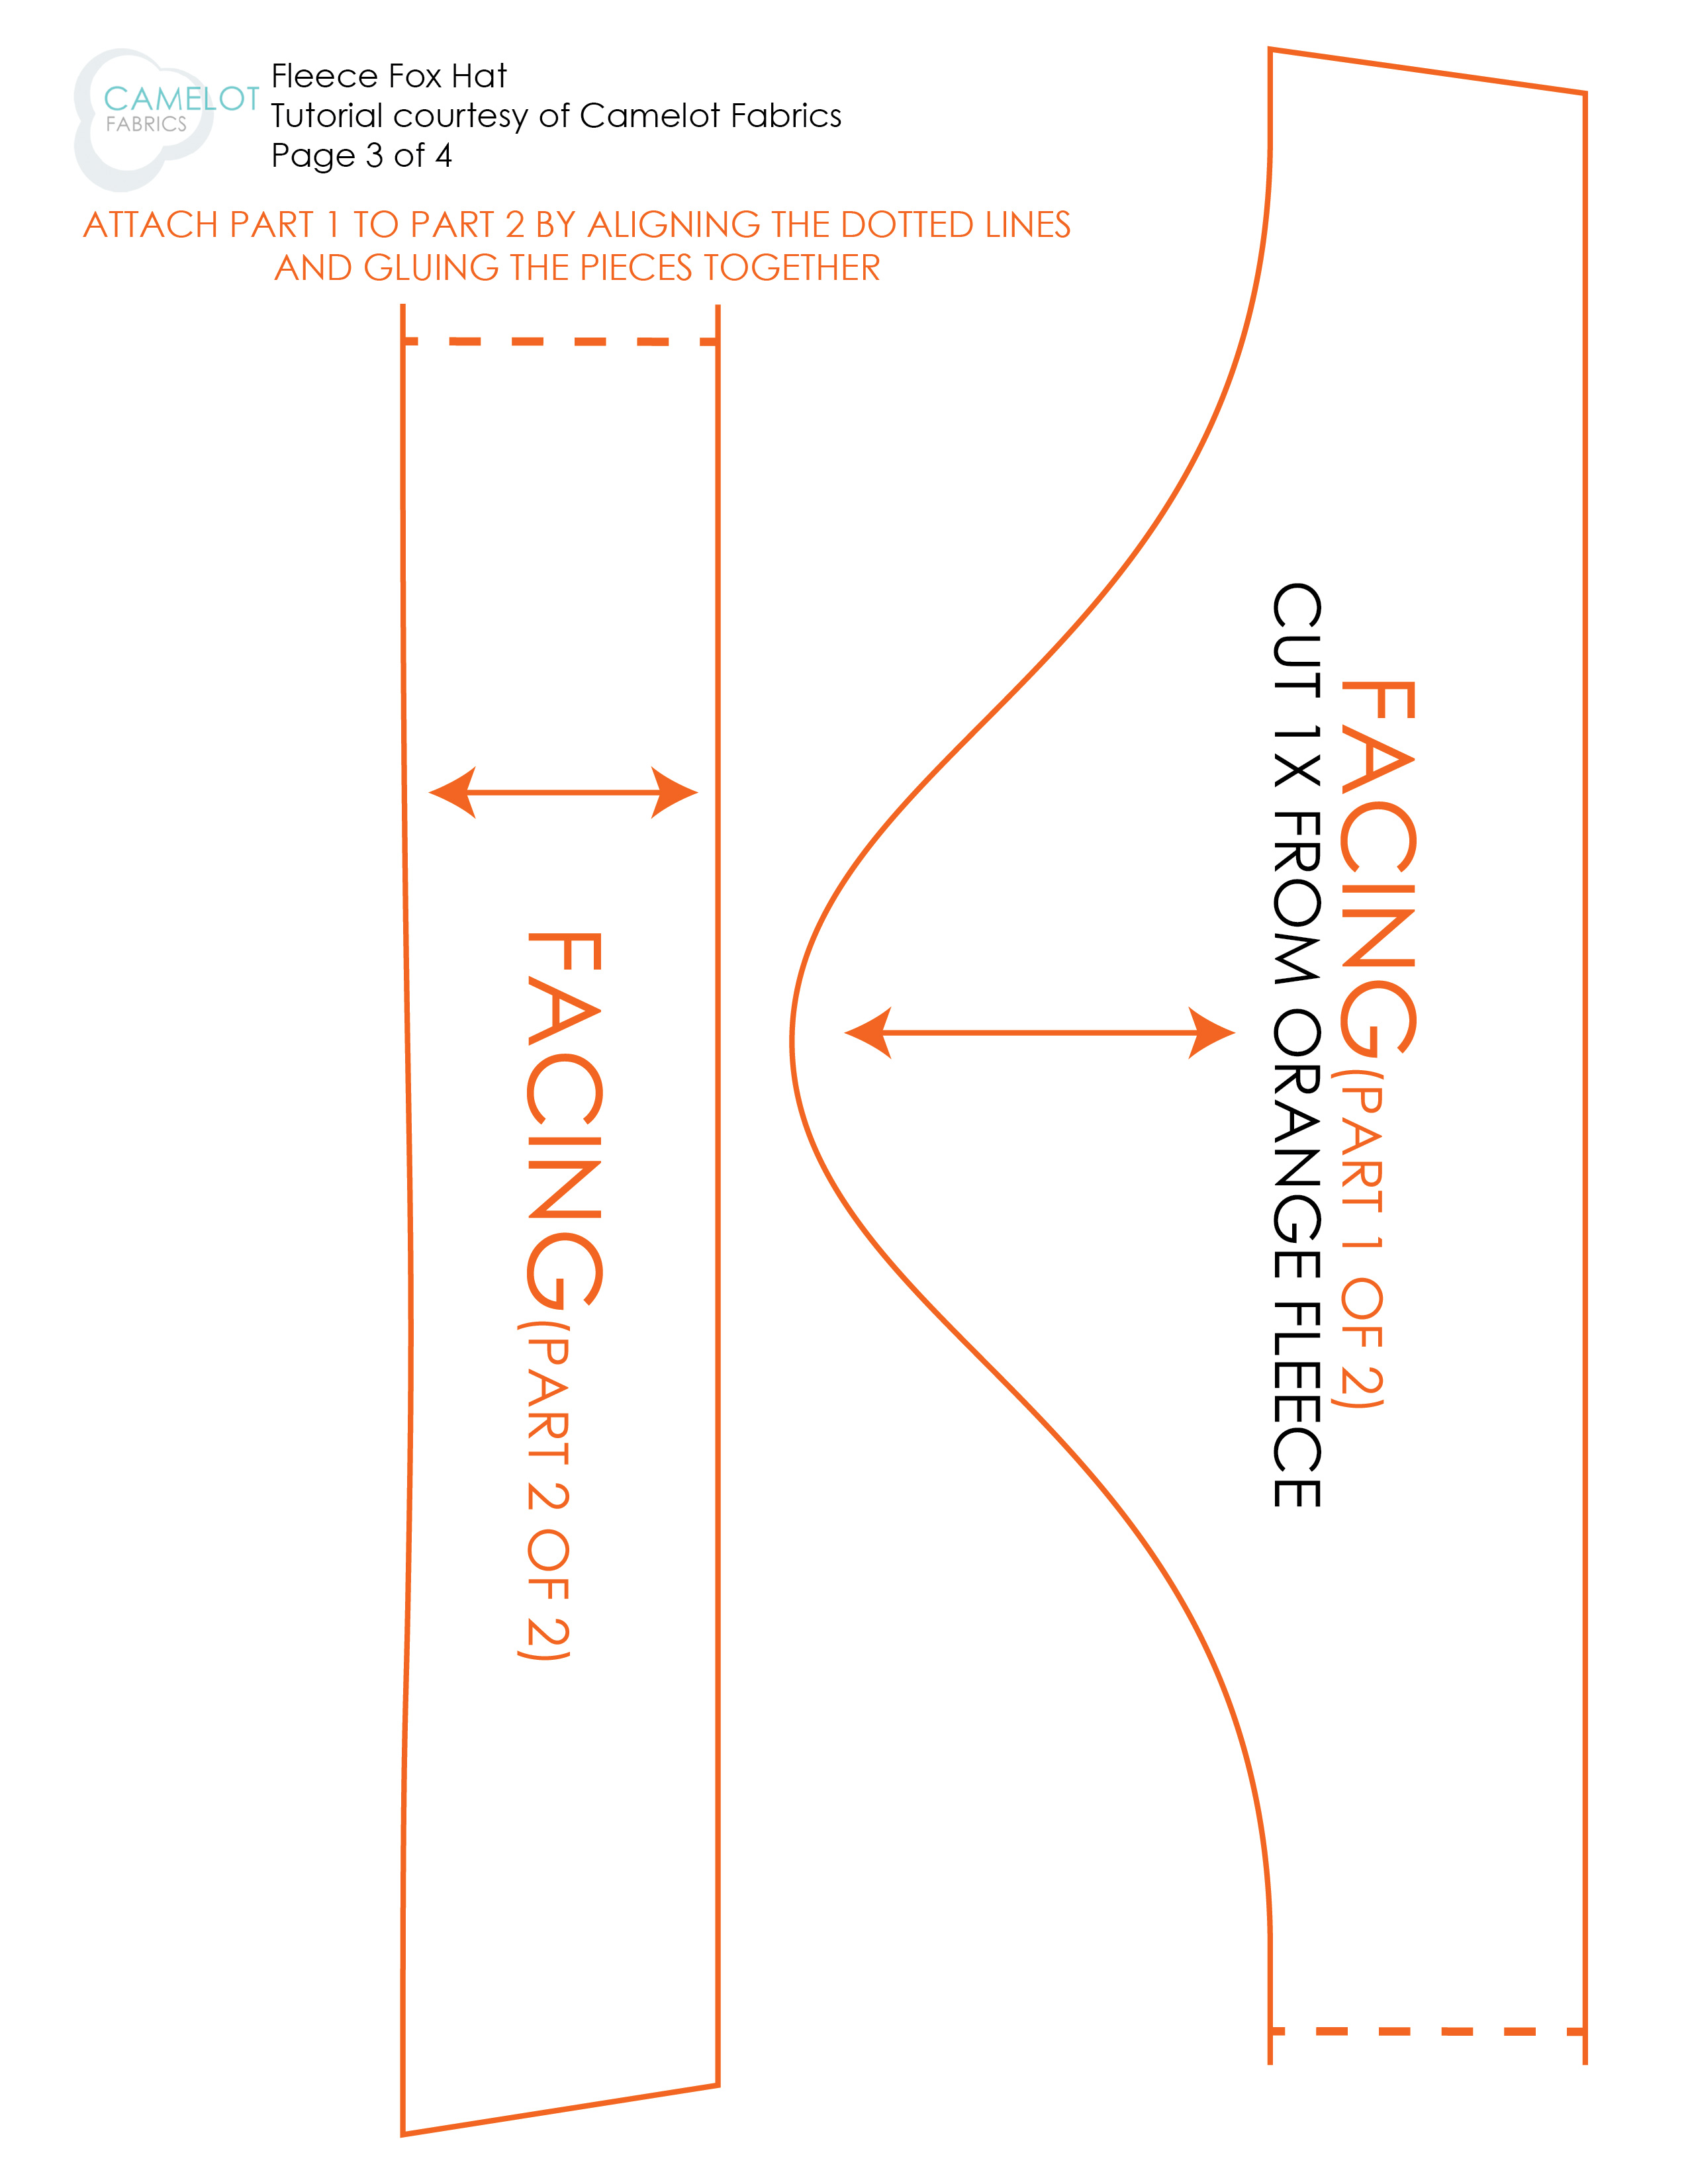
1. Print our the Fox Hat patterns (found at the end of the tutorial) at 100% of actual size. Cut out the pieces. Please note that the pattern on page 3 was too long for 8.5 x 11″ paper so it has 2 parts; glue the pattern pieces together following the instructions on the page.
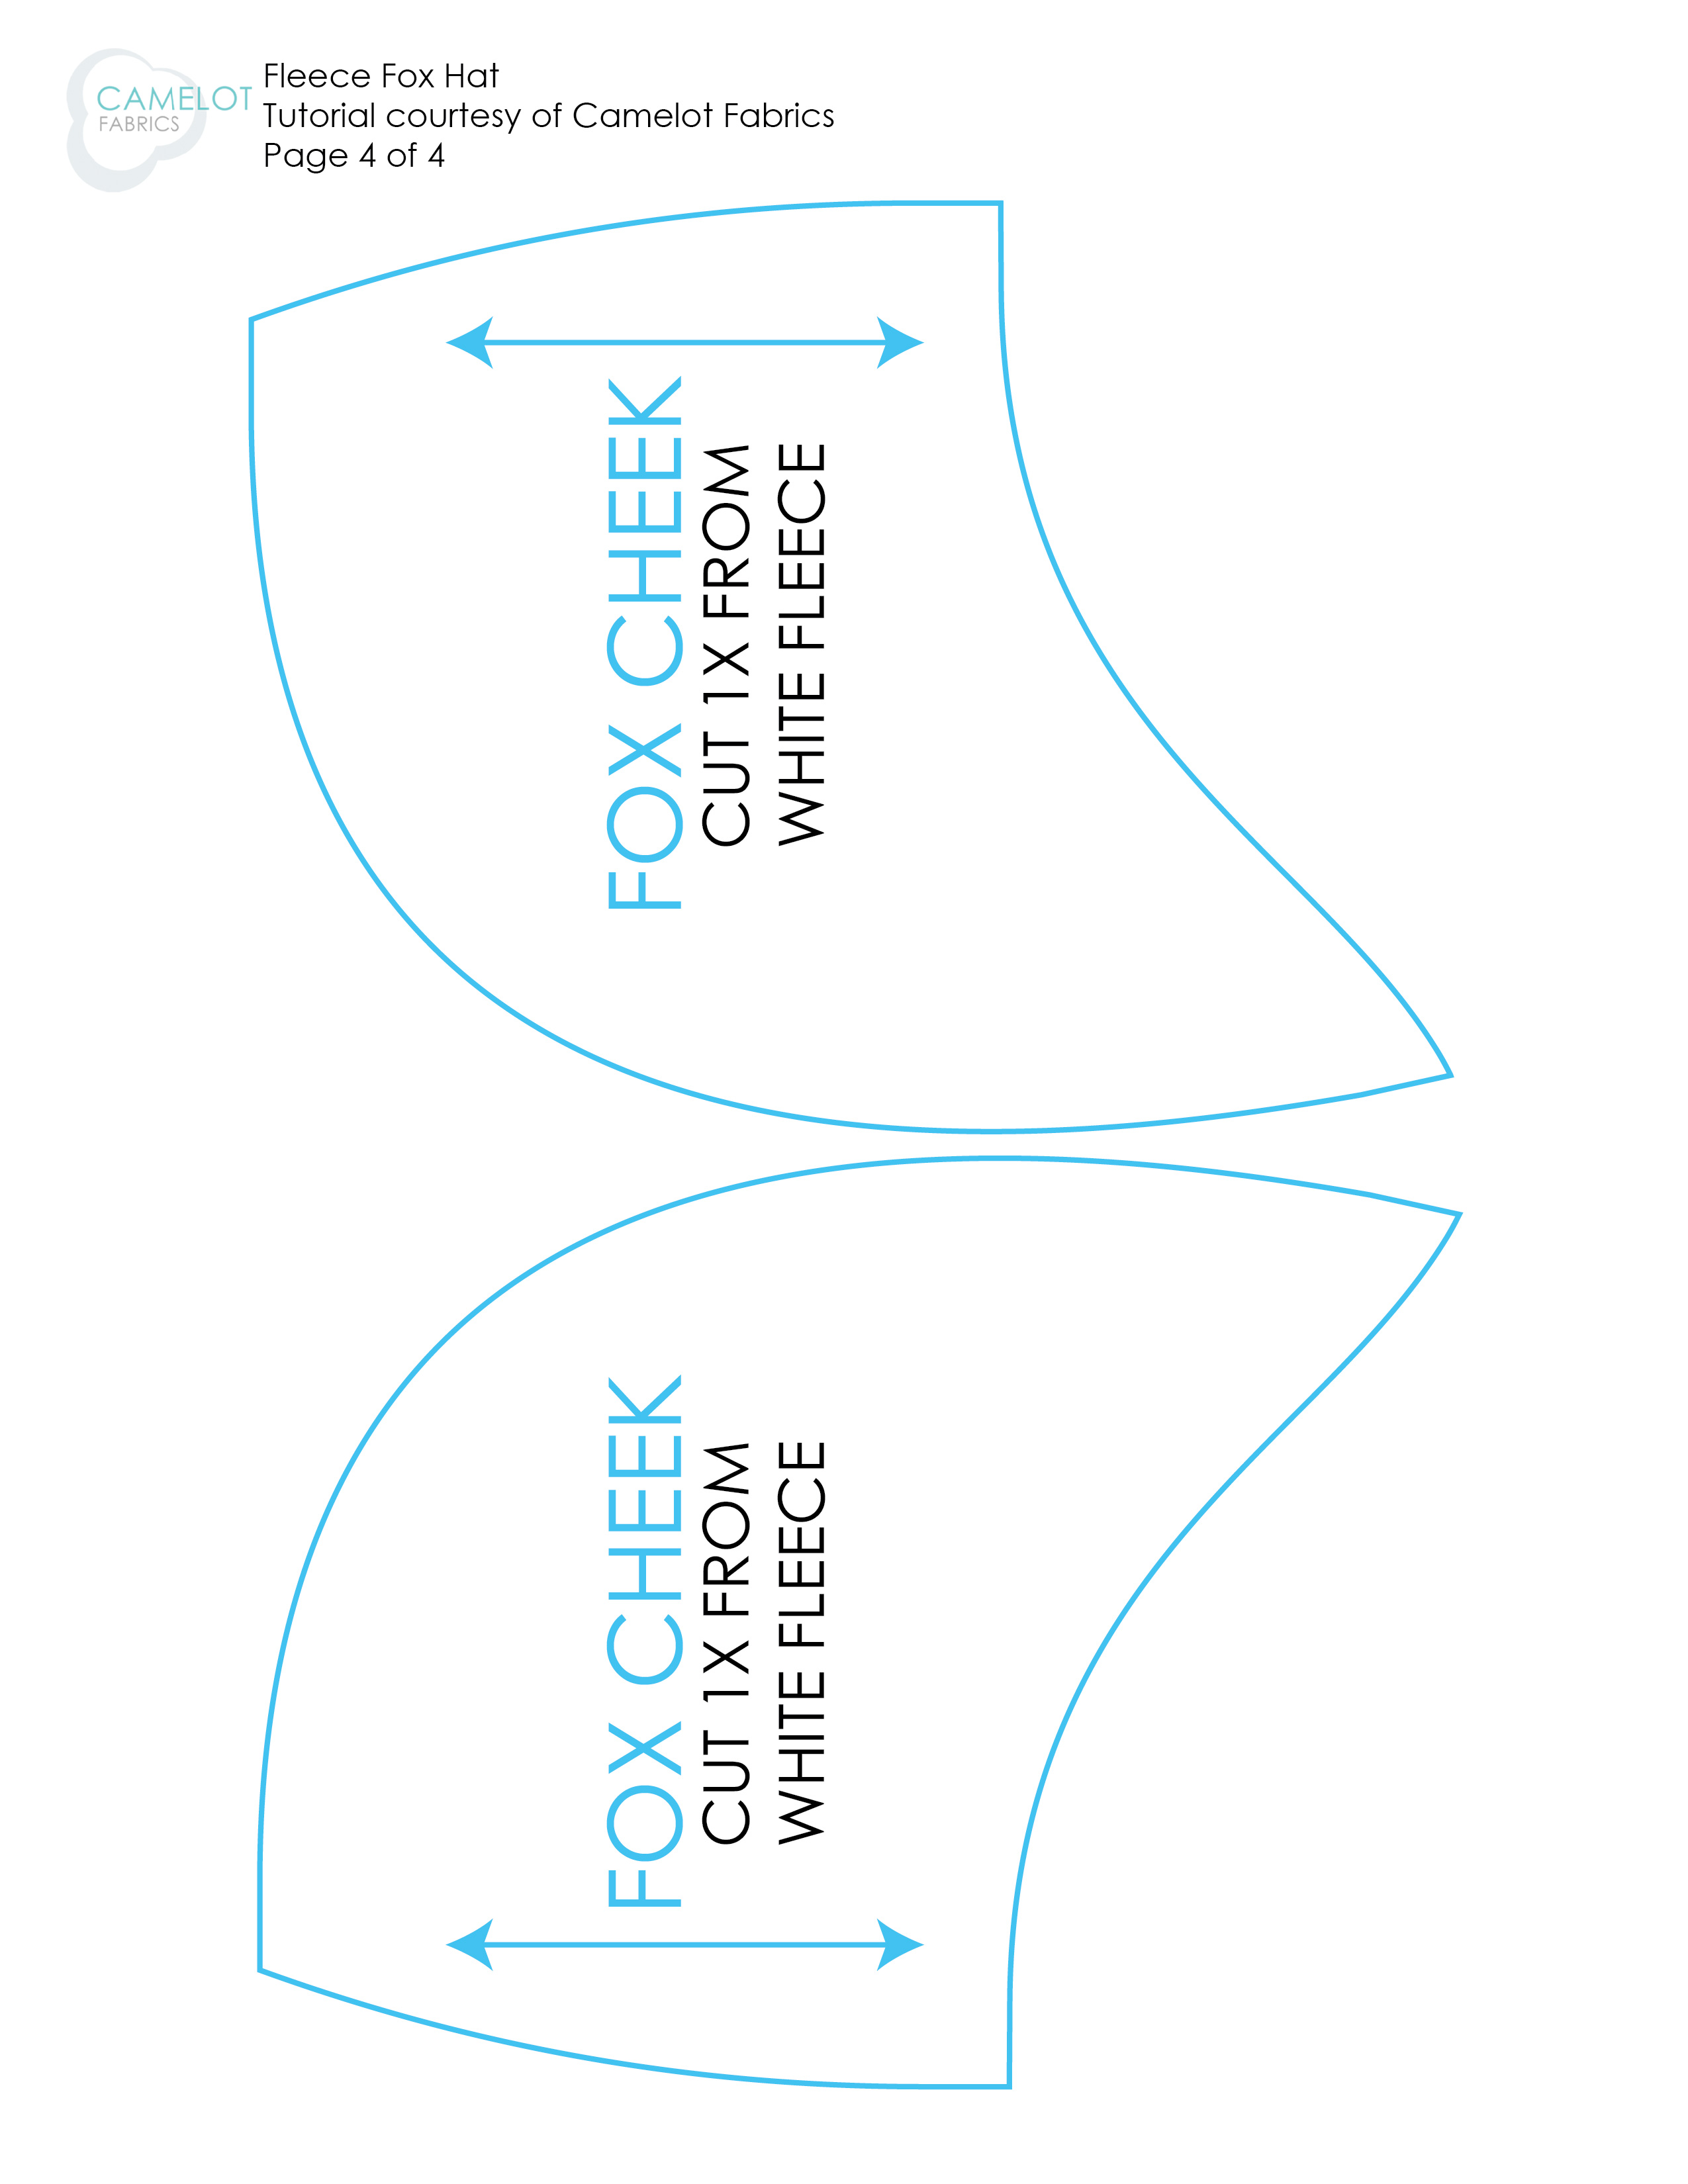
2. Trace each piece onto your fleece (making sure to trace onto the correct color fleece as indicated on the pattern). Cut out the pieces.
3. Your cut fleece pieces should look like this:
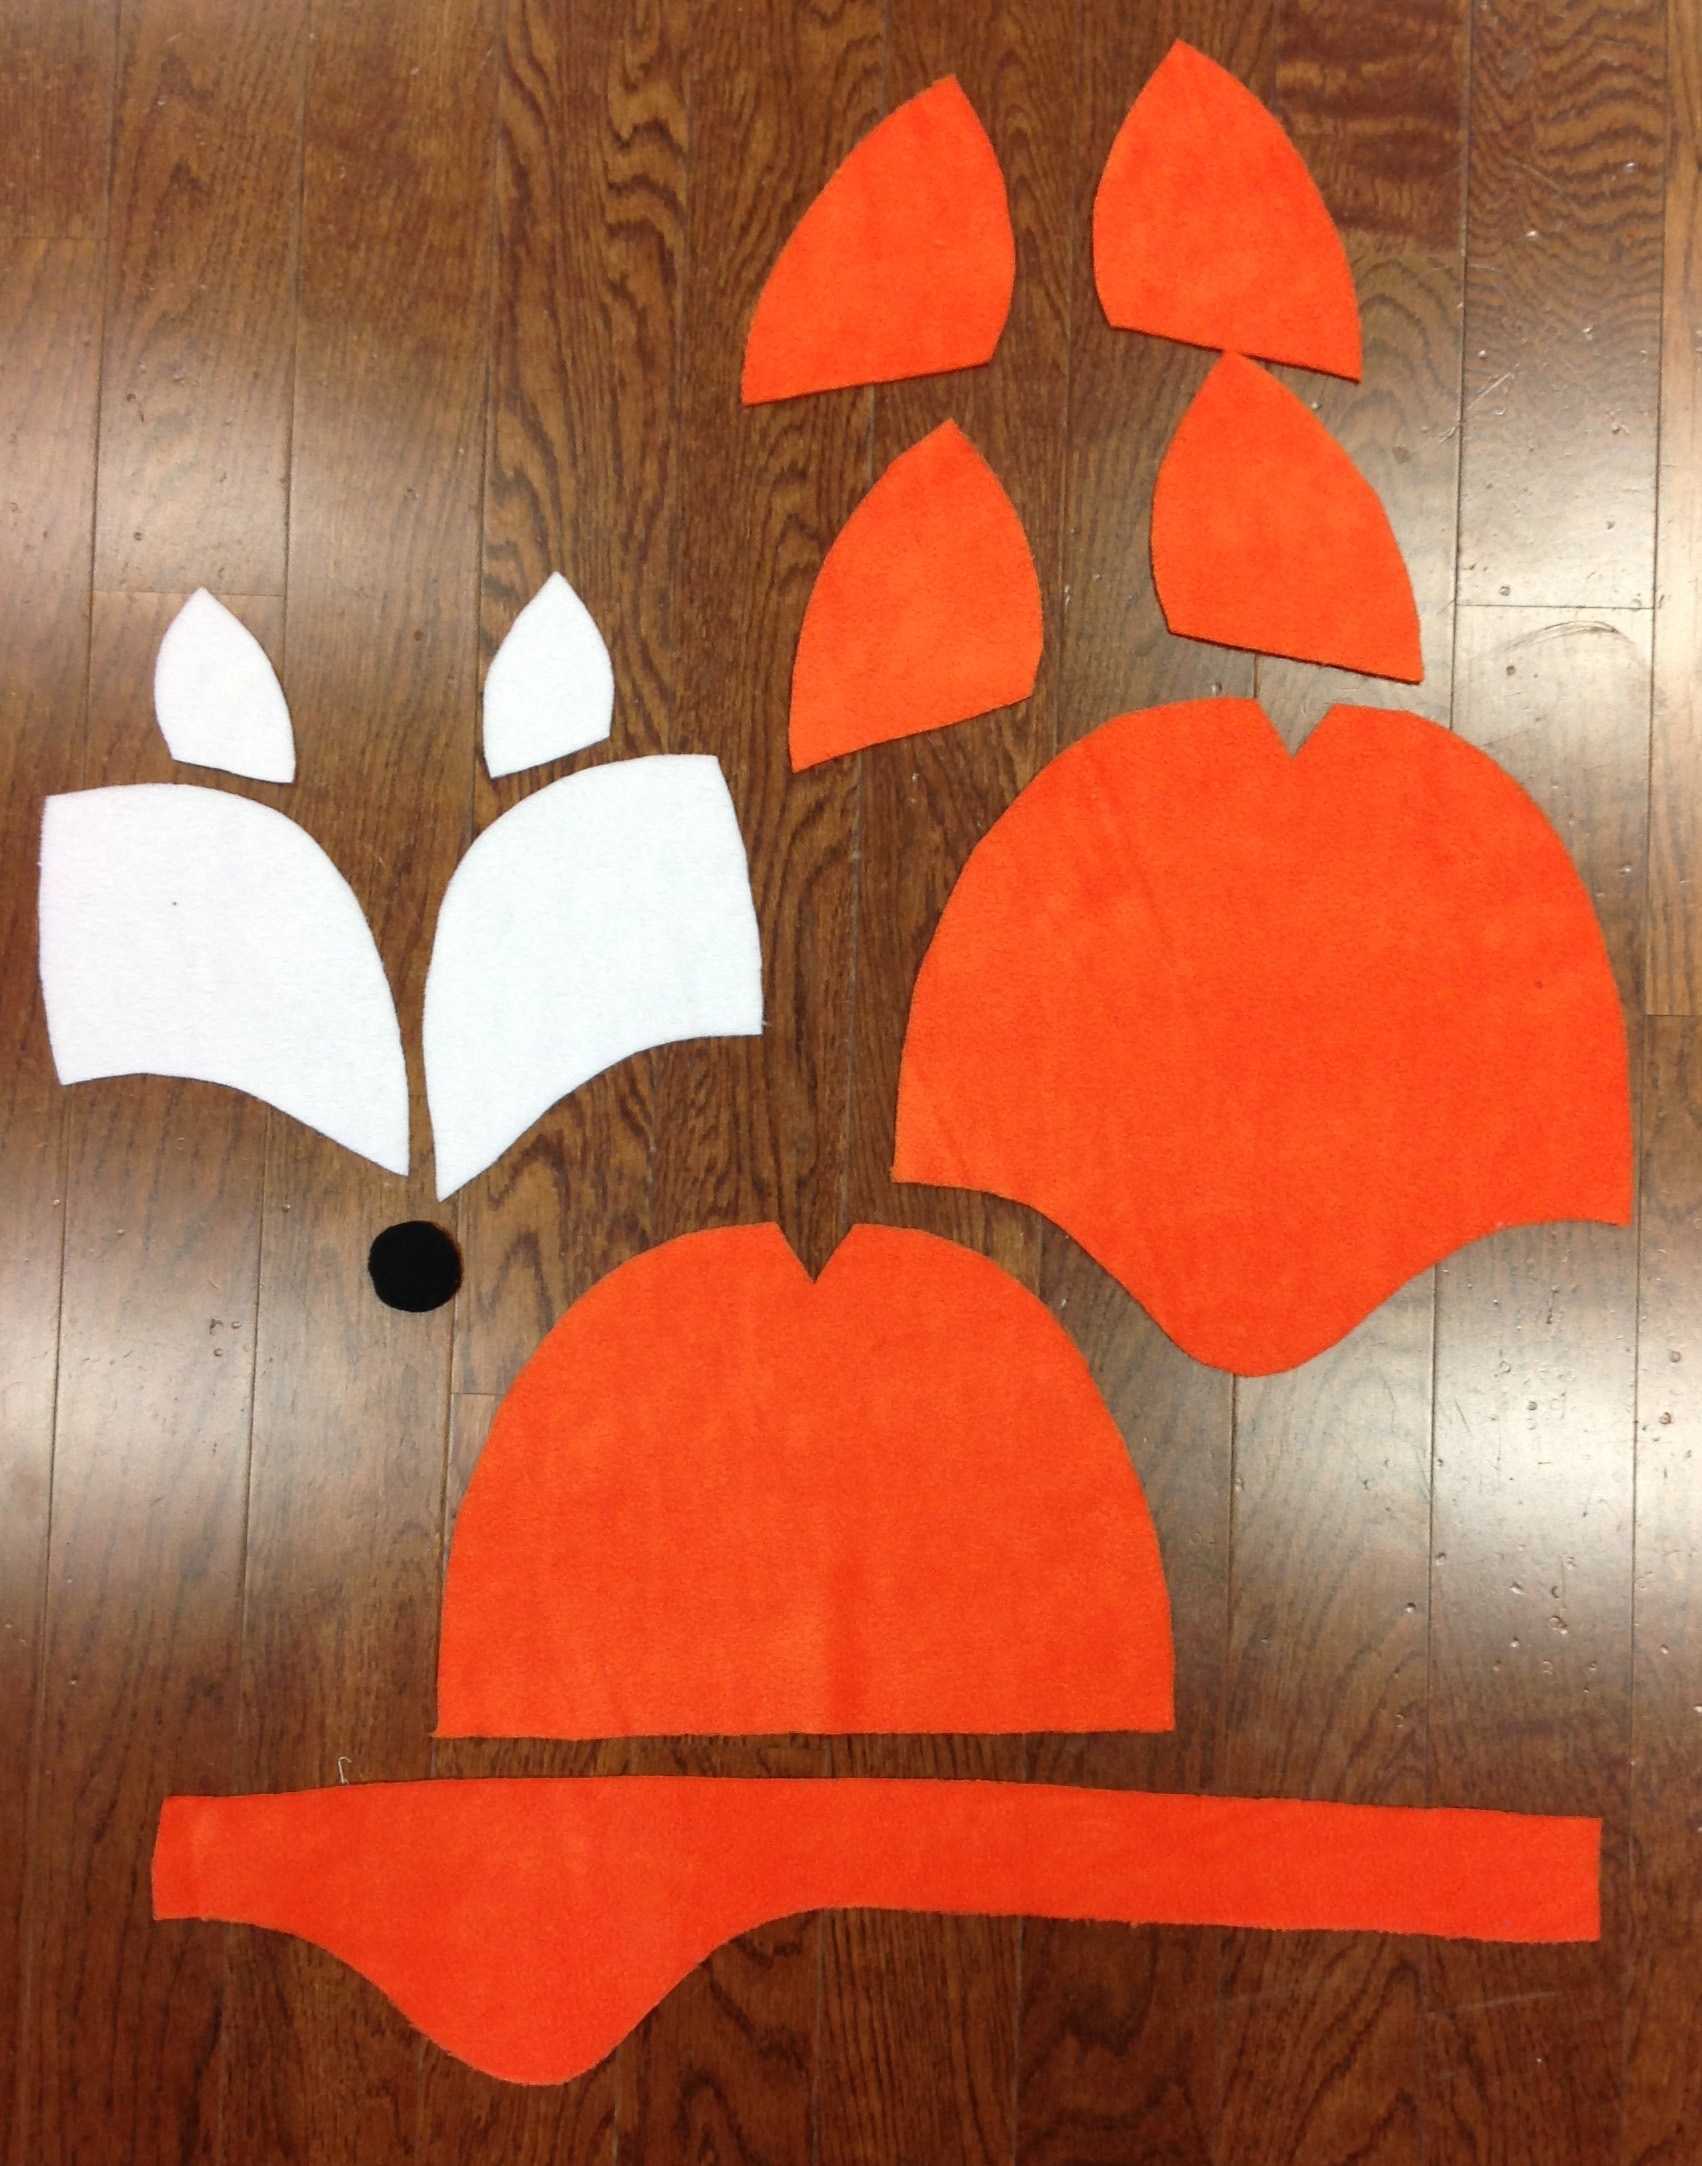
Assembly
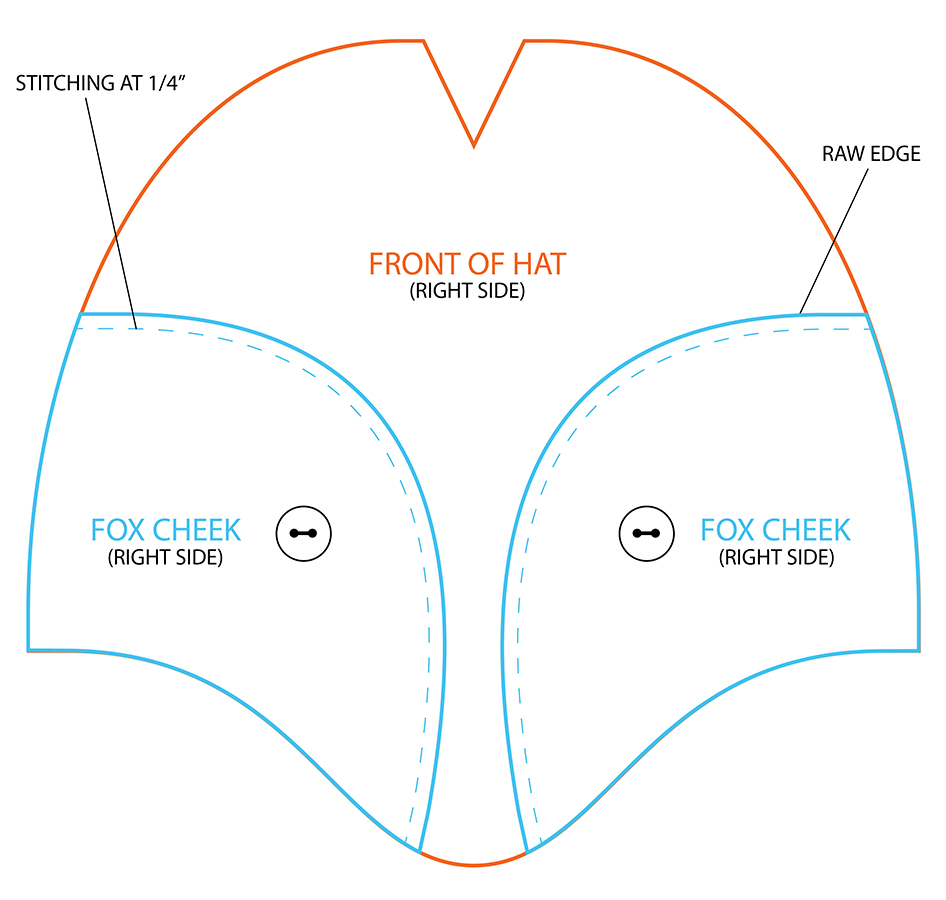
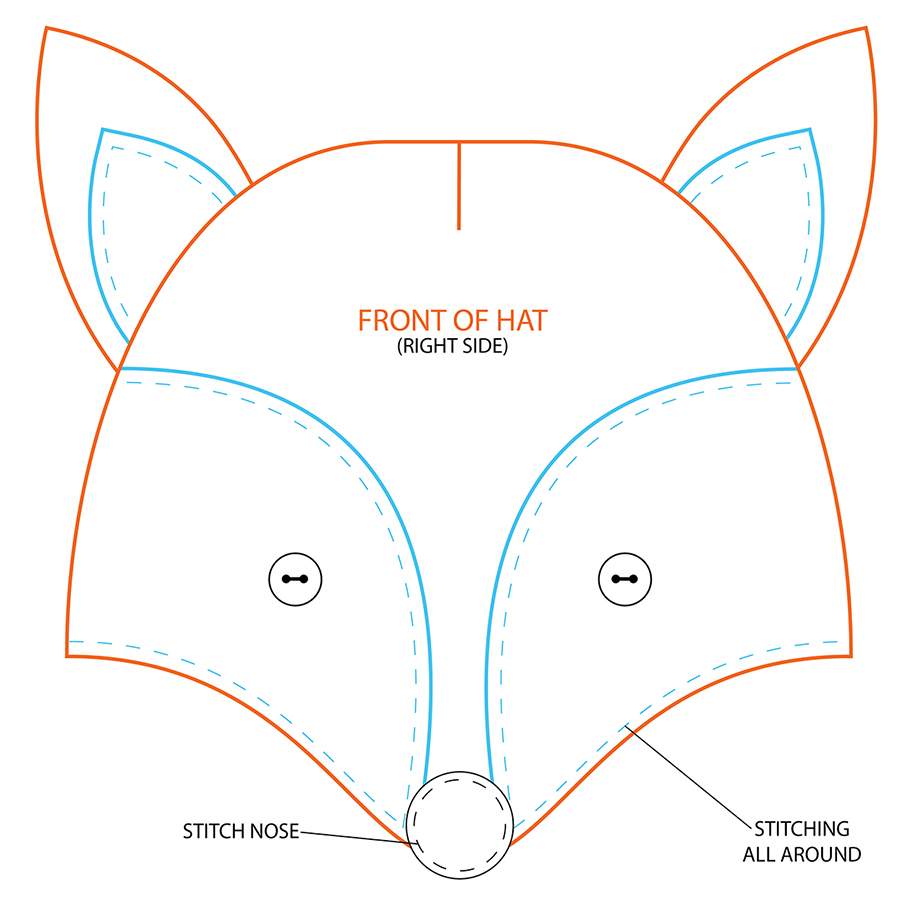
1. Place the Cheeks onto the Front of the Hat, Right Sides up.
2. Applique Cheeks to the Front of the Hat by sewing along the top curved edge at 1/4″ (keeping a raw edge).
3. Sew the black buttons onto the Cheeks at 1.5″ from center & 2″ down (refer to diagram below for diagram placement).
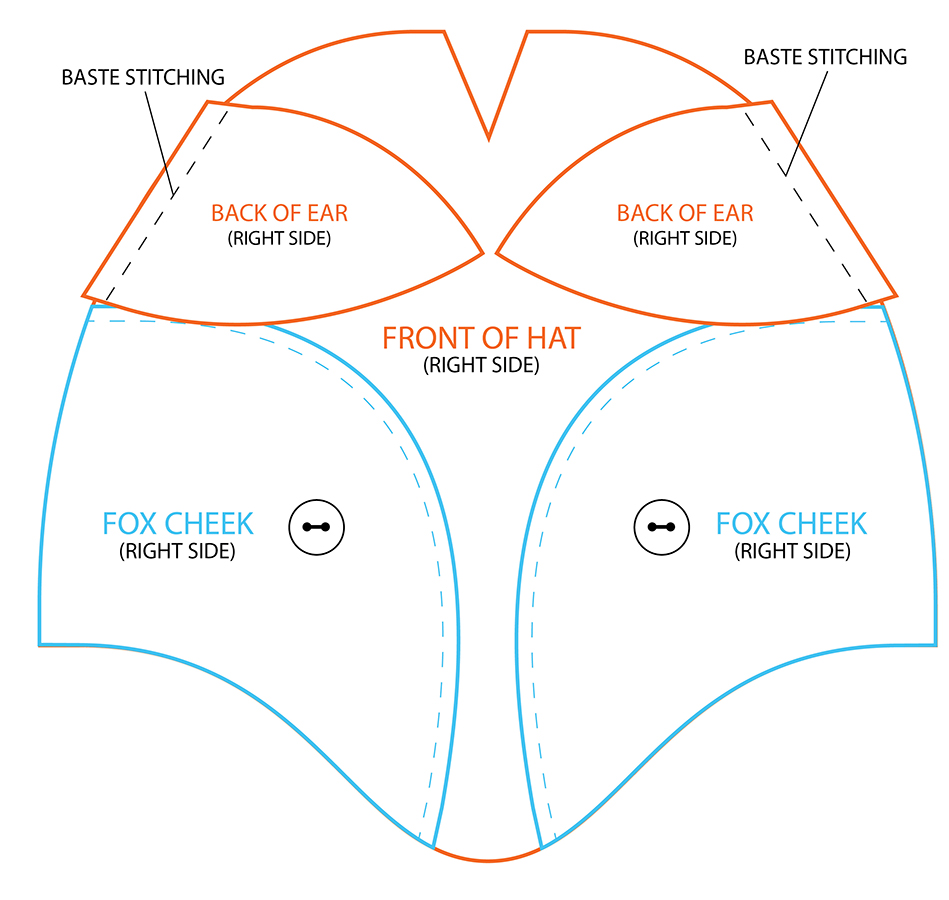
4. Place the Inner Ear pieces onto the Ear pieces, Right Sides up. Applique the Inner Ear onto the Ear by sewing along the side edges at 1/4″ (keeping a raw edge). Do this for both Ears (the second Ear should be a mirror image of the first).

5. Overlap the front of the Ear (Ear piece with the Inner Ear stitched on) with the back of the Ear (Ear piece without anything stitched on) Right Sides together and stitch along the sides of the Ear, leaving the bottom open. Trim off excess seam allowance from corners. Do this for both Ears.

6. Turn the ears right side out & stuff them slightly to give structure.
7. Overlap the ears onto the Front of the Hat, placing them just above the top edges of the cheeks. The front of the Ear should be on top of the Right Side of the front of the Hat. Baste 1/4″ from the edge at the base of the ear.
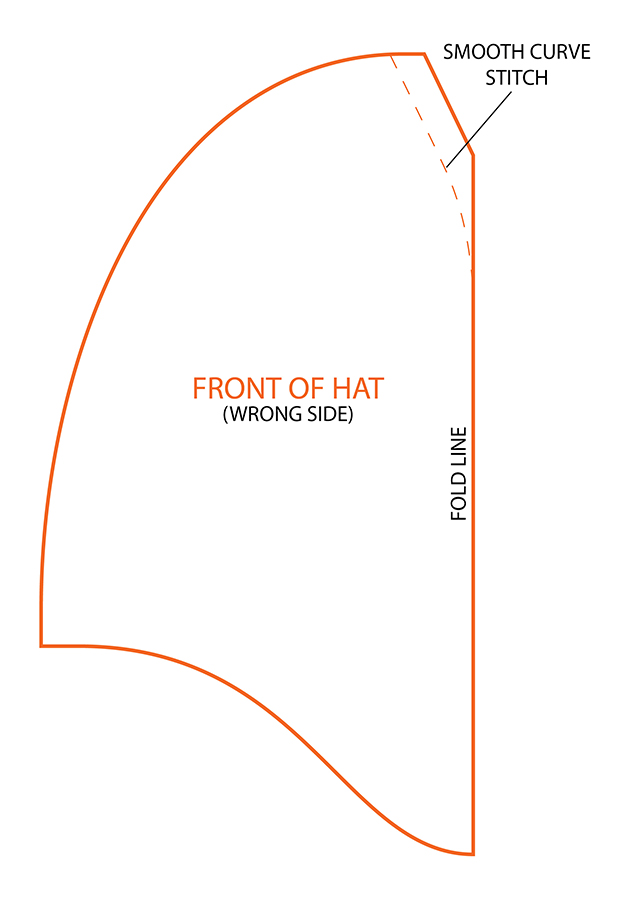
8. Fold the front of hat piece in 2 lengthwise, Right Sides together, and sew the dart closed, keeping a smooth curve. Repeat this step for the Back of the Hat piece.
9. Overlap the Front of the Hat & the Back of the Hat, Right Sides together. Stitch along the top, leaving the bottom open; make sure the ears are sandwiched between the two hat pieces when you’re stitching. Trim off the excess seam allowance.

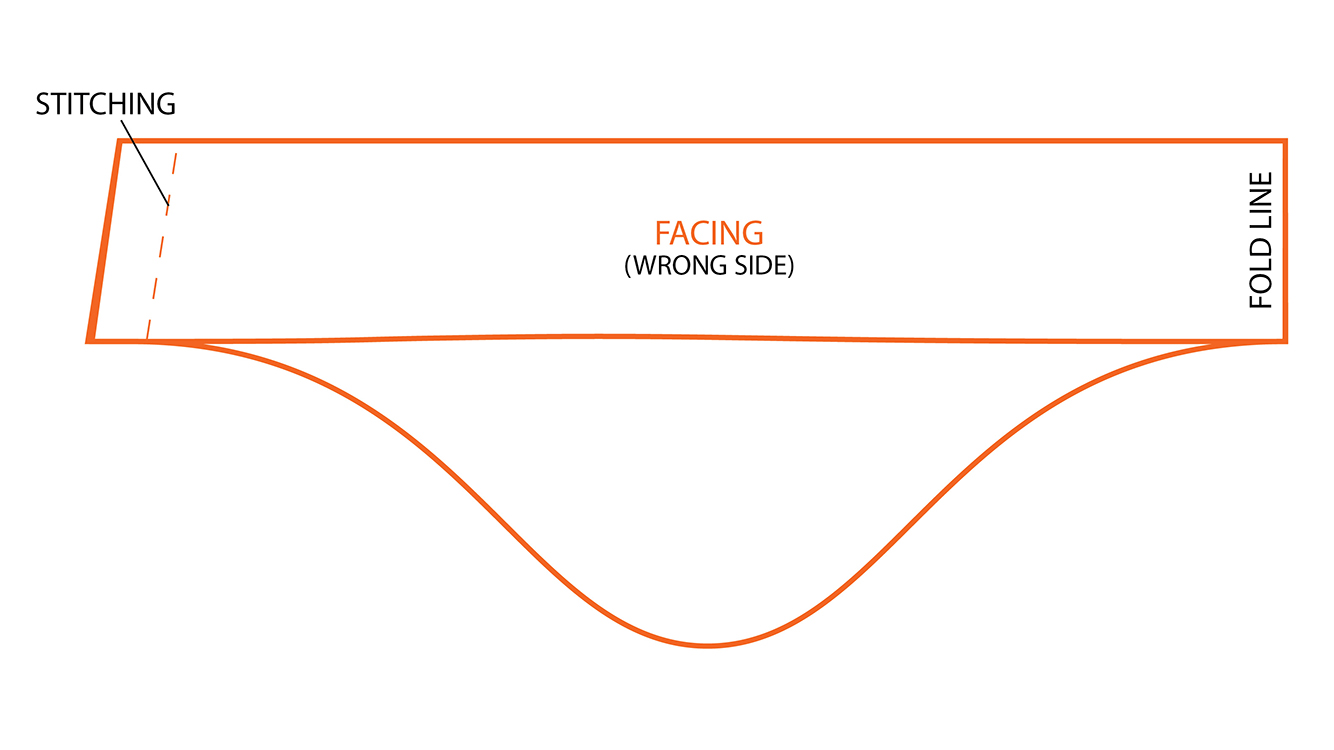
10. Match up the short edges of the Facing by folding the piece in two, Right Sides together, and stitch along the short edge.
12. Place the Facing inside the Hat, Right Sides together, matching up the bottom. Stitch along the bottom edge all around the hat opening; make sure not to sew all 4 layers together.
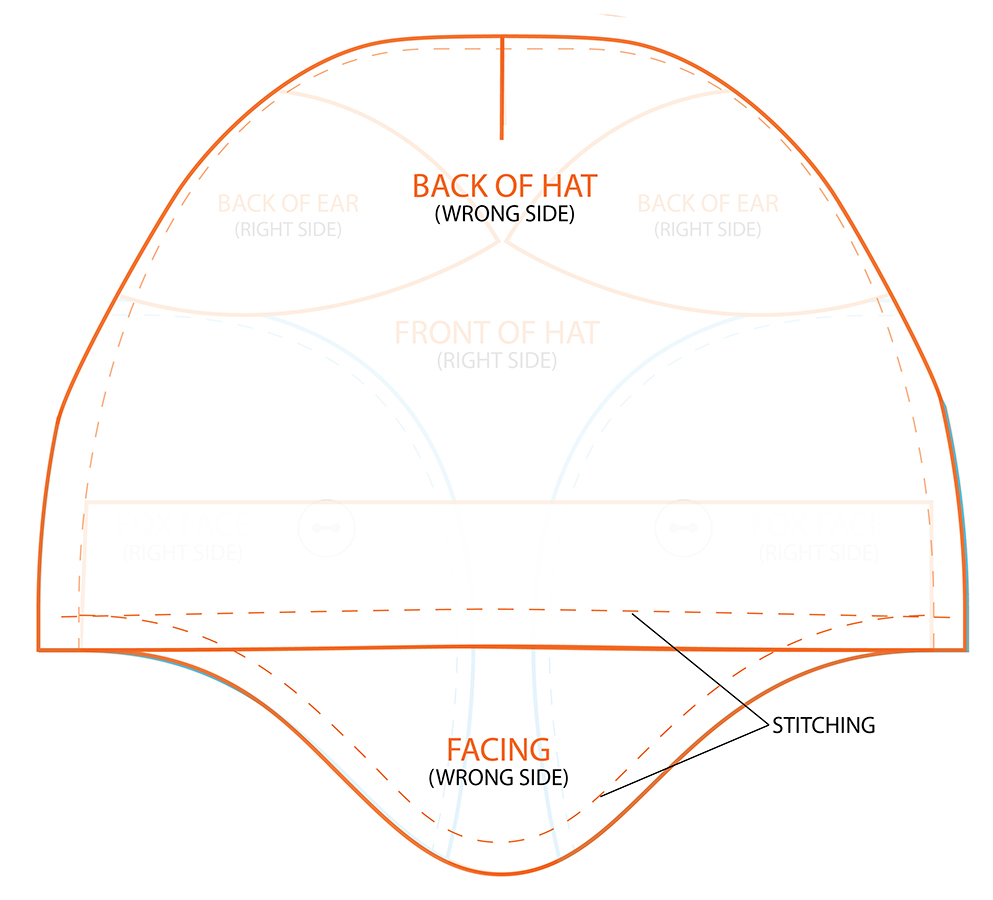
13. Turn the hat right side out and topstitch 1/4″ from edge along the hat opening. Make sure to switch to white thread when stitching over the Cheeks.
14. Tack the facing onto the seam allowance inside the hat at either side.
15. Applique the Nose on the edge of the front hat, stitching 1/4″ around the nose.
FOX TAIL INSTRUCTIONS:
Cutting
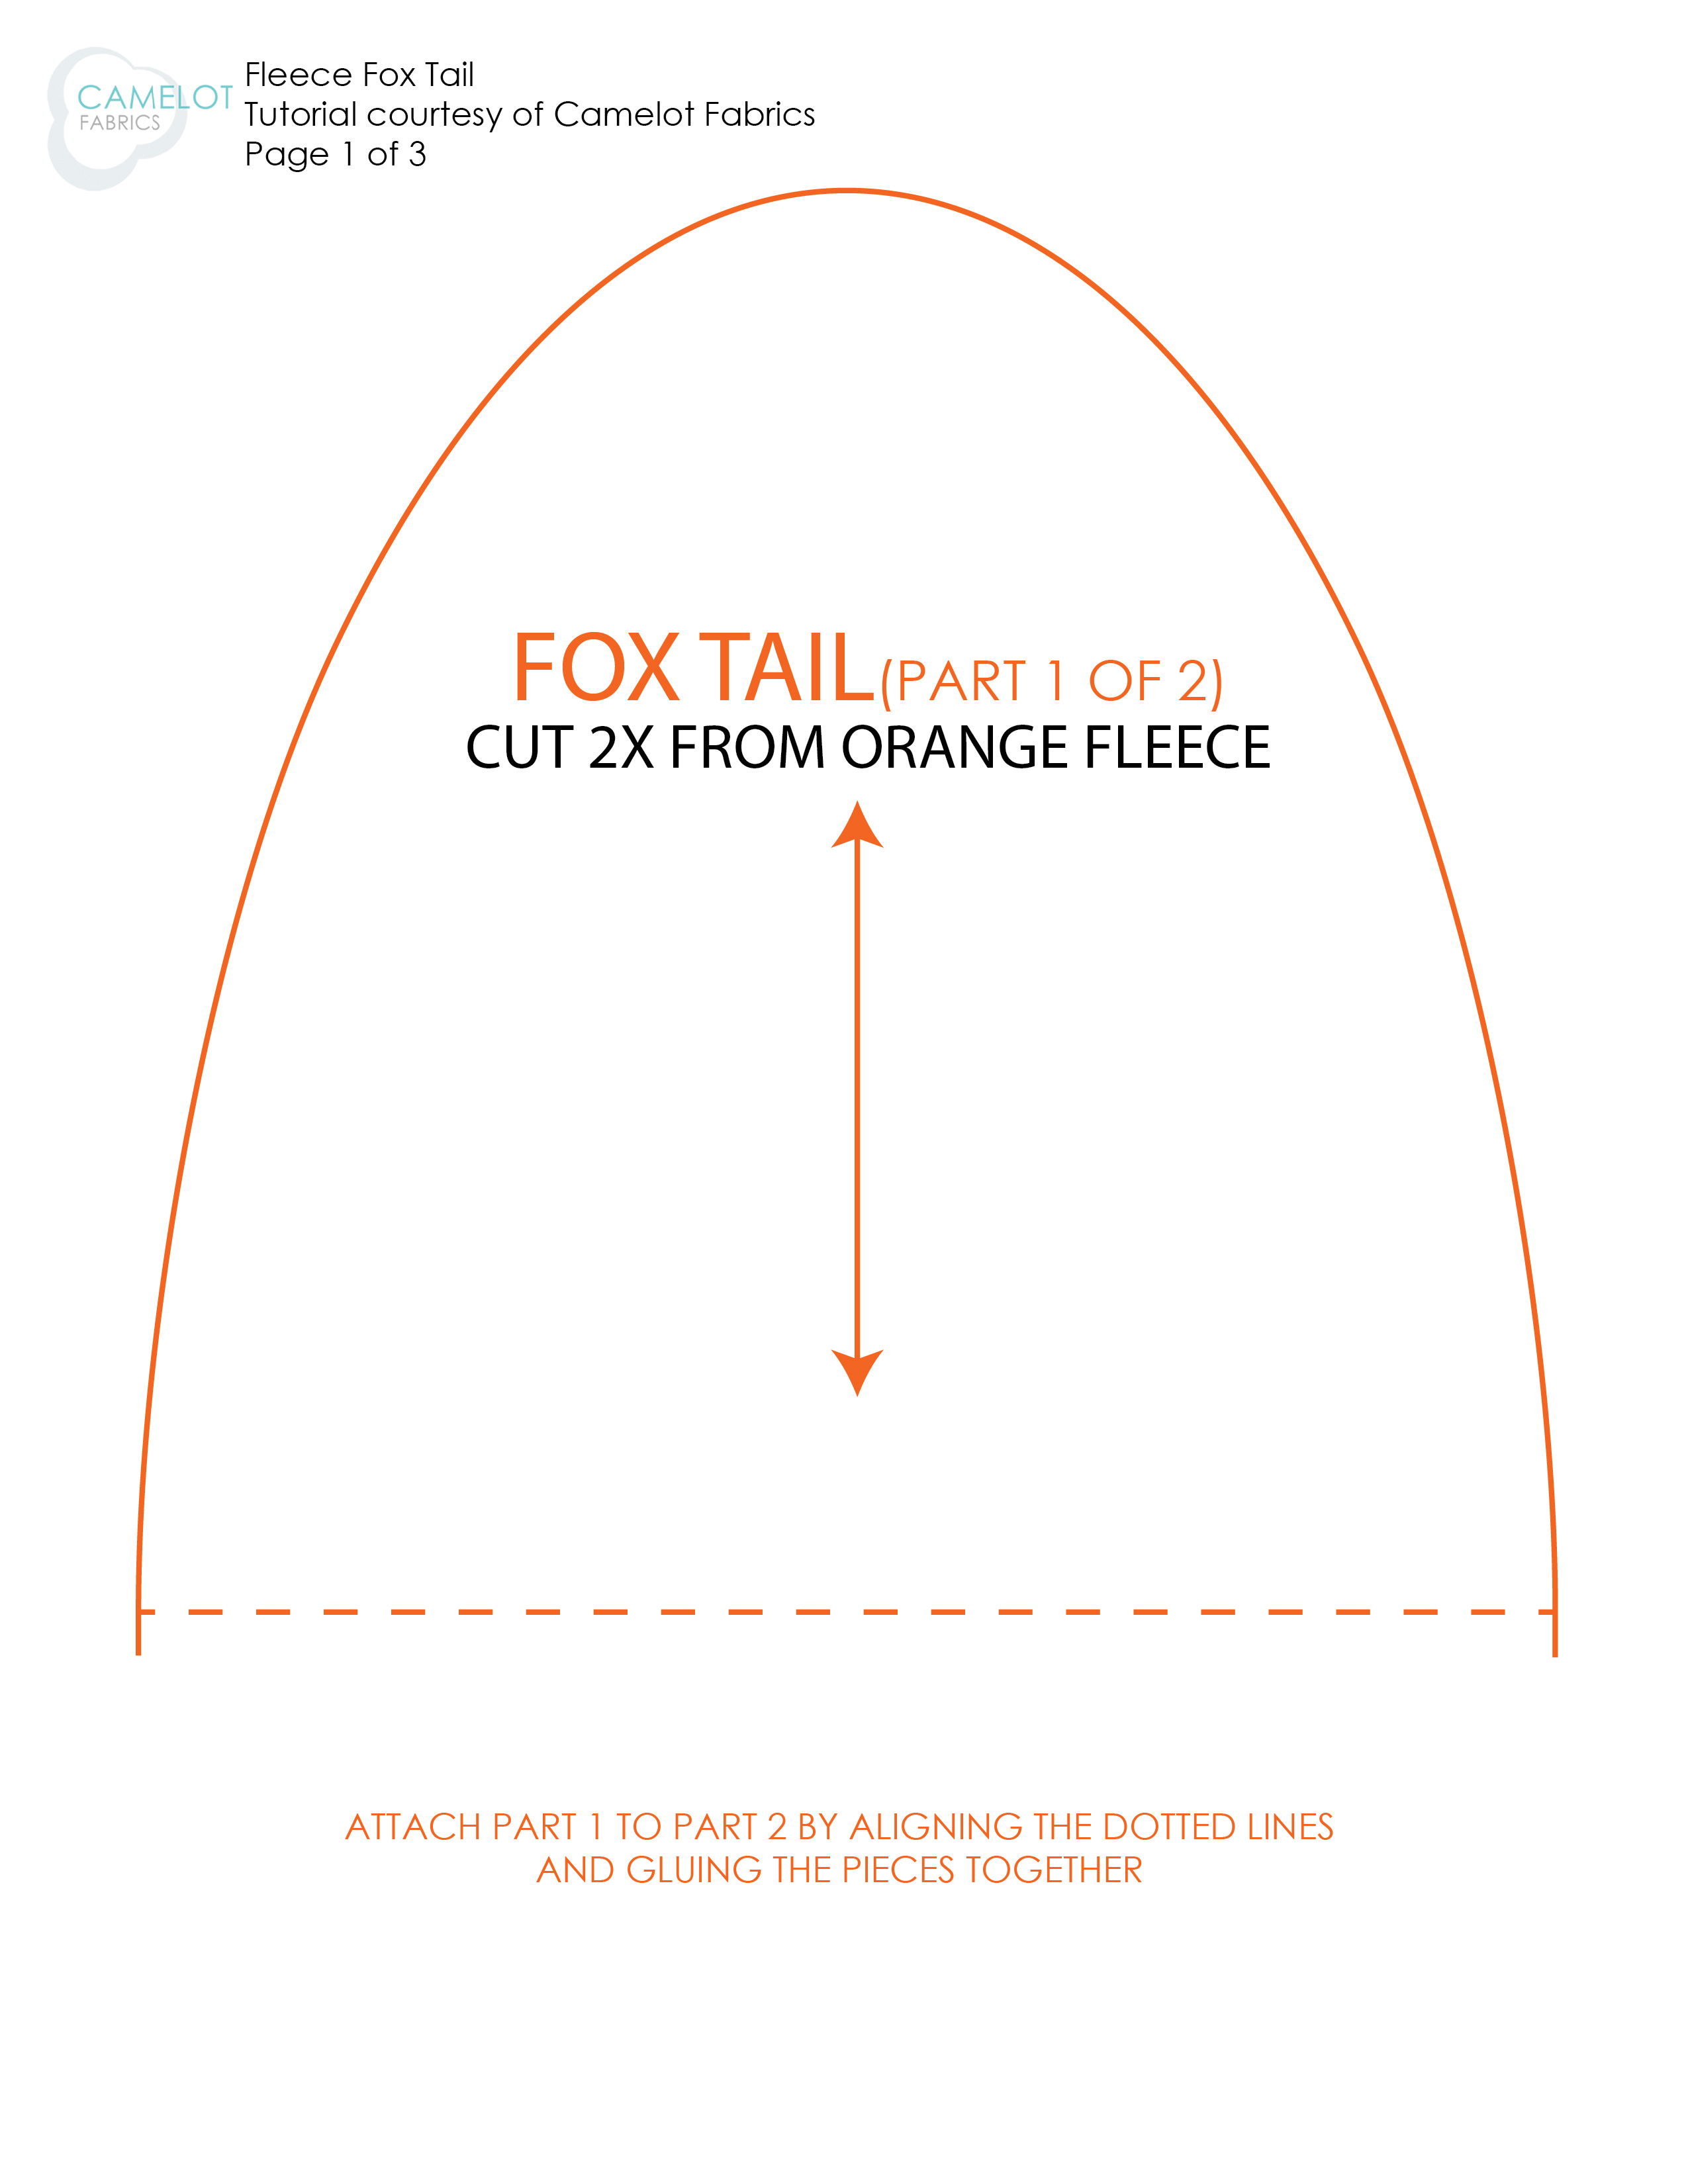
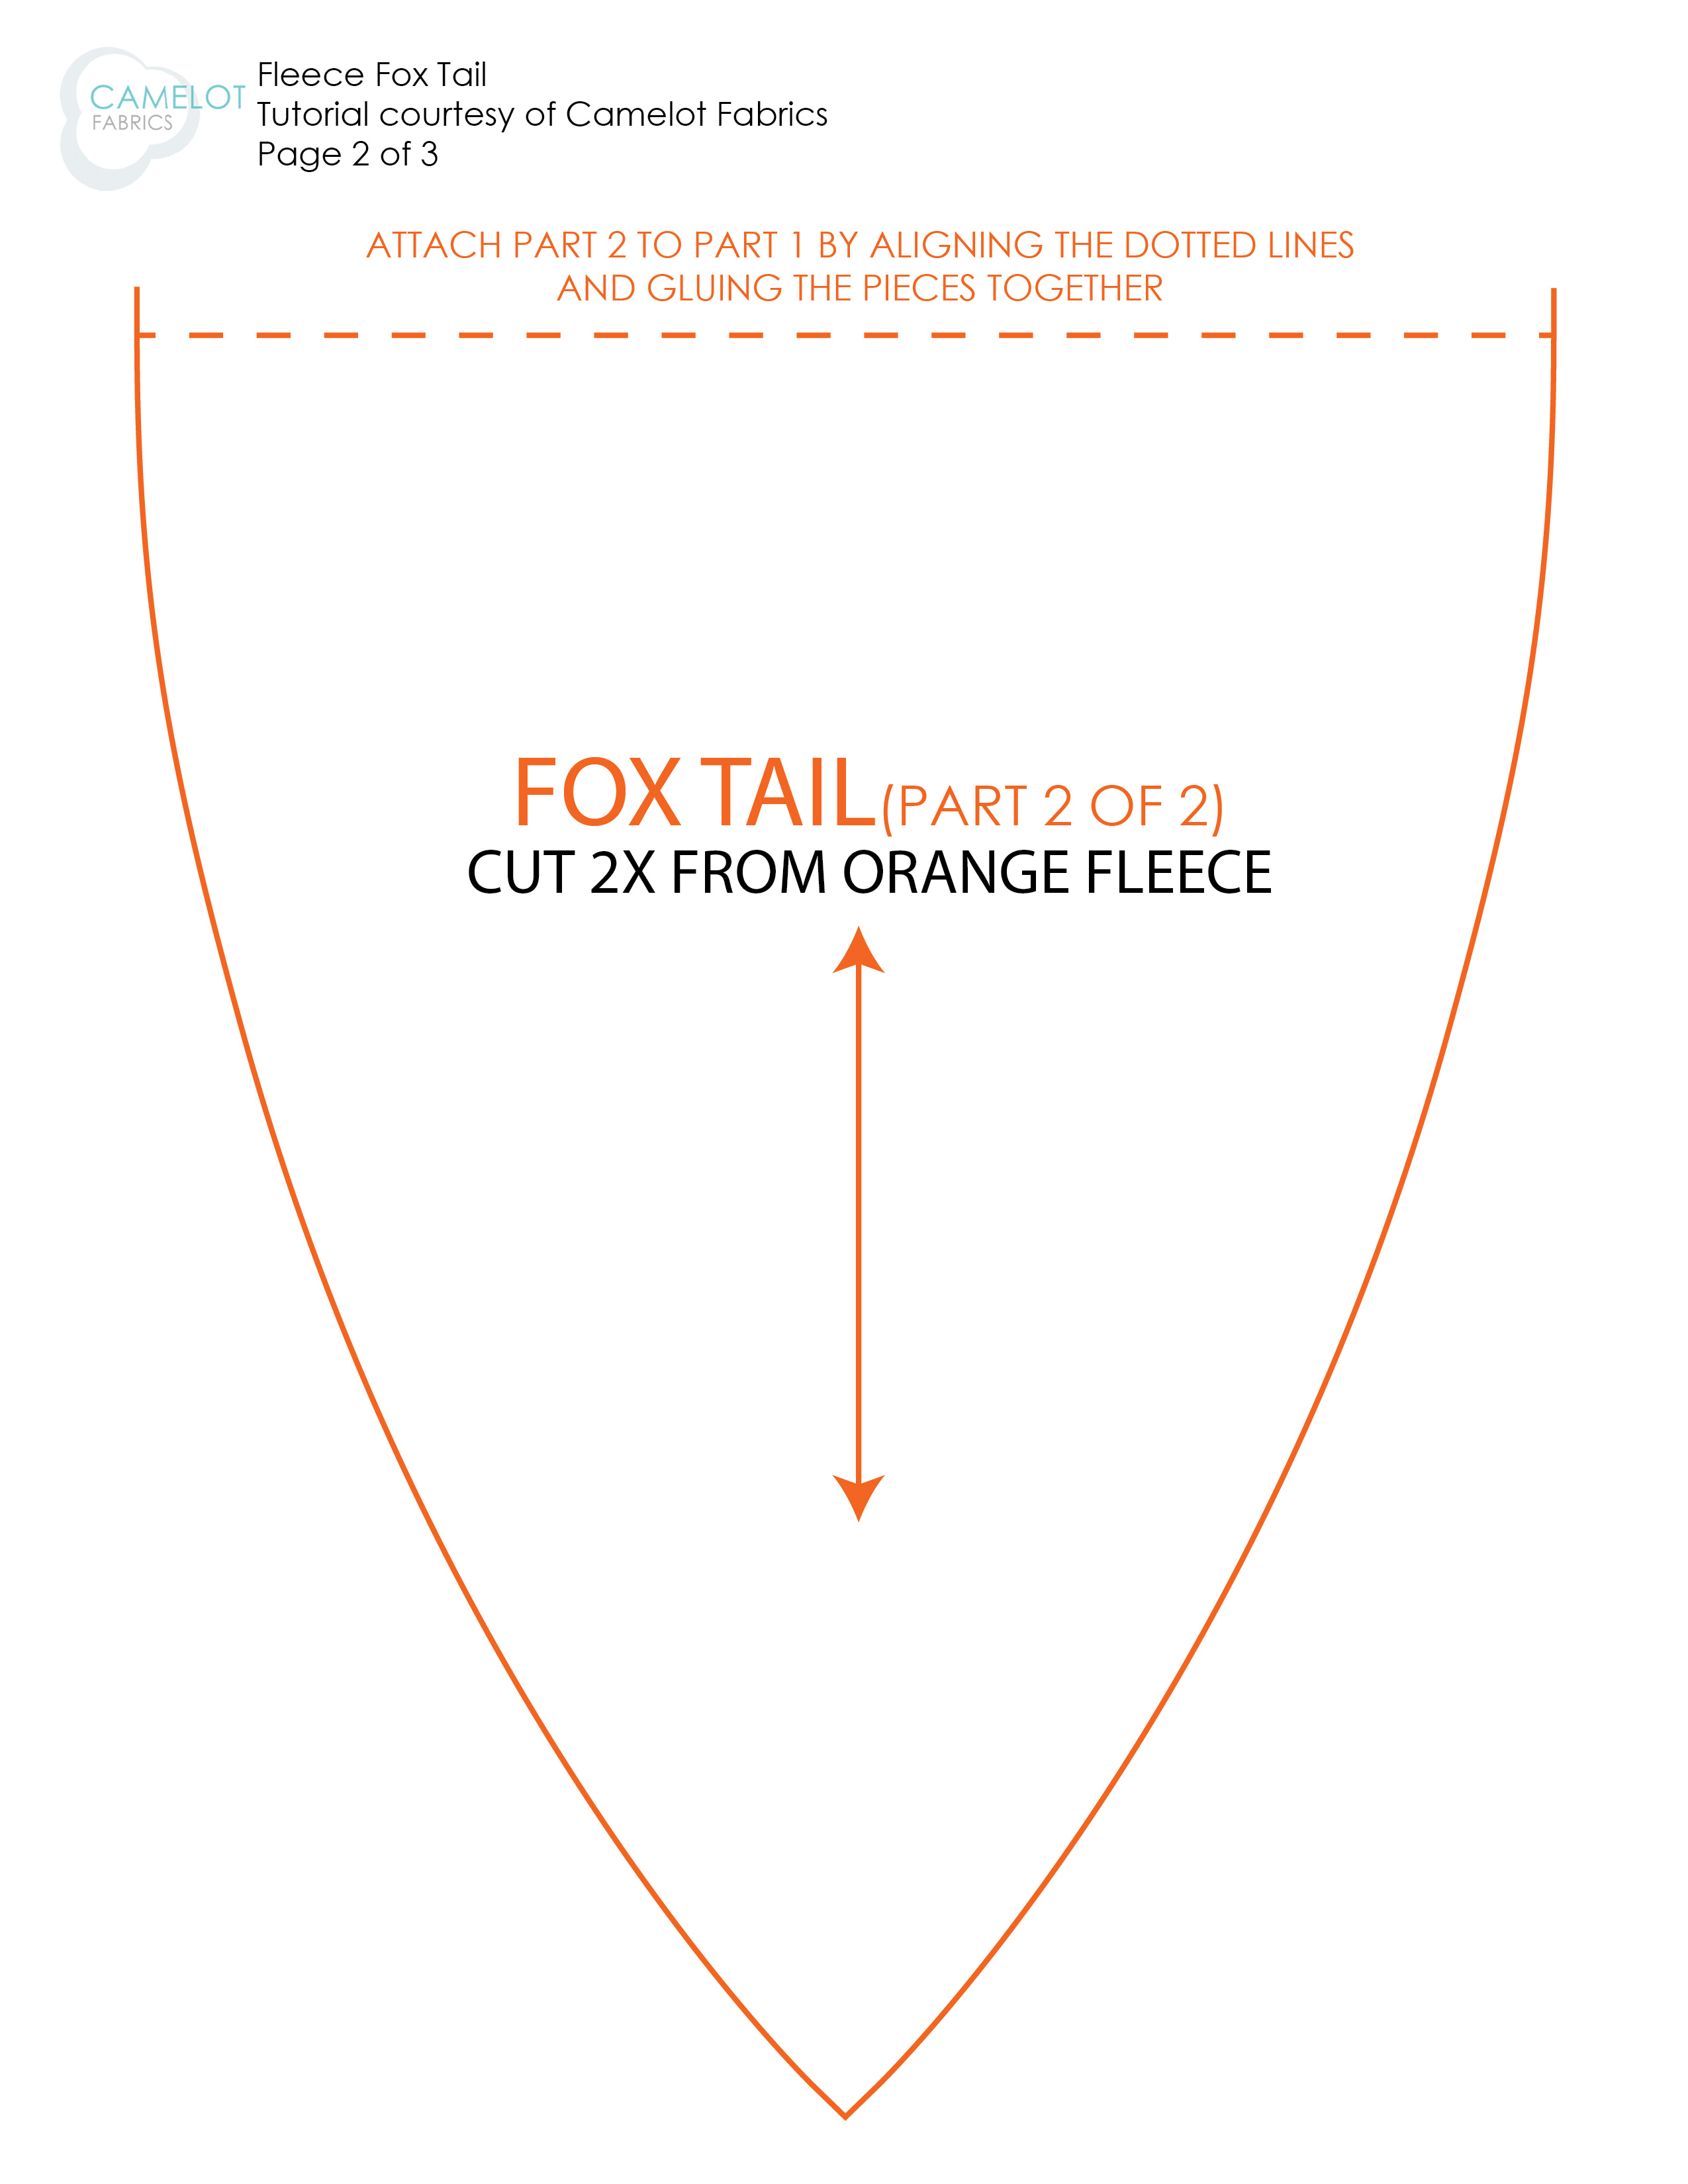
1. Print out the Fox tail pattern at 100% of its actual size. Cut out the pieces. Please note that the pattern on page 1 & 2 was too long for 8.5 x 11″ page so it has 2 parts; glue the pattern pieces together following the instructions on the page.
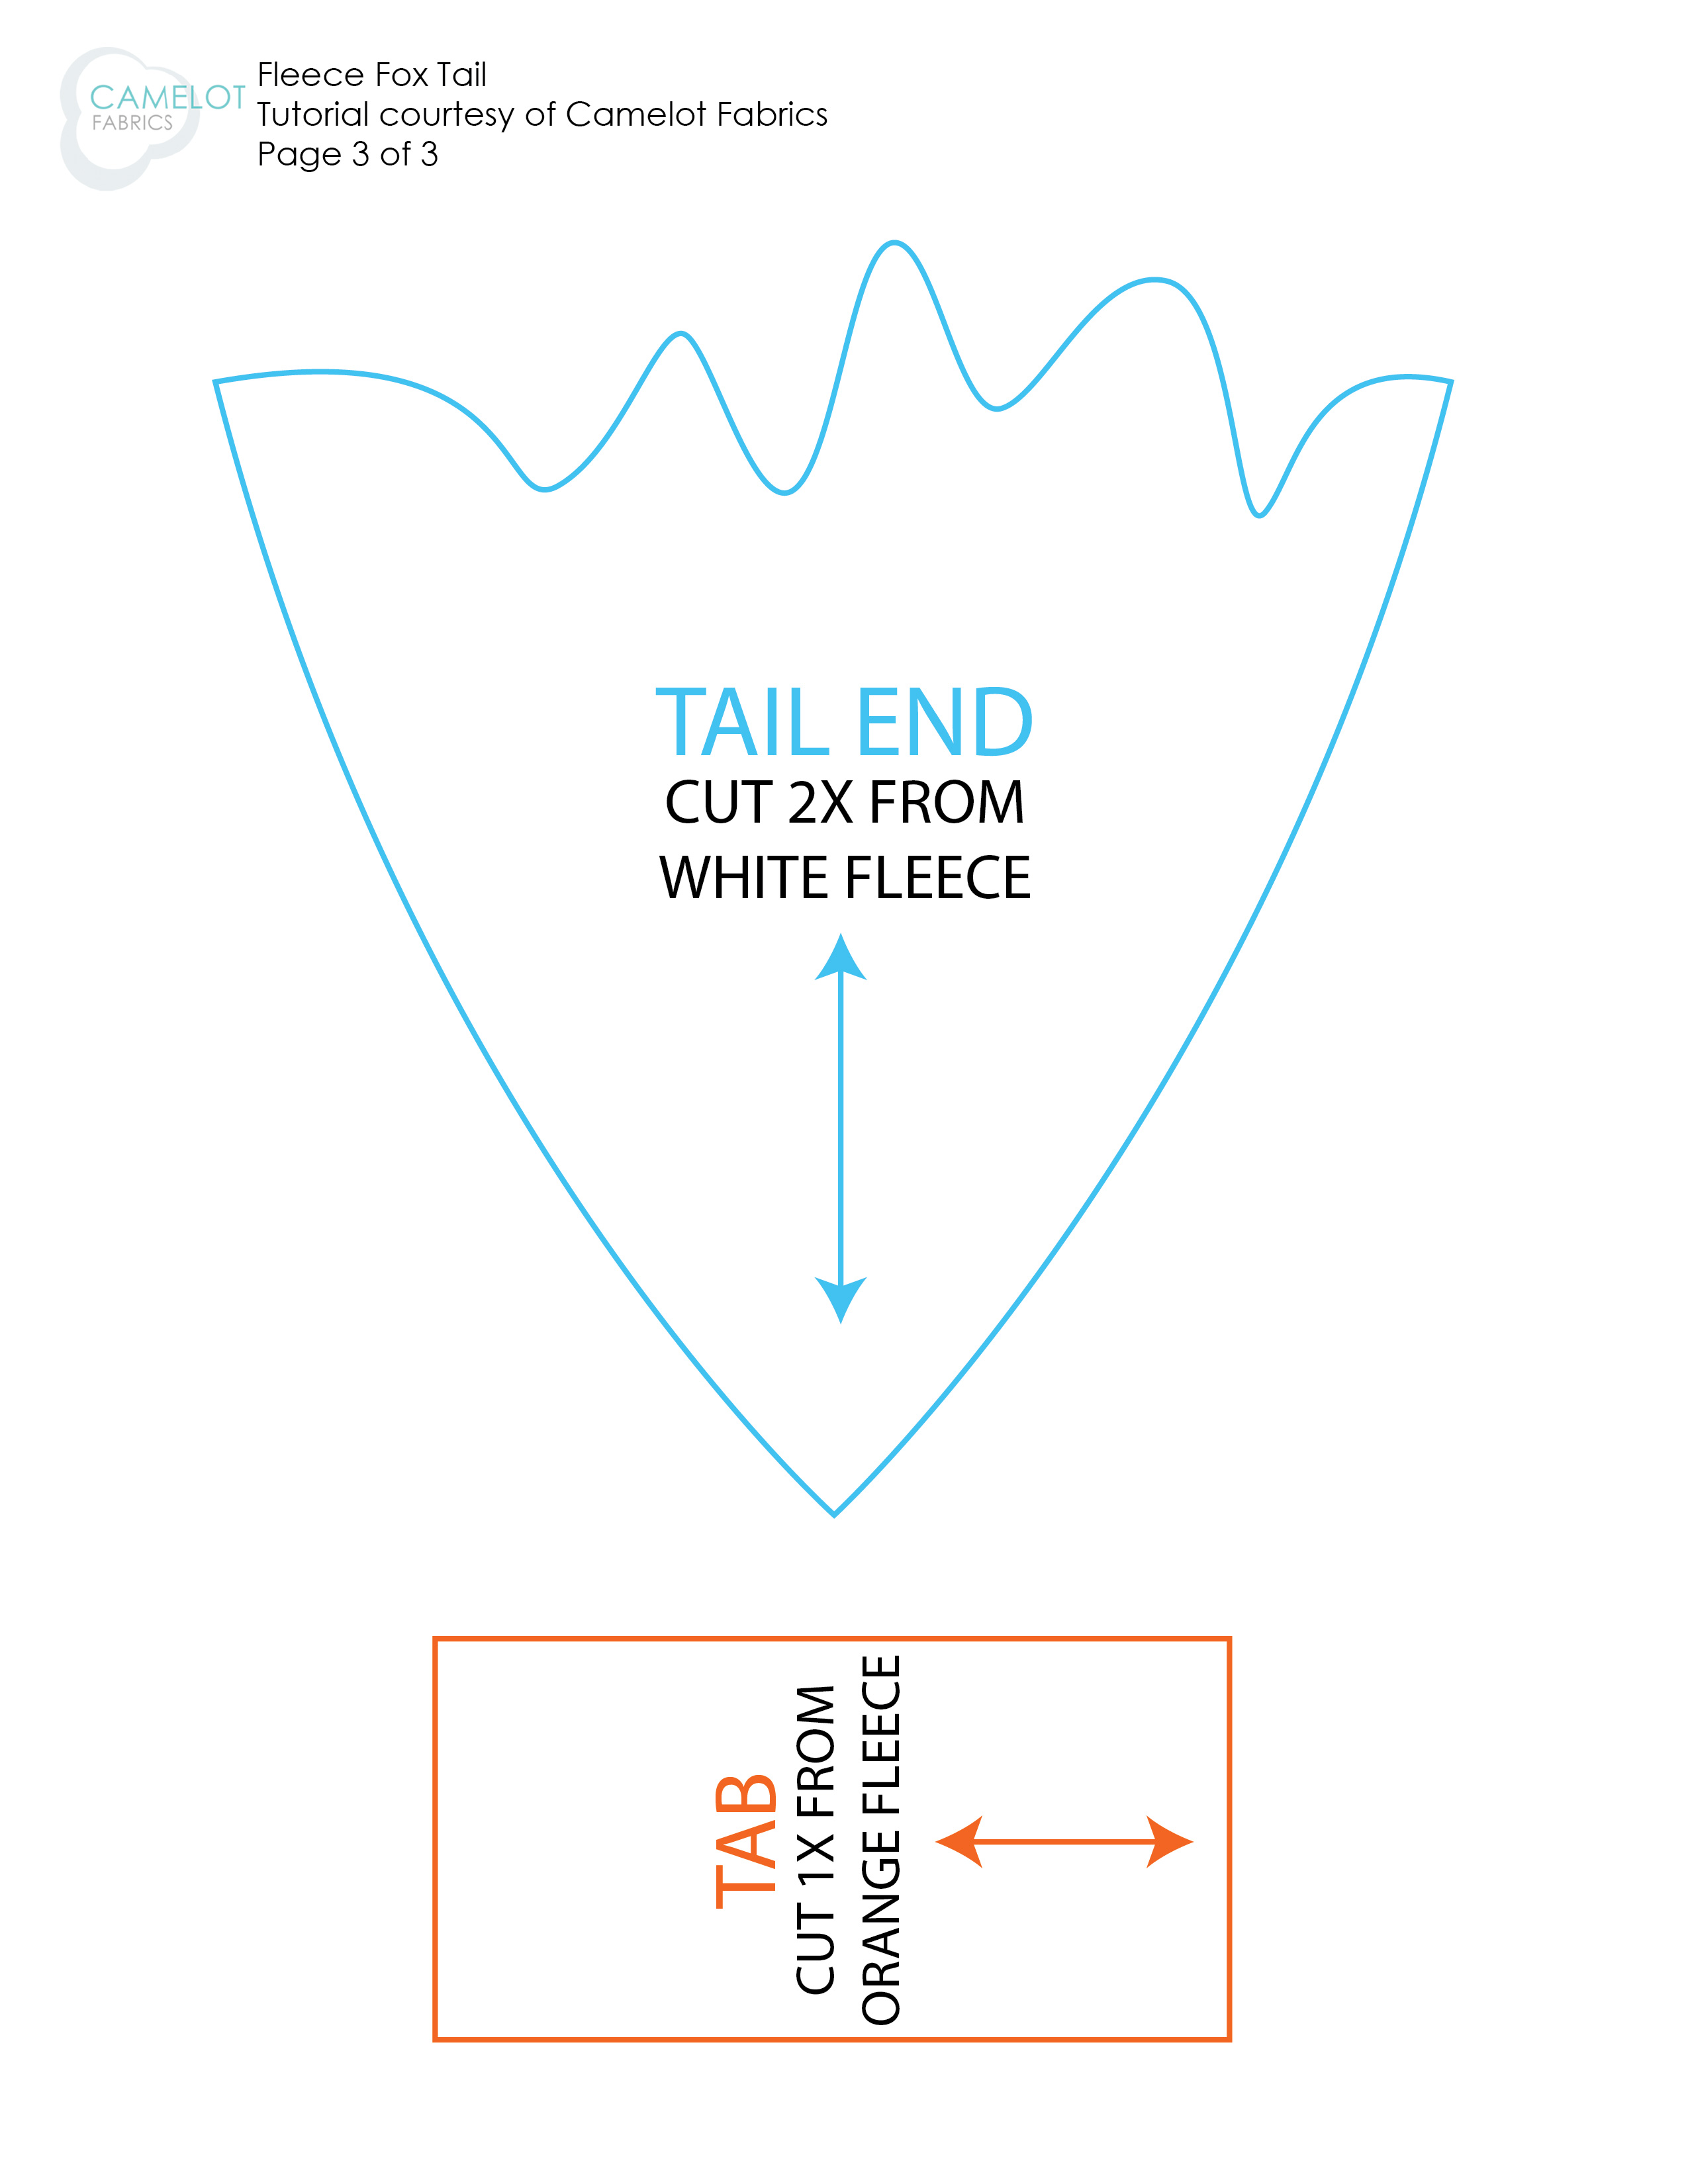
2. Trace each piece onto your fleece (making sure to trace onto the correct color fleece as indicated on the pattern). Cut out the pieces.
Assembly
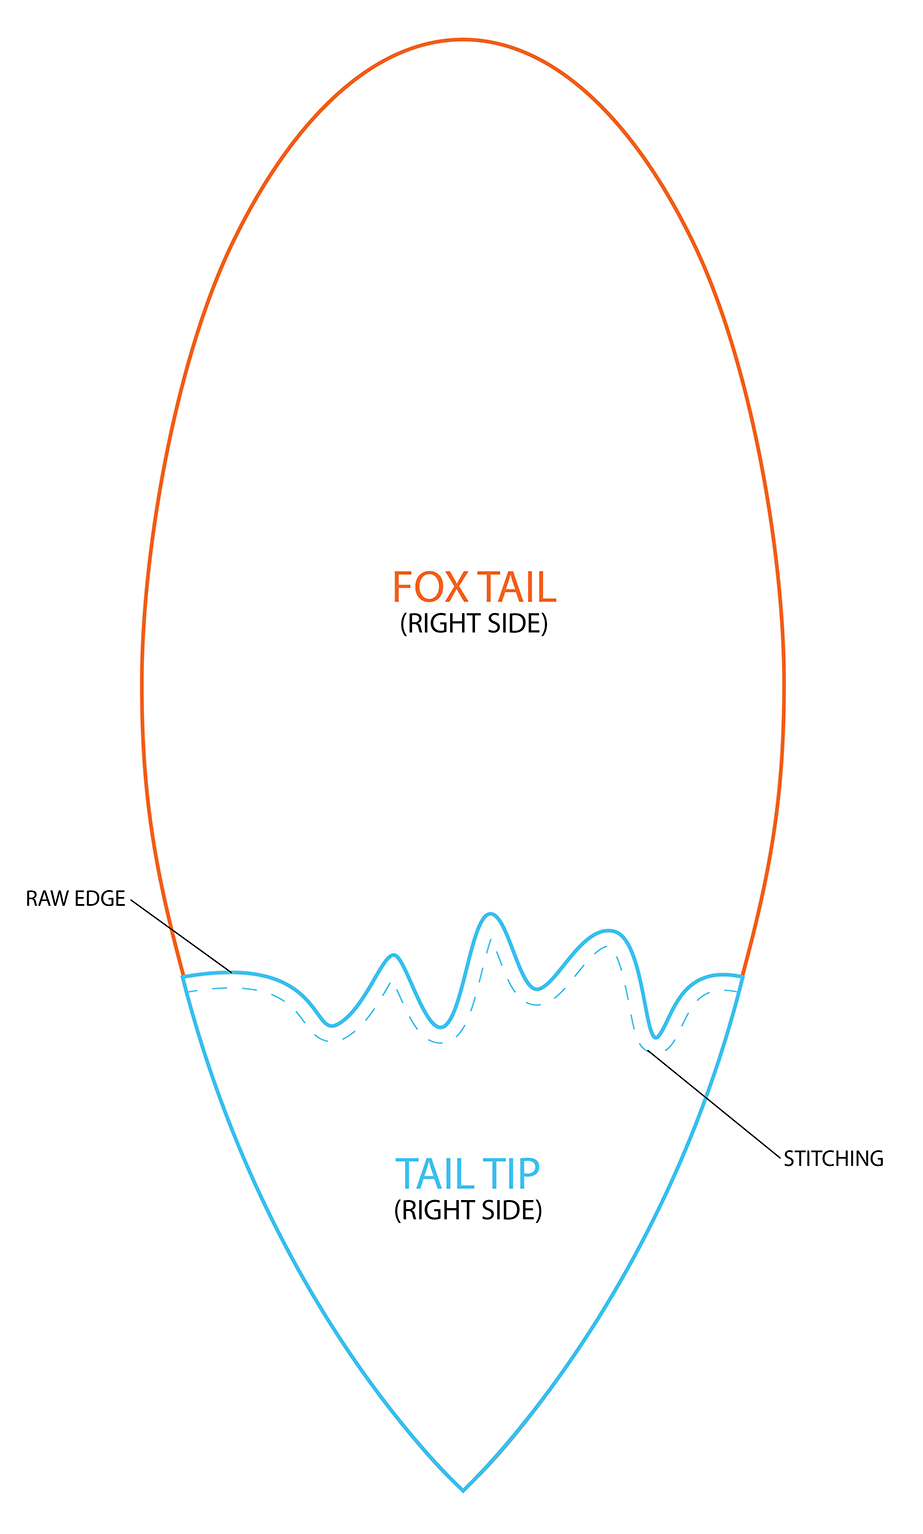
1. Place the Tail Tip onto the Fox Tail, Right Sides up. Applique the Tail Tip onto the Fox Tail at the top by stitching at 1/4 ” from the edge, keeping a raw edge. Do this for both Fox Tail pieces.
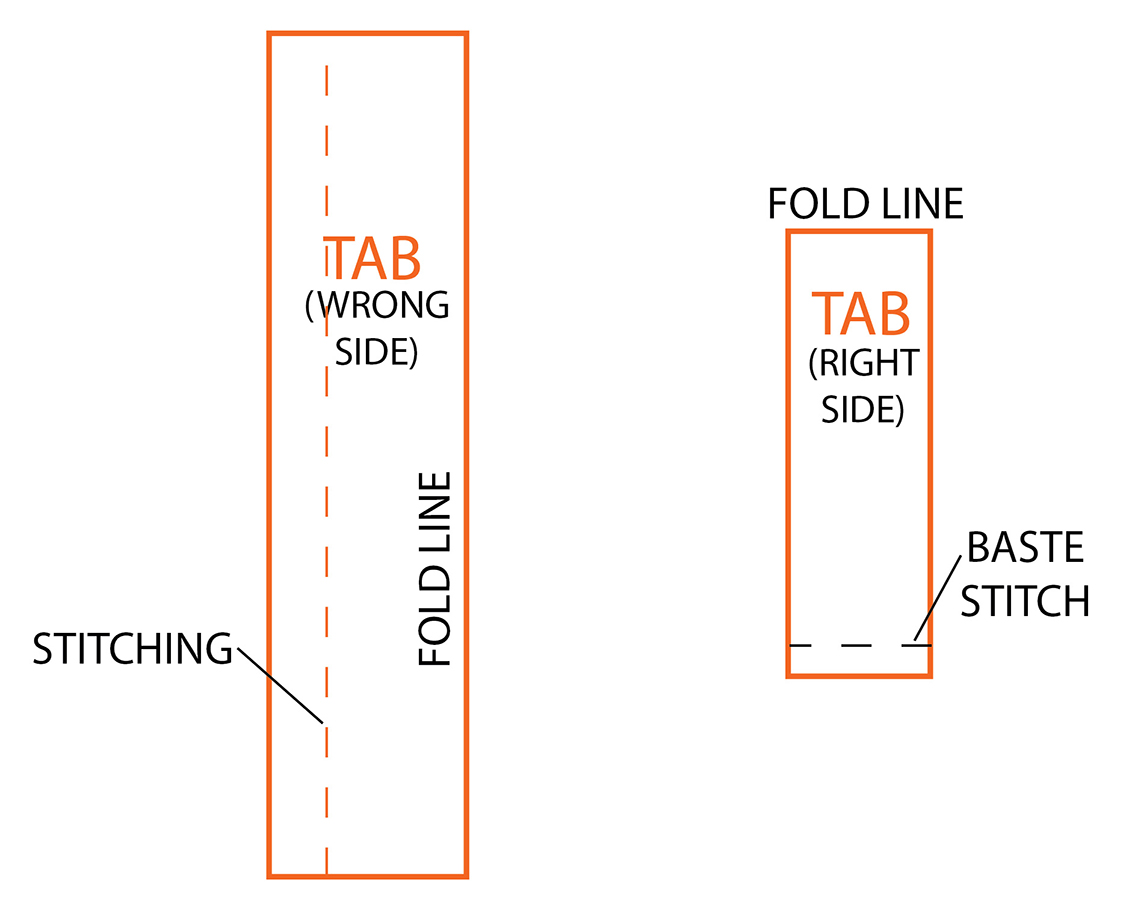
2. Fold the Tab in 2 lengthwise, Right Sides together. Sew along the long raw edge. Turn Right Side out & arrange tube so that the seam runs down the center of one side. Fold in 2 widthwise, keeping the seam on the inside, and baste together at 1/4″ from the short raw edge.
3. Overlap the Fox Tails, Right Sides together. Stitch along the edge, making sure the Tail Tips are sandwiched at the tip of the tail & the tab is sandwiched at the top of the tail. Leave an opening of about 3″ on the side of the tail.

4. Turn Fox Tail inside out, stuff with fiber stuffing and stitch opening closed.
PATTERNS:
We hope you enjoyed this DIY Fox costume tutorial! If you decide to try this out, we would LOVE to see :) You can tweet us a pic or send it to us at info@camelotfabrics.com – We wish you all a ghoulish and safe Halloween this year.
Happy Sewing!
October 27, 2014 at 3:35 am, amy said:
This is one of the best if not THE best hat tutorial I have ever read! Love foxes and will be making this hat. Thank you SO much!
October 28, 2014 at 9:12 am, Vanessa@camelotfabrics.com said:
Ohh thank YOU so much, Amy!! That really means so much. We’d love to see pictures when you make your own fox hat. Happy Sewing!
November 10, 2014 at 5:52 pm, Daria Stepka said:
LOVE it:)) Just found at best momen,t my 2 years old told me as the fox hat is one as he can wear:) the other one is Frog;)) What size it realy???
January 07, 2015 at 6:43 am, Marcelino said:
Spot on with this write-up, I truly believe that this amazing site needs far more attention. I’ll probably be returning to read through more, thanks for the info!
January 18, 2015 at 6:08 pm, Katie said:
How does the tail attach to the boy’s pants?Does it have to go around his belt?
Thanks!
January 19, 2015 at 9:54 am, Vanessa@camelotfabrics.com said:
A safety pin would work perfectly to attach to his pants :)
January 27, 2015 at 11:42 am, 20 DIY Ears & Hats for Halloween | The Crafty Bunny said:
[…] 18. Fleece Fox Hat […]
July 20, 2015 at 10:58 pm, Whitney said:
I just found this tutorial recently, made it and LOVED it! I’ve blogged about it here: http://www.elmstreetlife.com/2015/07/a-few-toddler-ideas.html
Thanks for the wonderful idea!
October 08, 2015 at 6:59 am, 10 Simple Tips for Making a Halloween Costume that Will Get Noticed said:
[…] The fox costume was a bit more challenging, but still easy enough for a beginner. I read the instructions wrong and used felt instead of fleece, but it still turned out fine. The hat just wasn’t very stretchy. I used this tutorial. […]
September 13, 2016 at 4:46 am, vip hack MovieStarPlanet free said:
The set of most popular or important local business details mirrors results from earlier surveys by Google and others.
October 12, 2016 at 9:39 pm, What Does the Fox Say? Fox Costume Tutorials - Andrea's Notebook said:
[…] tutorial by Camelot Fabrics […]
October 24, 2016 at 5:29 am, Apakah Si Kecil Sudah Siap Untuk Halloween? Yuk Moms Lihat Ide Kostum Halloween Untuknya! - Blibli Friends said:
[…] kain felt tersebut sesuai dengan pola yang ada di sini kemudian jahitlah hingga membentuk topi kepala rubah. Untuk bagian ekor, jahitlah terlebih dulu di […]
October 25, 2016 at 8:11 pm, 11 Quick and Easy DIY Halloween Costumes For Kids | Tea Time Creative said:
[…] Fox Halloween Costume […]