How To’s Day: Around the Block Pillow by Kristy Daum
February 3rd, 2015 by Camelot Fabrics
Hi everyone,
Happy Tuesday! We hope everyone is bundled up and warm today – it’s another chilly one for us. As well, it’s the last day to enter our Elixir FQB Giveaway! You can enter here.
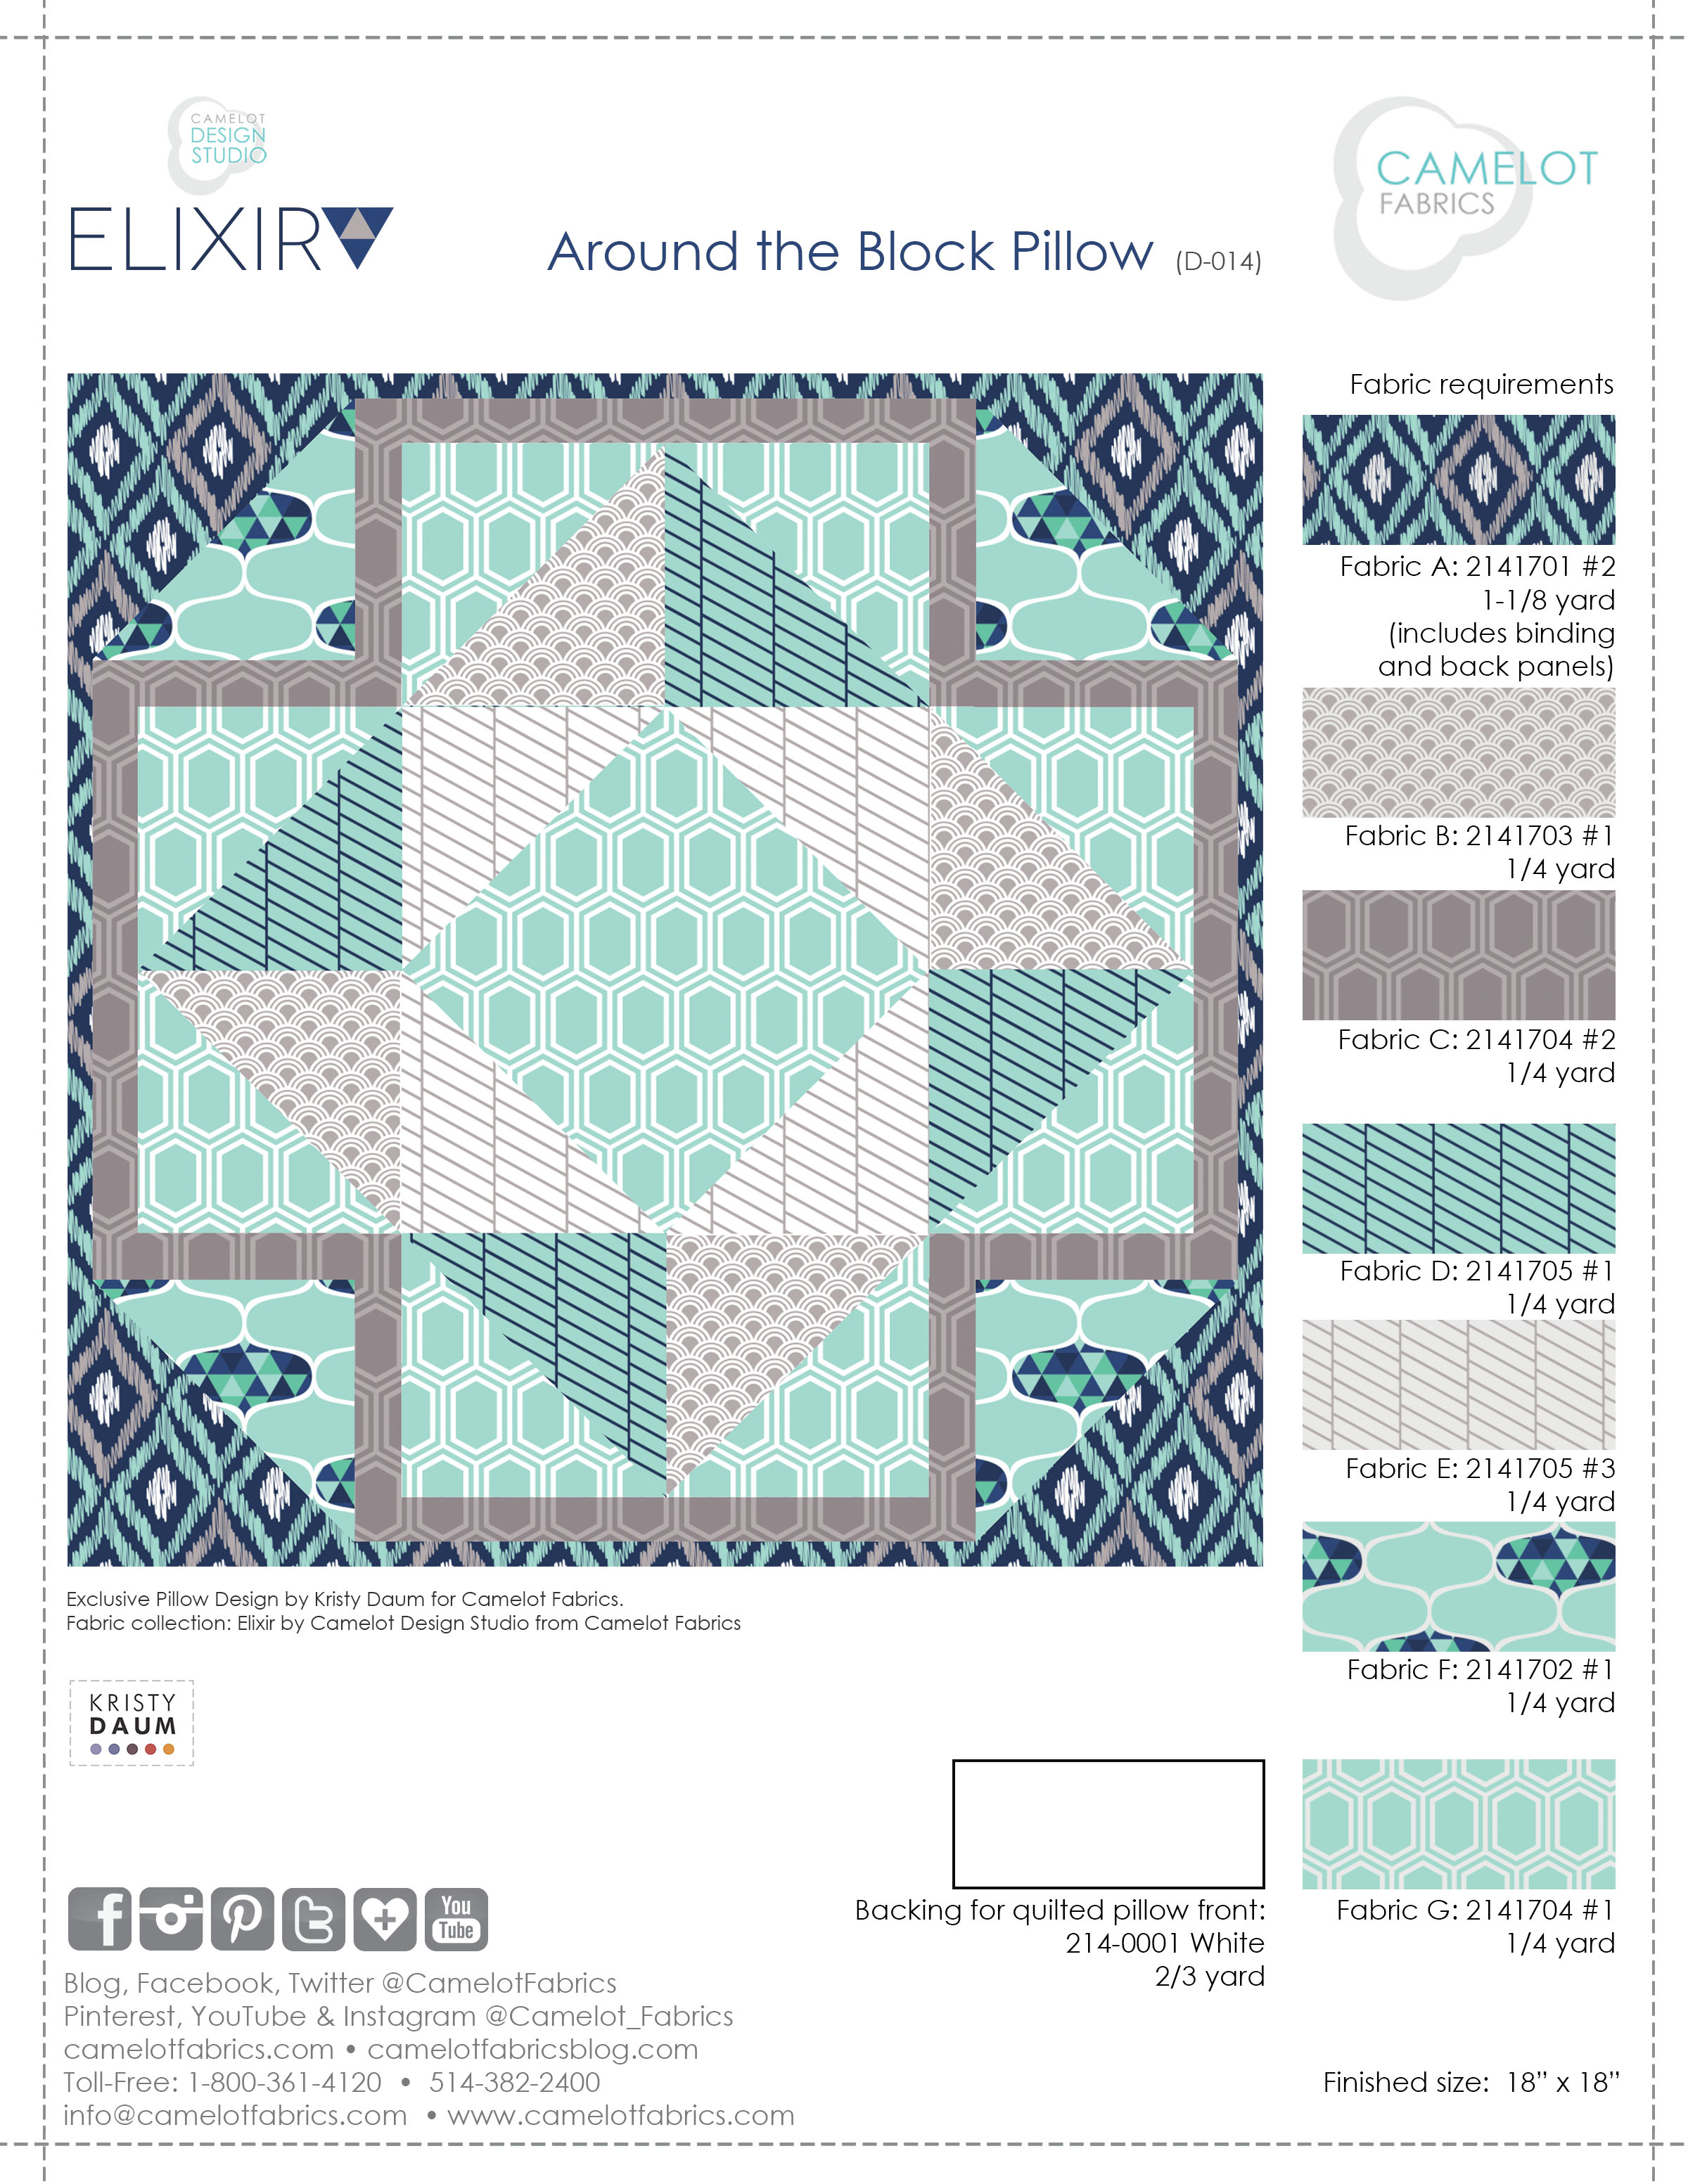
It’s time for our How To’s Day! Today we are sharing one of our projects from our Free Projects Program. One of our pattern designers, Kristy Daum, created a beautiful quilted pillow pattern for us called Around the Block. Create a couple of these pillows to add a pretty and modern flair to any bedroom or living space, and you will be living in a comfortable paradise! We love our Elixir Collection with this pillow too, the collection that we just so happen to be giving away this week! As usual, Kristy created an easy to work with and beautiful pillow pattern for us…thank you, Kristy :)
Want to make your own Around the Block Pillow? Click MORE for the full tutorial.
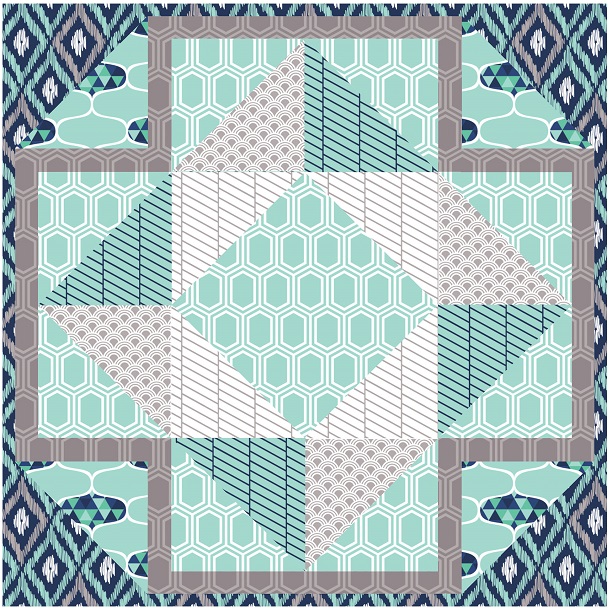
Around the Block Pillow
Created by: Kristy Daum for Camelot Fabrics
Collection Featured: Elixir by the Camelot Design Studio
OTHER TOOLS & SUPPLIES:
– 18” square pillow form
– Sewing machine & coordinating thread
– Rotary cutter & fabric shears
– Straight edge ruler & measuring tape
– Straight pins
– Fabric marker or pencil
NOTES:
– Please read through all directions before beginning.
– Wash, dry & iron your fabric before beginning, and trim selvages.
– Unless otherwise noted, sew all seams with a scant 1/4” allowance.
– Press seams open as you go.
– RST = Right Sides Together.
– WOF = Width of Fabric (42”).
– Directional prints will require extra yardage.
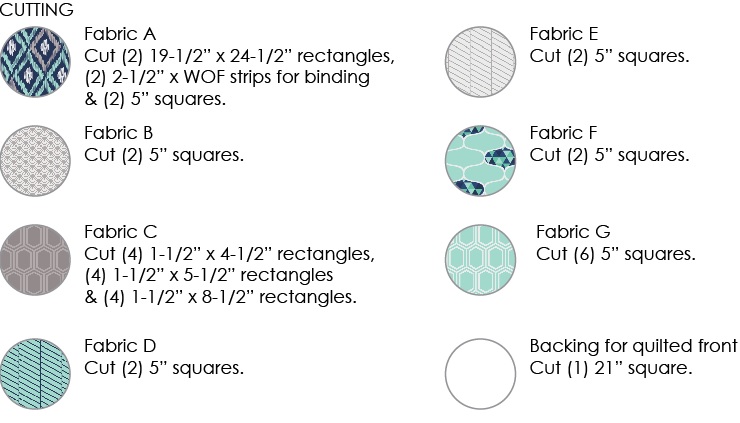
MAKING HST SQUARES
1. Take (1) Fabric G 5” x 5” square and (1) Fabric A 5” x 5” square, and place them RST.

2. With a pencil, mark a diagonal line between opposite corners.

3. Sew a scant 1/4″ away from the pencil line on both sides.

4. Cut on the line, separating the two halves; this creates (2) HST units.


5. Repeat the process above using the following fabric combinations to yield all the HST units you need for this pillow. Note: each pair of squares yields (2) HST units. If you are using directional fabric, pay attention to the direction of your diagonal line.
Make (4) Fabric F & A HST units.
Make (4) Fabric G & B HST units.
Make (4) Fabric G & D HST units.
Make (4) Fabric G & E HST units (including the one you made in Steps 1-4).
6. Trim all HST units to 4-1/2” square.
MAKING HST BLOCKS:
1. Sew a 1-1/2” x 4-1/2” Fabric C rectangle to the right-hand side of a Fabric A-F HST unit.

2. Sew a 1-1/2” x 5-1/2” Fabric C rectangle to the bottom of the Fabric A-F HST unit.
3. Repeat Steps 1 & 2 to make the remaining (3) corner units.

3. Repeat Steps 1 & 2 to make the remaining (3) corner units.
4. Sew a Fabric G-B HST unit to a Fabric G-D HST unit to create a flying goose unit. Sew a 1-1/2” x 8-1/2” Fabric C rectangle to the top of this unit.
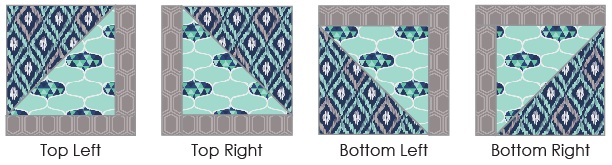
Make (4), paying attention to the direction of patterns.

PIECING THE PILLOW TOP
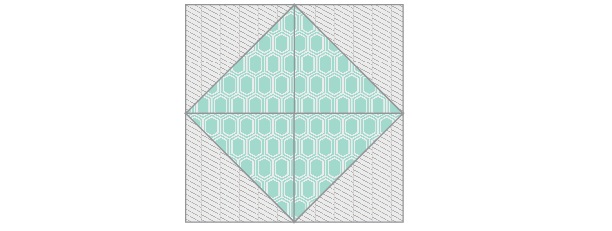
1. Sew the (4) Fabric G-E HST units to form a square as shown.
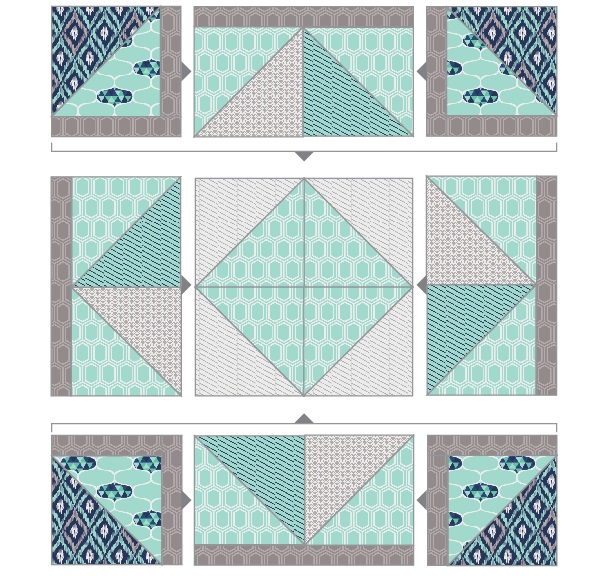
2. Piece the blocks in rows according to the Assembly Layout below, and join the rows to finish piecing the Pillow Top.
ASSEMBLY LAYOUT
We hope you have enjoyed this week’s How To’s Day!! You can also find the free PDF printout on our website. If you decide to create your own Around the Block Pillow, we’d love to see. You can send your project pictures to info@camelotfabrics.com. Have a lovely, day!
Happy Sewing!
February 03, 2015 at 11:53 am, allison CB said:
Lovely block!