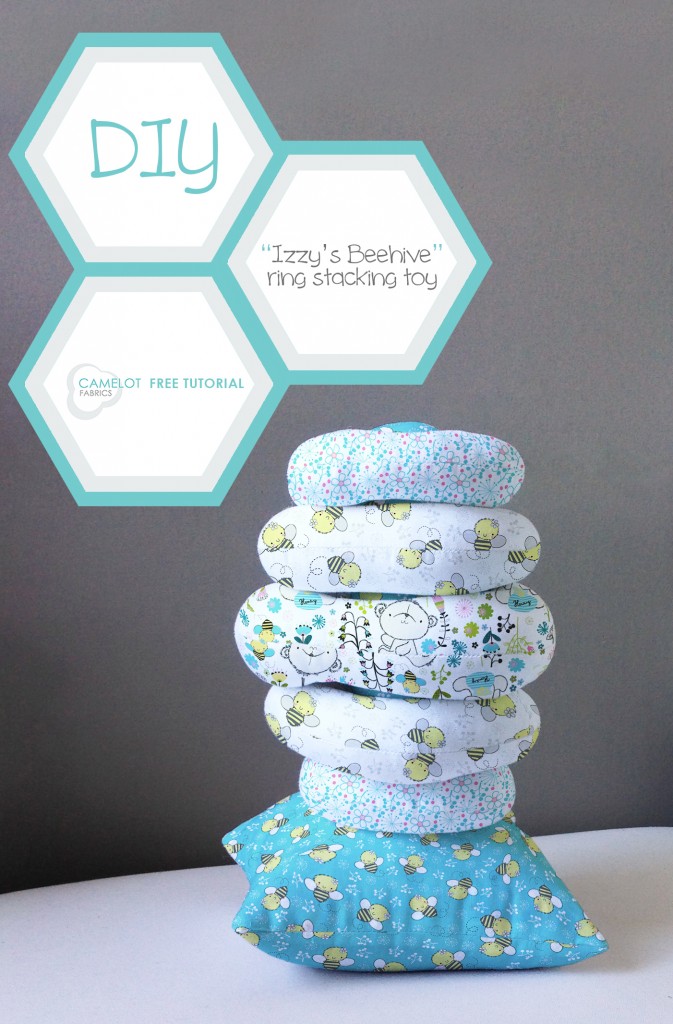
How To’s Day: “Izzy’s Beehive” Ring Stacking Toy
February 18th, 2014 by Camelot Fabrics
Hi everyone!
Happy Tuesday! Whew – we made it past the middle of February, and you know what that means – it’s time to be thinking about spring! Ah, spring … sunshine, longer days, bees buzzing among the flowers.
Okay, maybe we’re being a tiny bit optimistic, but it can’t hurt to look ahead, can it? In that optimistic vein, our DIY Tutorial this week is the perfect homemade gift for any little spring or winter baby to teeth on and practice his or her coordination. Made from the super-adorable Theodore and Izzy collection, this ring stacking toy makes a versatile and unique gift for the little honey in your life.
Click “more” to see the full tutorial and free sewing pattern!
You can see the entire Theodore & Izzy collection right here.
Supplies
– 1/3 yard of Theodore & Izzy quilting cotton (44” wide) from Camelot Fabrics in 9140103 #3 for the Base & Pole
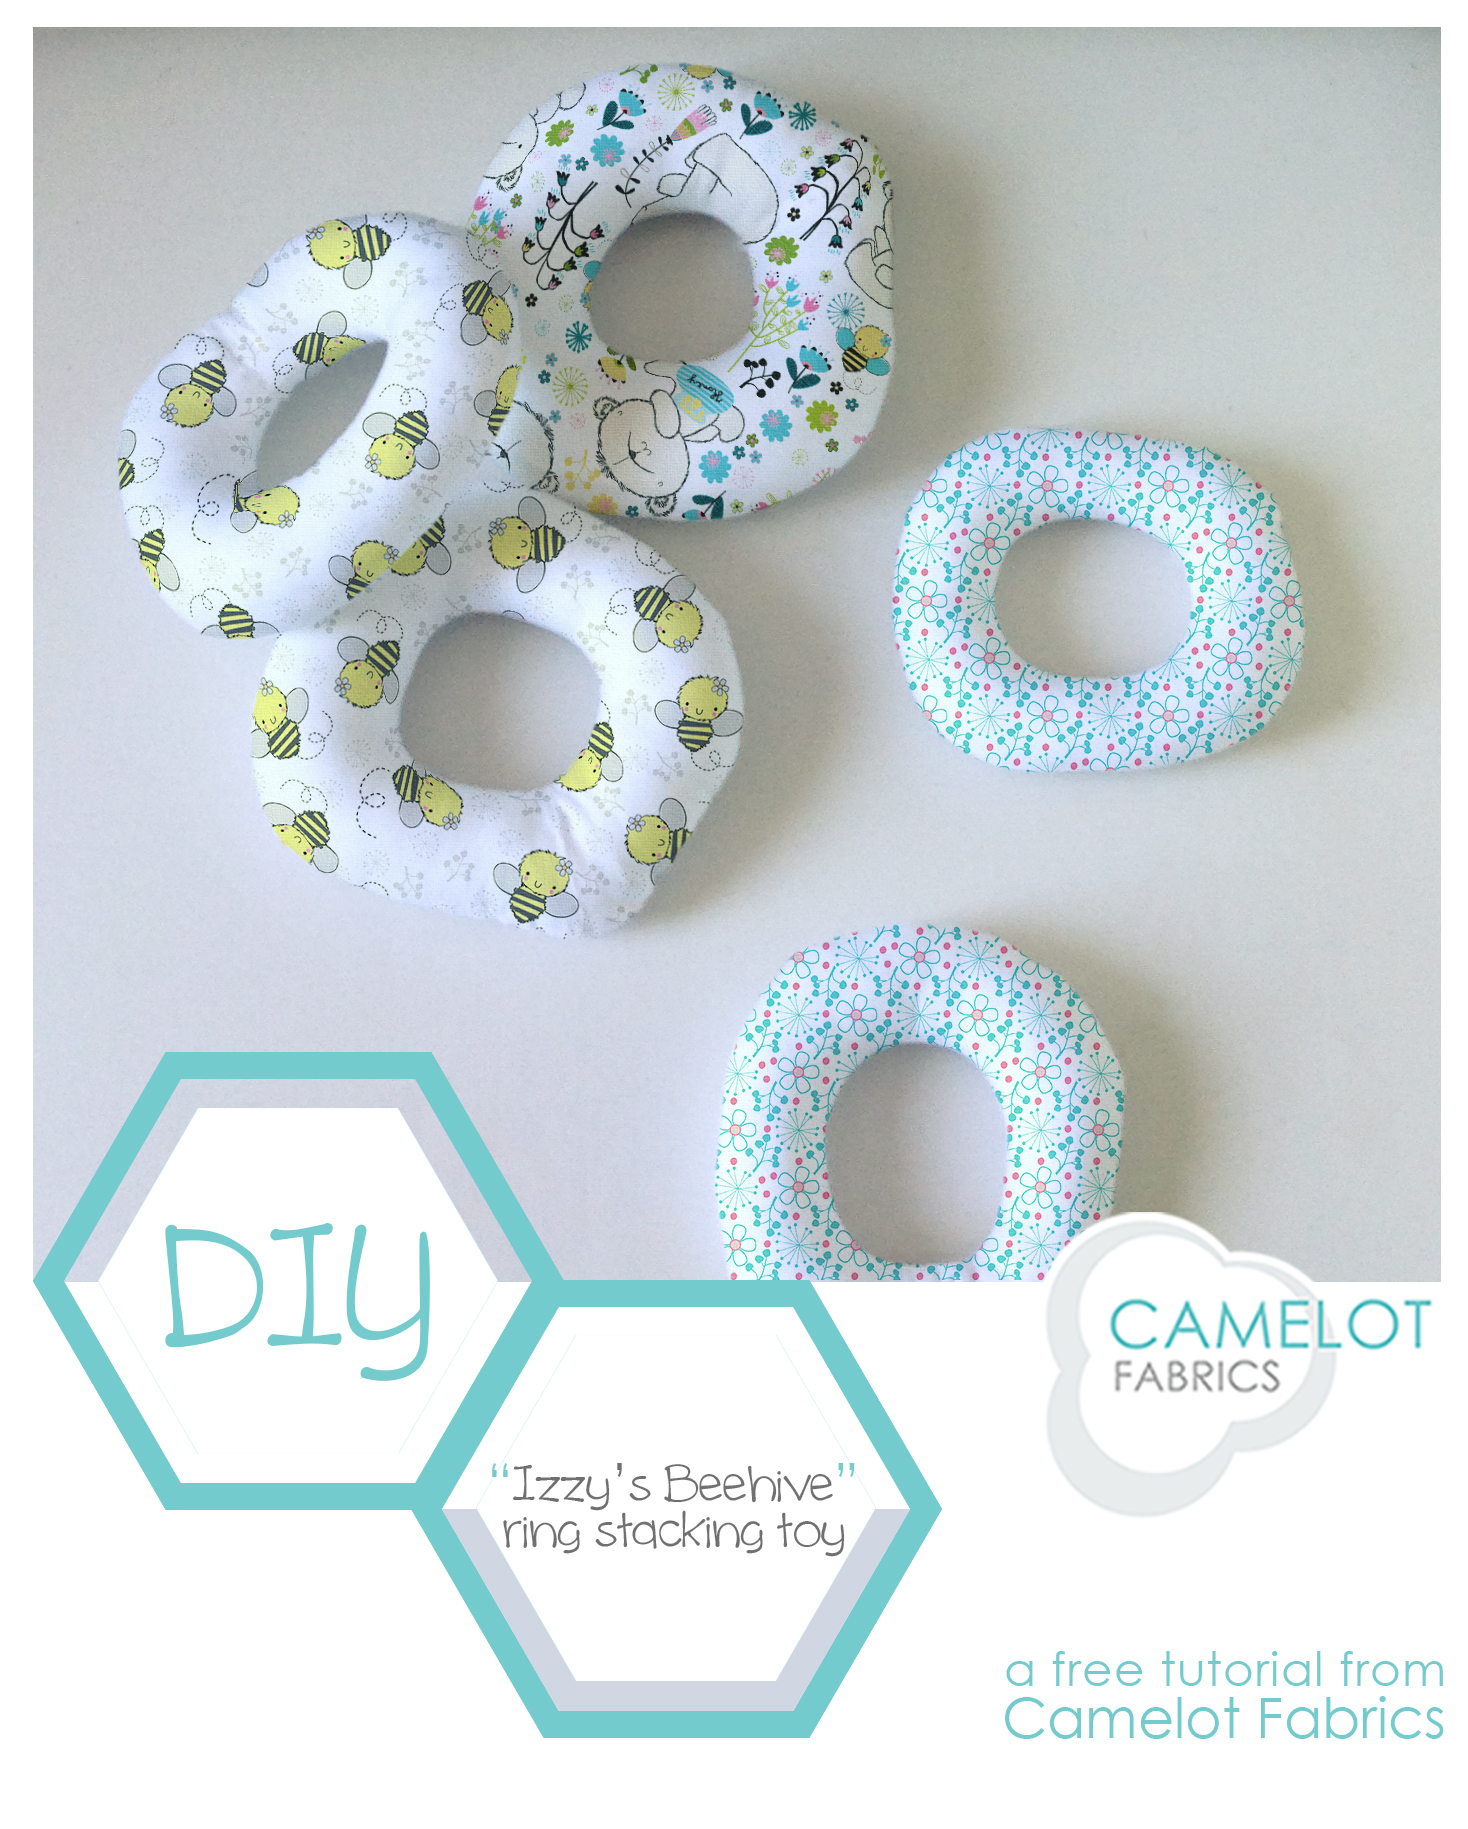
– fat eighth yard of Theodore & Izzy quilting cotton (44” wide) from Camelot Fabrics in 9140101 #1 for the Large Ring
– fat eighth yard of Theodore & Izzy quilting cotton (44” wide) from Camelot Fabrics in 9140103 #2 for the Medium Rings
– fat eighth yard of Theodore & Izzy quilting cotton (44” wide) from Camelot Fabrics in 9140105 #1 for the Smallest Rings
– fiber stuffing
– small bag of dry rice, beans or other loose grains. We used flax seeds.
– basic sewing supplies: sewing machine, iron & pressing surface, scissors & fabric shears, fabric marker, straight pins, needle & coordinating thread
Notes
– Please wash, dry & iron your cotton before beginning.
– Unless otherwise noted, sew all seams with a 1/4” seam allowance.
Cutting
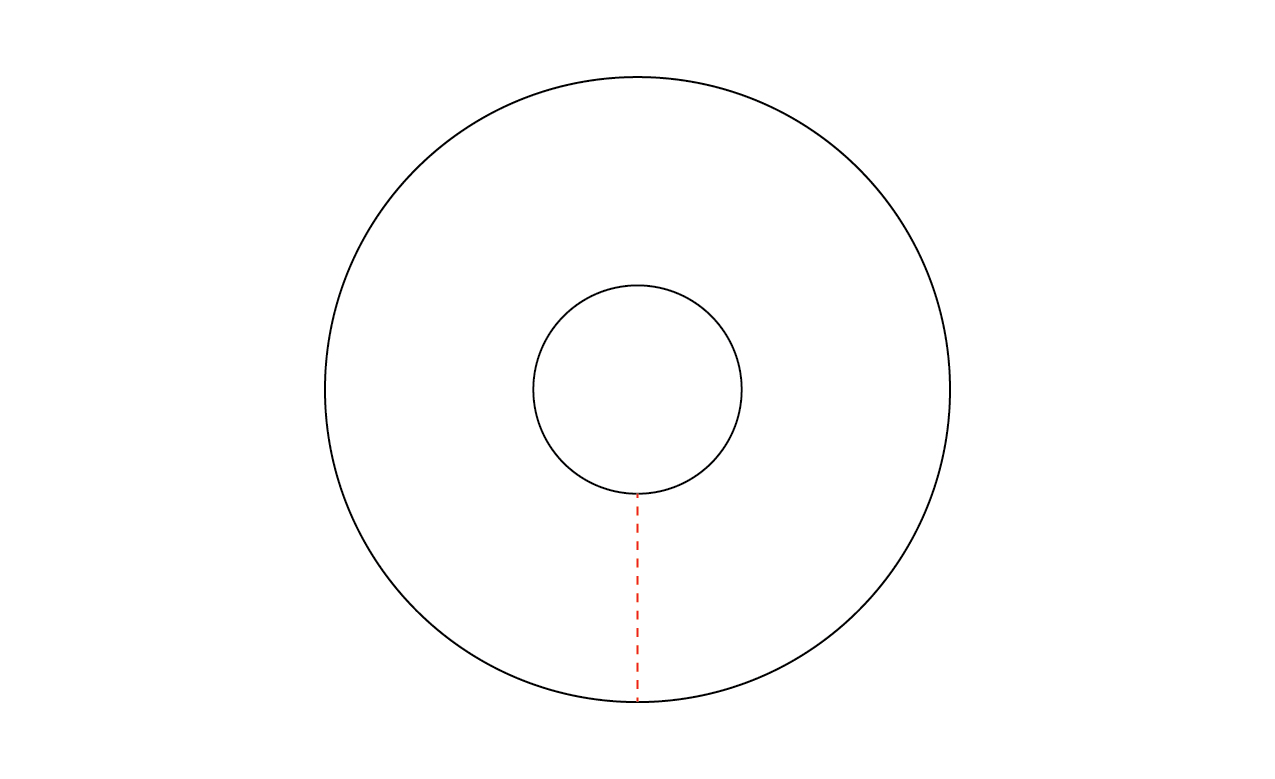
1. Print the “Izzy’s Beehive” Ring Stacking Toy Template PDF at 100% of actual size. Cut out the pieces and tape the two halves of the Large Ring together.
2. Trace the tempate pieces onto the Wrong Sides of your quilting cottons. Be sure to trace each Ring piece twice onto double-layers of fabric as indicated on the template, for a total of (4) Small & (4) Medium Ring pieces, and (2) Large ring pieces. The shaded circles at the centers of the Rings and Base Top pieces should be cut out and discarded.
Sewing the Base
1. Sew the two Base pieces, Right Sides together, around their perimeter. Clip your corners and press this seam open. Turn the Base Right Side out through the hole in the Base Top and fill a quarter full with the loose grain. Stuff the remaining space tightly with fiber stuffing.
2. Sew the long edges of the Pole Right Sides together, and press the seam open.
3. Hand-stitch the Pole Cap to the top end of the Pole. Turn the Pole Right Side out and stuff firmly with fiber stuffing.
4. Set the bottom of the Pole into the hole in the Base and stitch it in place by hand.
Sewing the Rings
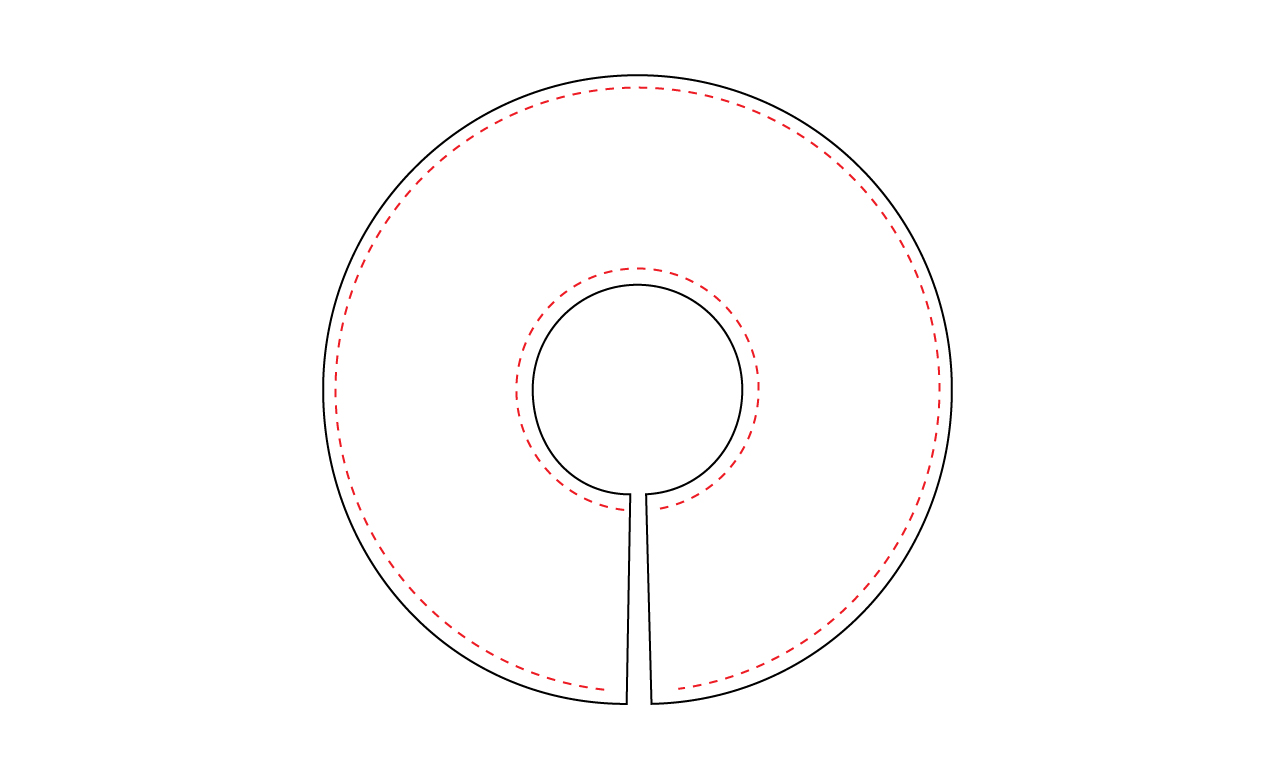
1. Pin each pair of Rings together, Right Sides facing. Cut a line from the outer perimeter of each Ring to its inner edge as shown.
2. Sew each pair of Rings together around their inner & outer circumferences, beginning and ending as shown at the line you cut in step 1. Backstitch at both ends of each seam.
3. Clip the seam allowance on the inner seam of each Ring and press the outer seams open. Turn and press a 1/4” hem at each open end.
4. Turn the Rings Right Sides out and stuff them well, being sure that the fiber stuffing is distributed throughout their lengths. Stitch the ends closed by hand.
We hope you have enjoyed this week’s How To’s Day! Have a fantastic day :)
Happy Sewing!
Comments are closed.