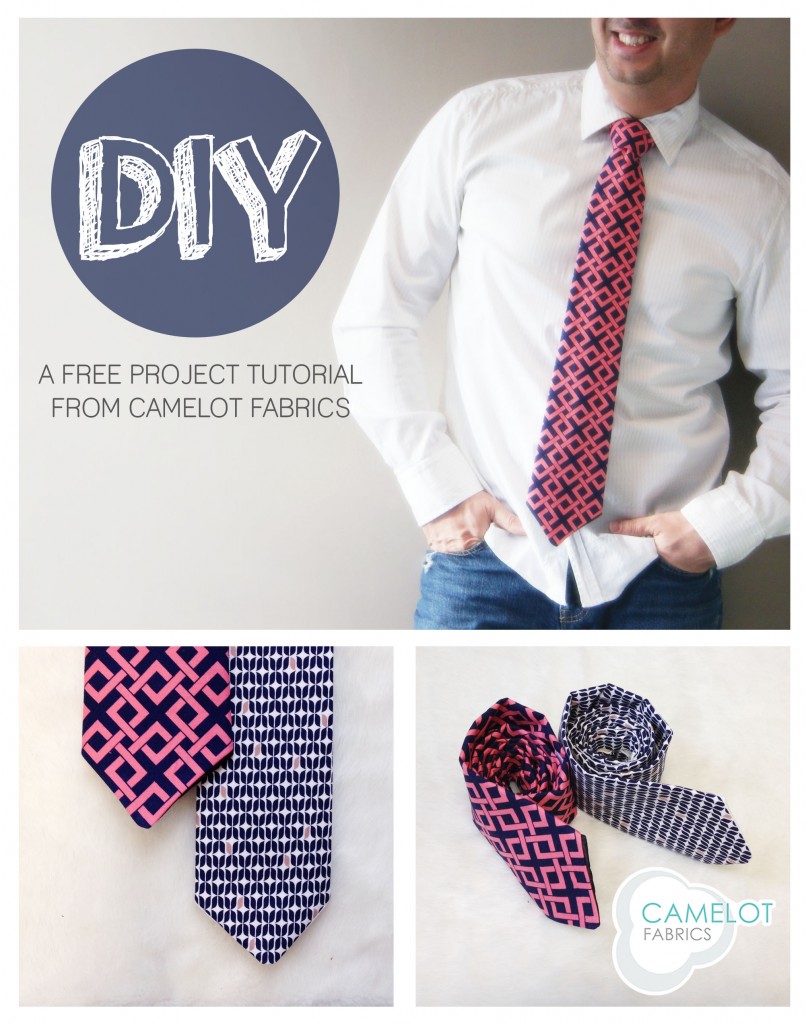
How To’s Day: DIY Necktie Tutorial
January 14th, 2014 by Camelot Fabrics
Hi everyone!
Happy Tuesday! We hope everyone is having a wonderful day so far. The end of the Winter holidays only means the commence of all celebrations to follow (ie. Valentine’s Day, St. Patty’s Day, Easter, etc.). With the bountifulness of all the upcoming celebrations, having the appropriate attire is always *fitting*. And yes, from one woman to another, it’s honestly one of the best parts of a holiday – finding a new and pretty outfit to match! ;) But…how about the men in our lives?
Sure, a man can wear his best suit…but even they have the chance to amplify their outfit a bit. Changing up a necktie design is one of the easiest ways to start anew with a basic suit. Today we are sharing our DIY necktie tutorial with you all! Any design would look fantastic with our tutorial, but we especially adore our Iconic collection as an added freshness and modernity to a look.
Click more to see the full tutorial!
PS: Have you entered our Pinterest Fabric Giveaway yet? Enter here by repinning our Bumper-2-Bumper Giveaway image! :)
DIY NECKTIE TUTORIAL
Supplies
– 1/2 yard of Iconic quilting cotton (44” wide) from Camelot Fabrics
– 1/2 yard of Monaco Satin (58” wide) from Camelot Fabrics
– 1/2 yard of fusible interfacing (44” wide) from Camelot Fabrics
– A few inches of polyester ribbon
– Paper printer
– Lighter or match
– Basic sewing supplies: sewing machine, needle & coordinating thread, iron & pressing surface, scissors & fabric shears, straight pins, and a fabric marker
Cutting
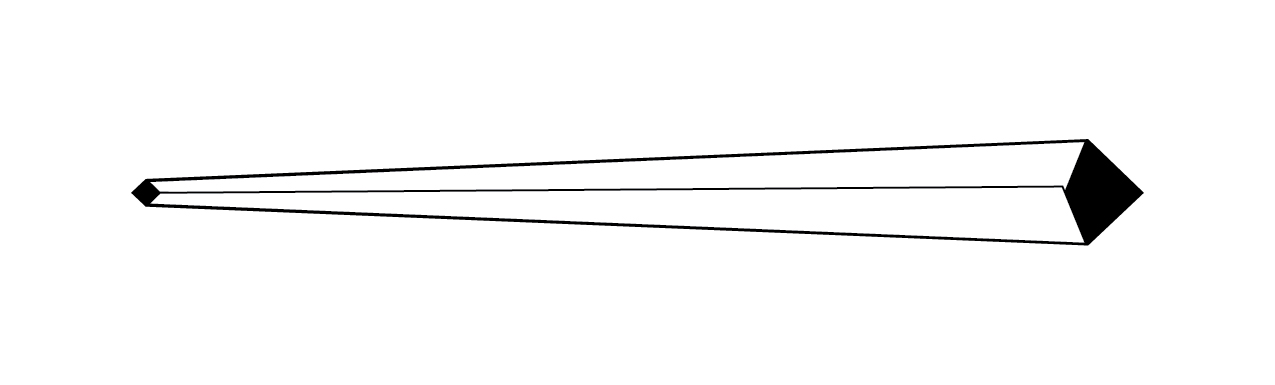
1. Print the Necktie Template PDF at actual size. Trim the pages along the marked borders and tape the pieces together according to the lettered triangles. Cut out the pattern pieces.
2. Trace the template onto the Wrong Side of your quilting cotton. Pin the cotton to the satin, Wrong Sides together, and cut out the pieces for your tie in both fabrics.
3. Place your cotton tie pieces on your pressing surface, Wrong Sides up, and cover them with the fusing, glue side down. Iron well to bond the two fabrics, peel them off the pressing surface and cut the fusing flush with the edges of the cotton pieces.
Assembly
1. Assemble the matching tie pieces, cotton to cotton and satin to satin, Right Sides together with a 3/8” seam. Sew the individual pieces together along Seams #1 & #2 as indicated on the pattern template. Press the seams open, using gentle heat on the satin.
2. Sew the satin tie to the cotton tie, Right Sides together with a 1/2” seam, leaving a gap as indicated on the pattern template. Clip your corners and press the seams open.
3. Turn the tie right side out and whipstitch the gap closed by hand.
4. Fold the long sides of your tie toward the center, satin sides facing, so that they overlap slightly at the wider end as shown. Press the fold lines.
5. Cut a 2 1/2” piece from your ribbon and melt the ends with a lighter or match flame. Whipstitch the short ends of the ribbon to the center back of your tie, about 14” from its wider end.
6. Hand-tack the long edges of the tie together about 5” from the wider end.
We hope you have enjoyed today’s How To’s day post. Now your significant other or all the men in your life can look extra snazzy for all future occasions and celebrations! Have a great one, everyone :)
Happy Sewing!
PS: Have you entered our Pinterest Fabric Giveaway yet? Enter here by repinning our Bumper-2-Bumper Giveaway image! :)
September 18, 2014 at 7:01 pm, Jackie said:
This Neck Tie is one pattern I would like to try. I made one for my husband once upon a time but never tried it again. This pattern has motivated me to give it another try. Thanks so much.
October 14, 2015 at 9:51 am, Kim said:
I love your tutorial. I wanted a certain silk that is coming from China and it is sold in widths of 27 inches. Do you think using this width of fabric will cause a hindrance to following your pattern? Thank you very much for any advice you can offer.