How To’s Day: Flower Power Quilt by Quilt Doodle Designs
December 1st, 2015 by Camelot Fabrics
Hi everyone,
Happy Tuesday! I hope you are all having a lovely day.
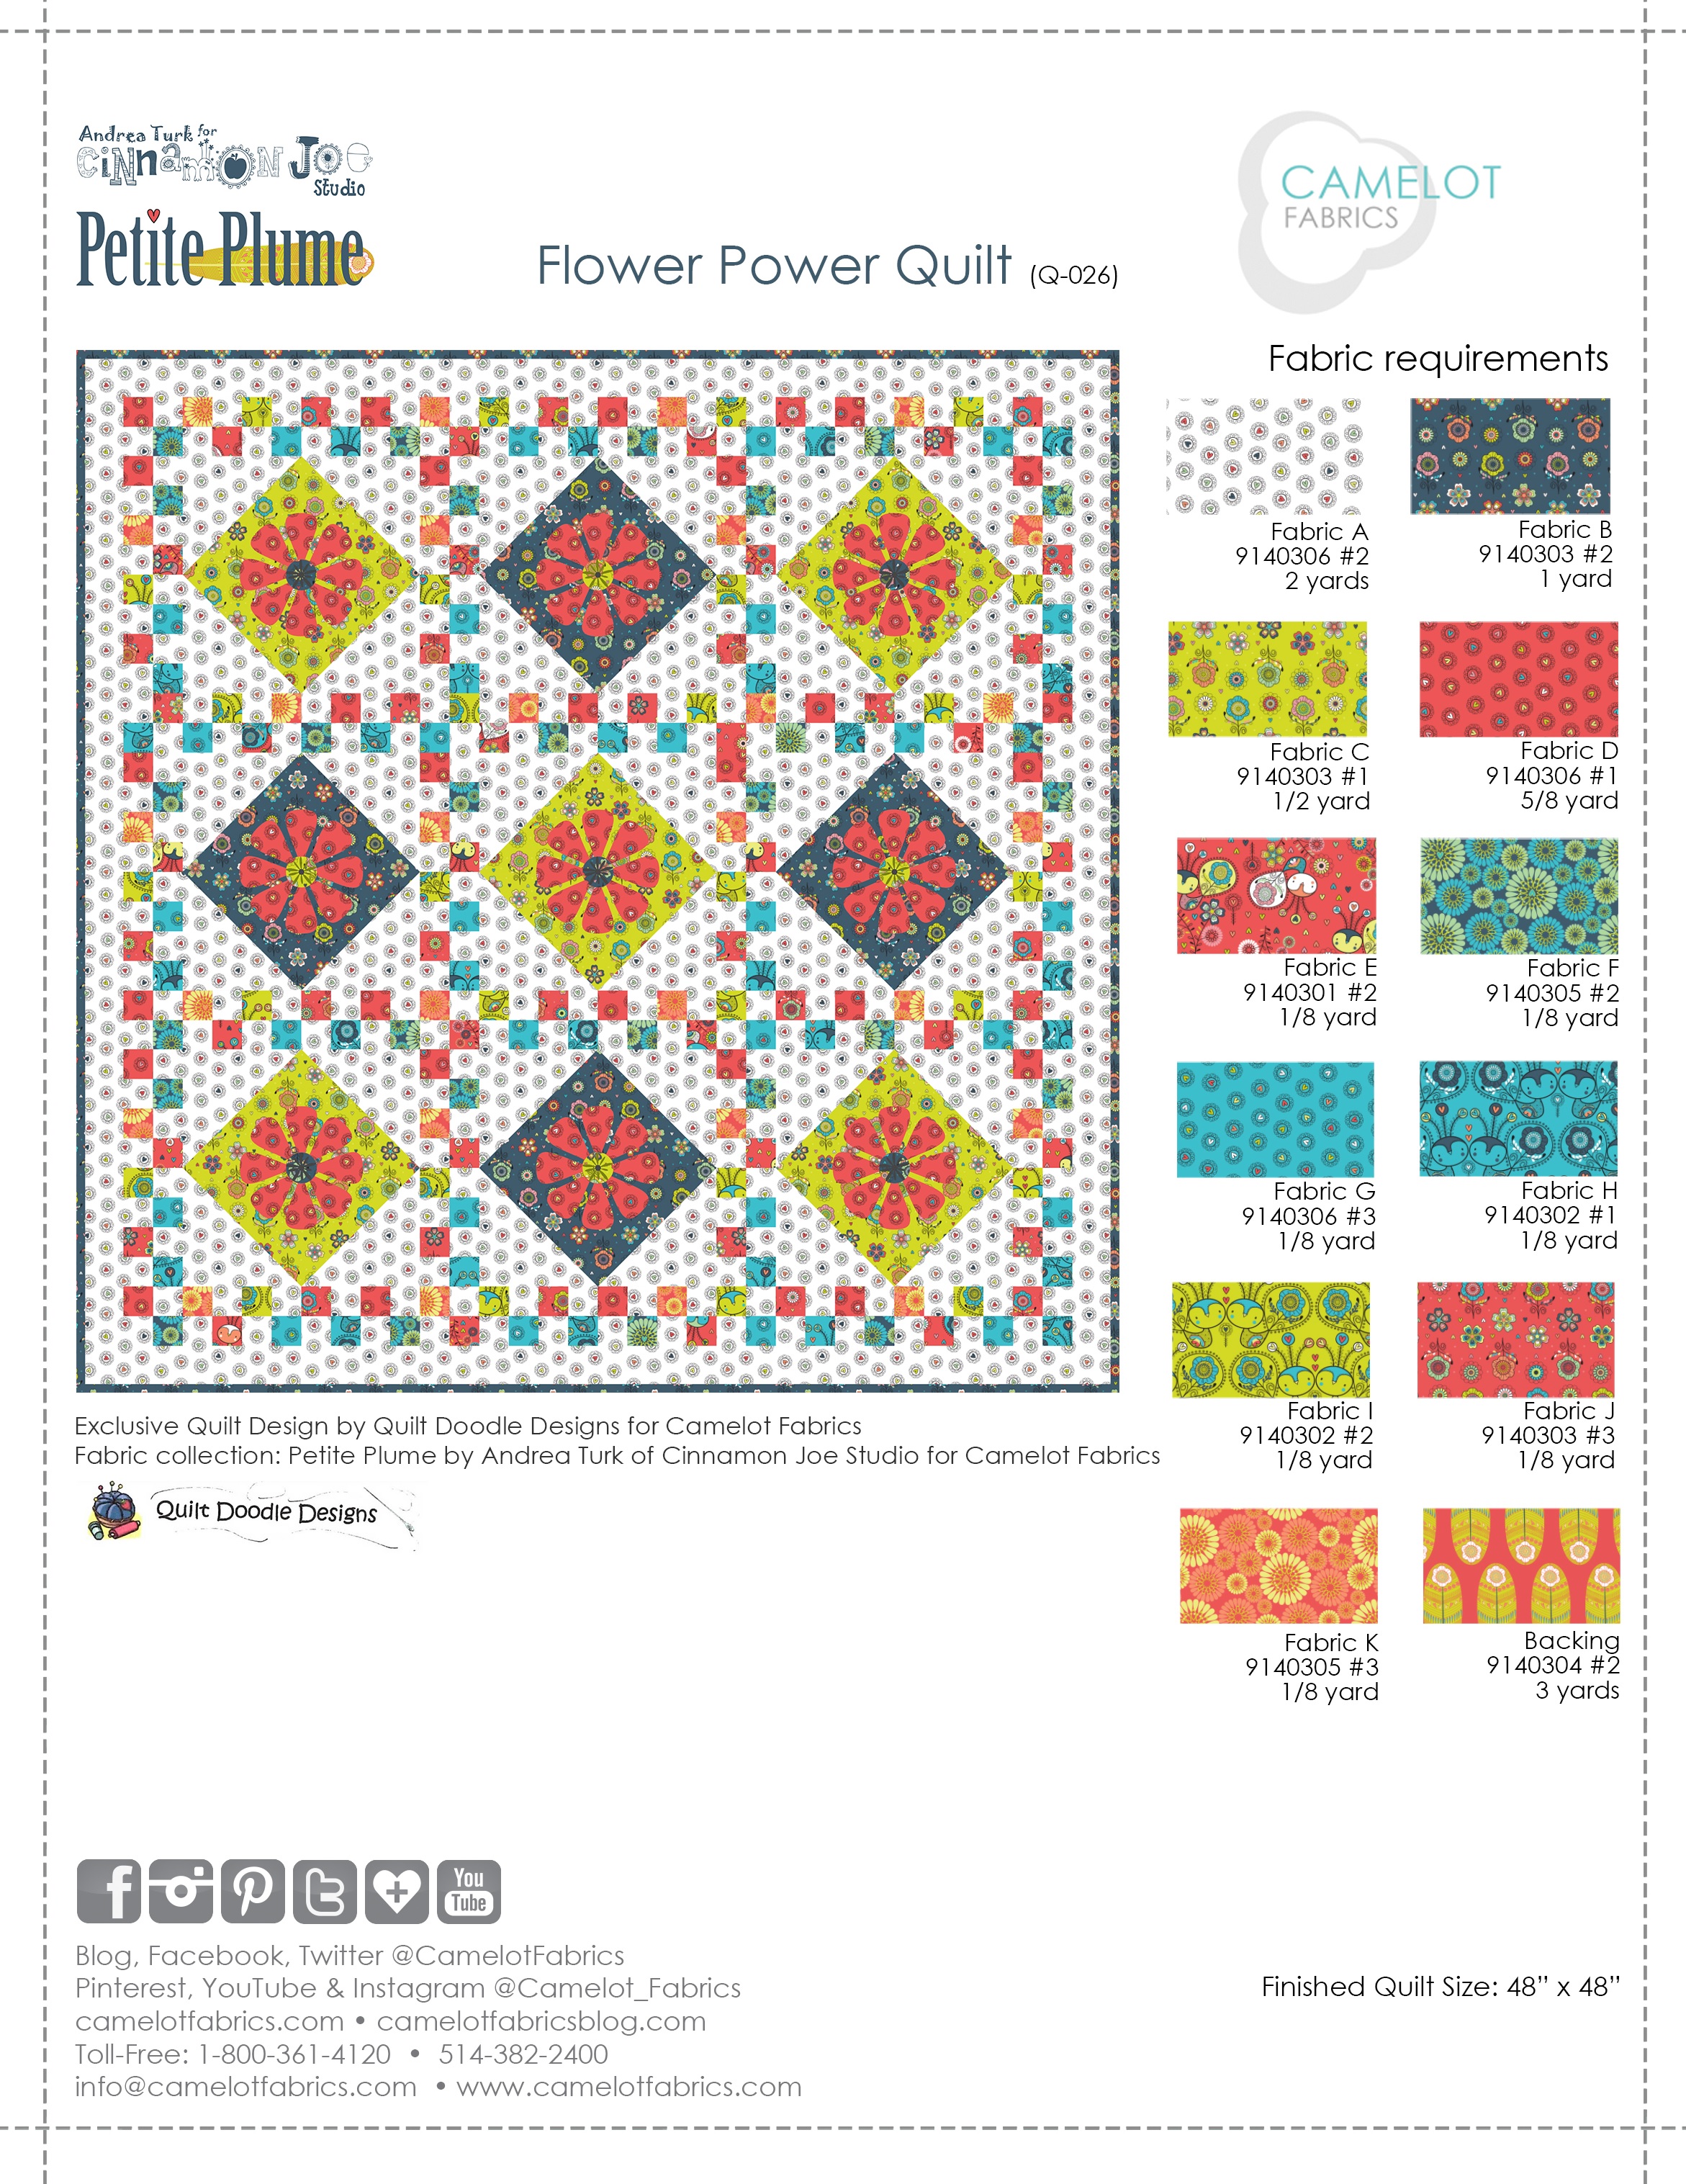
It’s time for this week’s How To’s Day! Today we are featuring our Flower Power Quilt by Quilt Doodle Designs. Flower Power is a more traditional-type quilt design, which includes beautiful floral cutouts and appliqued yo-yo centers. Around each flower is a border of small squares, which add a really fun detail. A lot of work, but visually worth it!
We chose to feature our Petite Plume by Andrea Turk collection, which was perfect with the powerful flowers in the quilt pattern. The bird/floral/feather prints in chartreuse, navy, and coral colorways matched together to create a sophisticated and clean design. We enjoyed Cindy of Quilt Doodle Designs’ unique style, and we had a wonderful time collaborating with her on this quilt pattern.

Want to make your own Flower Power quilt? Click MORE to see the full tutorial.
FLOWER POWER QUILT
Pattern Designer: Cindy of Quilt Doodle Designs
Fabric Featured: Petite Plume by Andrea Turk for Cinnamon Joe Studio
OTHER TOOLS & SUPPLIES
– 1-1/2 yds of quilt batting (58” wide)
– 1 yd of iron-on adhesive for fabric (17” wide)
– Sewing machine & coordinating thread
– Rotary cutter, mat & fabric shears
– Straight edge ruler & measuring tape
– Straight pins
– Fabric marker or pencil
– Template (p. 6 – 7)
NOTES:
– For best results, read through all instructions before beginning.
– WOF = width of fabric (42”)
– RST = right sides together
– Unless otherwise directed, sew all seams with an accurate 1/4” seam allowance, and press seams open as you go.
– Please wash, dry & iron your fabric before beginning, and trim selvages.
MAKING THE BLOCKS
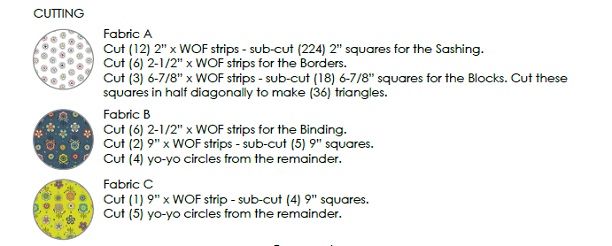
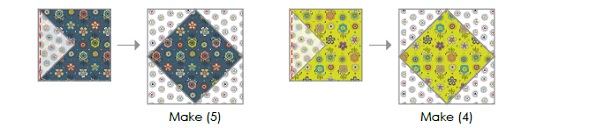
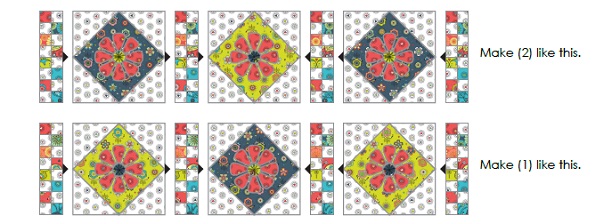
1. Sew (4) Fabric A triangles to the edges of each 9” Fabric B square, as shown. Do the same with your 9” Fabric C squares. Trim the blocks to 12-1/2” square.
2. Print the templates (p. 6-7) and trace the Flower template (9) times onto the paper-backed side of the iron-on adhesive, according to the manufacturer’s directions.
3. Iron the adhesive onto the Wrong Side of your 1/2 yard Fabric D piece, and cut out the flowers.
4. Peel the paper backing off the flowers, and iron (1) in the center of each 12-1/2” block as shown.
5. Appliqué the flowers in place by machine-sewing around their edges with a buttonhole or satin stitch, or hand-stitching in embroidery floss with a blanket stitch.

MAKE THE YO-YOS
1. Fold in the edges of each yo-yo circle by 1/4”, Wrong Sides together, and press.
2. Hand-stitch around the folded edge of a circle with a long running stitch, using fairly strong thread. Leave the end loose.
3. Pull gently on the end of the thread to gather the folded edge of the yo-yo toward the center, and knot the ends of thread together to secur the yo-yo. Repeat with the remaining yo-yo circles.
4. Hand-stitch each Fabric B yo-yo to the center of a Fabric C flower, and each Fabric C yo-yo to the center of a Fabric B flower, with the gathered side of the yo-yo facing out.

MAKING THE SASHING
1. Sew each 2” Fabric D-K square to a 2” Fabric A square as shown.

2. Sew (8) pairs together top-to-bottom as shown, “chequer board” fashion. Make (12) such units, in random combinations. Just make sure to alternate the Fabric A squares left & right.
3. Sew (32) pairs together top-to-bottom in the same manner – make (4) such units.

QUILT TOP
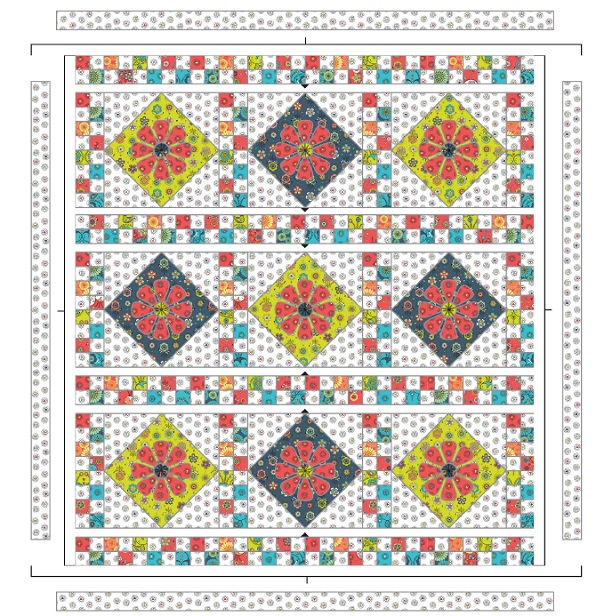
1. Sew the 12-1/2” square blocks together with the 12-unit Sashing units as shown, to make (3) rows.
2. Referring to the Assembly Layout on the last page, sew these (3) rows together with your (4) 32-unit Sashing strips to complete the quilt center.
3. Join the 2-1/2” Fabric A strips end-to-end for the Border.
4. Measure the height of the quilt center through the middle. Cut (2) Border strips to this length; sew them to the left- and right-hand sides of the quilt center.
5. Measure the width of the quilt center through the middle including the Borders. Cut (2) Border strips to this length; sew them to the top and bottom of the quilt center. This completes the quilt top.
FINISHING
1. Join the (6) 2-1/2” Fabric B strips end-to-end and press to make binding.
2. Join the (2) Backing rectangles along a 54” edge for the Backing.
3. Layer your Backing, batting & quilt front with the fabrics’ Right Sides facing out. Baste & quilt as desired, and bind with Fabric B.
We hope you have enjoyed this week’s tutorial. If you would like to quilt your own, we’d love to see! You can send your pictures to info@camelotfabrics.com or tag us on Instagram! Have a fantastic rest of the day.
Happy Sewing!
Comments are closed.