How To’s Day: Tumbling Jewels Quilt by The Cloth Parcel
September 1st, 2015 by Camelot Fabrics
Hi everyone,
Happy Tuesday! I hope everyone is having a wonderful First of September!! It’s also the last day to enter our Flannel FQB Giveaway, so if you haven’t yet, gogogo and enter!
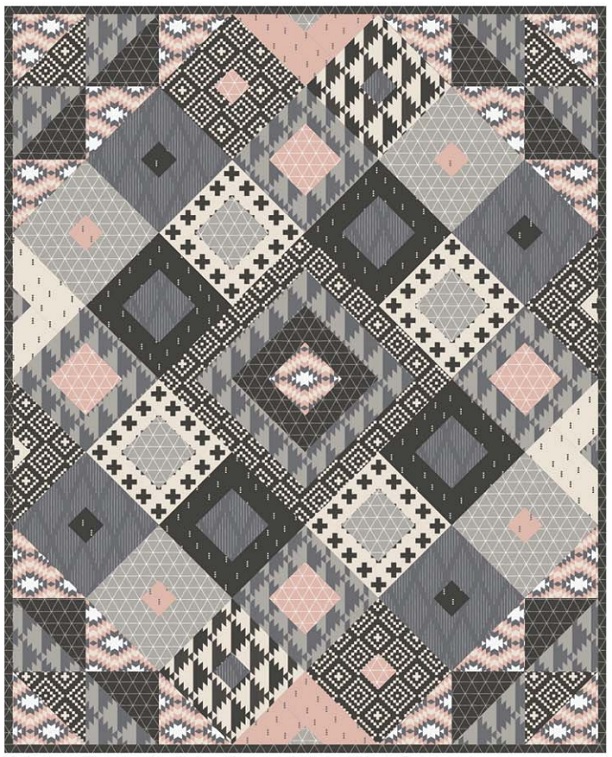
Let’s start off the day with our How To’s Day! Today we are featuring our Tumbling Jewels Quilt by The Cloth Parcel, the wonderful mother-daughter design team. The Tumbling Jewels Quilt is a gorgeous quilt design, composed of lots of different sized triangles and squares to create a “jeweled” effect. We love the randomness of how the shapes are placed, but together, create a super cool and neat pattern. We have fun playing around with this quilt pattern, and loved how it turned out with our Nordic Collection. The grey tones, muted pink, and black prints look so good together in this quilt.
Want to create your own Tumbling Jewels Quilt? Click MORE to see the full tutorial.
TUMBLING JEWELS QUILT
Pattern Designer: The Cloth Parcel
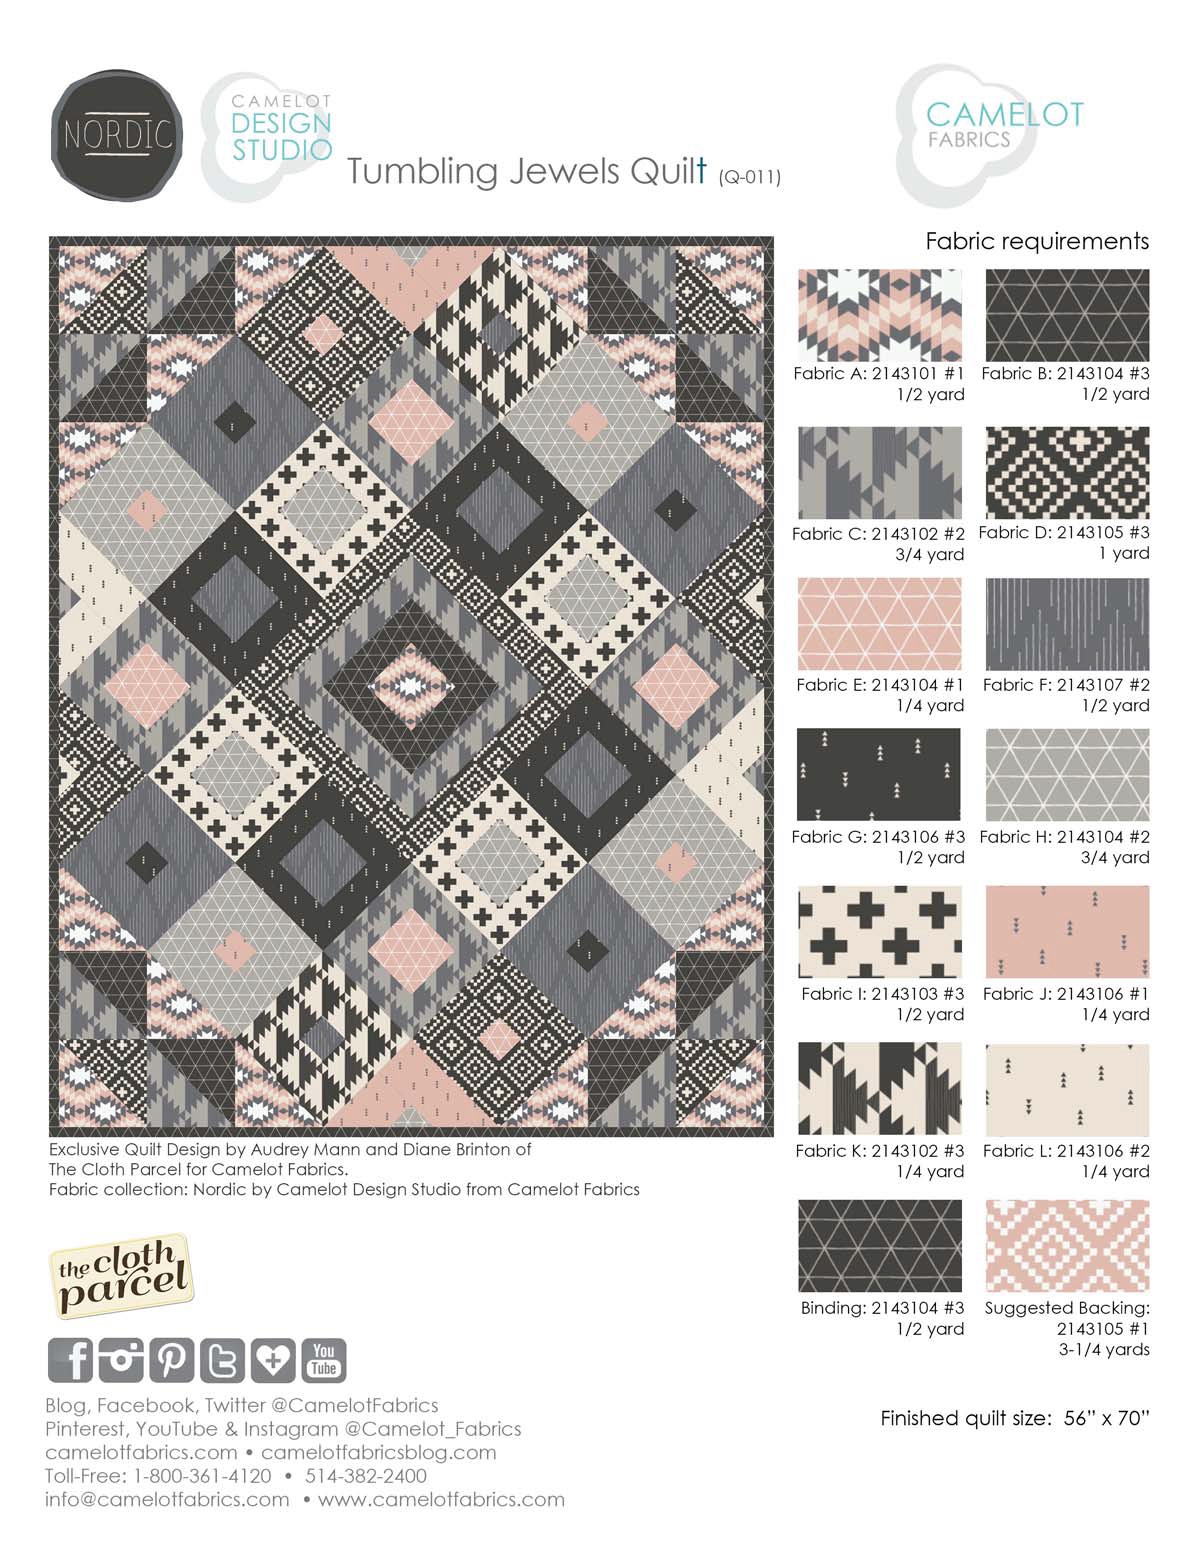
Fabric Featured: Nordic by the Camelot Design Studio
TOOLS & SUPPLIES:
– 2 yards of quilt batting (58” wide)
– sewing maching & coordinating thread
– rotary cutter & mat
– fabric shears
– straight pins
– fabric marker
– straight edge ruler & measuring tape
NOTES:
– Please wash, dry & iron your fabric before beginning.
– Unless otherwise directed, sew all seams with an accurate 1/4” seam allowance and the fabrics’ Right Sides together.
– WOF = width of fabric
– Grey letters in diagrams indicate the fabrics used, when applicable.
– For block placement, please refer to the quilt illustration on Page 1.
CUTTING:
Fabric A
(1) 5-1/2” square and (8) 8” squares
Fabric B
(2) 3” x 5-1/2” rectangles, (2) 3” x 10-1/2” rectangles and (4) 8” squares
Fabric C
(10) 3” x 10-1/2” rectangles, (2) 3” x 15-1/2” rectangles, (8) 3” x 5-1/2” rectangles,
(4) 8” squares and (2) 3-1/4” squares
Fabric D
(2) 3” x 15-1/2” rectangles, (2) 3” x 20-1/2” rectangles, (4) 3” x 4-1/4” rectangles,
(2) 8” squares, (6) 4-1/4” x 10-1/2” rectangles and (2) 4-1/4” x 6-3/4” rectangles
Fabric E
(4) 5-1/2” squares and (2) 3” squares
Fabric F
(4) 5-1/2” squares, (8) 4-1/4” x 10-1/2” rectangles, (8) 3” x 4-1/4” rectangles and (2) 3” squares
Fabric G
(8) 3” x 10-1/2” rectangles, (8) 3” x 5-1/2” rectangles and (4) 3” squares
Fabric H
(4) 5-1/2” squares, (2) 3-1/4” squares, (8) 4-1/4” x 10-1/2” rectangles and (8) 3” x 4-1/4” rectangles
Fabric I
(2) 3-1/4” squares, (8) 3” x 10-1/2” rectangles and (8) 3” x 5-1/2” rectangles
Fabric J
(4) 3” squares, (2) 4-1/4” x 10-1/2” rectangles and (2) 4-1/4” x 6-3/4” rectangles
Fabric K
(4) 4-1/4” x 10-1/2” rectangles and (4) 3” x 4-1/4” rectangles
Fabric L
(2) 4-1/4” x 10-1/2” rectangles and (2) 4-1/4” x 6-3/4” rectangles
Binding
Cut (7) 2-1/4” x WOF strips
Backing
(2) 60” x WOF rectangles
CENTER BLOCK:
Sew 5-1/2” Fabric A square to two 3” x 5-1/2” Fabric B strips. Sew two 3” x 10-1/2” Fabric B strips to top and bottom. (Fig. 1)

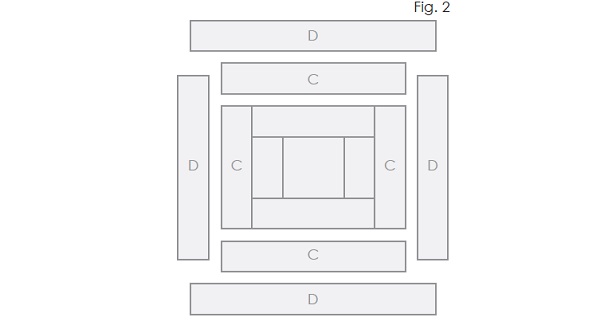
Add two 3” x 10-1/2” Fabric C strips, then two 3” x 15-1/2” Fabric C strips to the block using the same method. Add two 3” x 15-1/2” Fabric D strips, then two 3” x 20-1/2” Fabric D strips. (Fig. 2) This completes the center block.
FIRST SURROUNDING ROW:
These blocks are assembled using the same method as Fig. 1. Make four blocks of each of
the following combinations:
Block #1: Fabric E 5-1/2” square; Fabric C 3” x 5-1/2” rectangles and 3” x 10-1/2” rectangles.
Block #2: Fabric H 5-1/2” square; Fabric I 3” x 5-1/2” rectangles and 3” x 10-1/2” rectangles.
Block #3: Fabric F 5-1/2” square; Fabric G 3” x 5-1/2” rectangles and 3” x 10-1/2” rectangles.
Referring to the quilt illustration on Page 1, sew one Block #2 to one Block #3. Make sure to alternate long sides and pieced sides of squares to reduce bulk and make pressing easier. Repeat with 2 more blocks for the opposite side of the center block.

Now sew 4 blocks together in the following order: #1 to #3 to #2 to #1. Repeat with 4 more blocks for the opposite row.
Sew the two sets of 2 blocks to the center on opposite sides. Sew the two sets of 4 blocks to the remaining sides, as shown in Fig. 3.
SECOND SURROUNDING ROW BLOCKS:
These blocks are made using 3” squares for the centers, 3” x 4 ¼” strips and 4 ¼” x 10 ½” strips in the following combinations.
Make (4) blocks each:
Block #4: Fabric G 3” square; Fabric F 3” x 4-1/4” rectangles and 3” x 10-1/2” rectangles.
Block #5: Fabric J 3” square; Fabric H 3” x 4-1/4” rectangles and 3” x 10-1/2” rectangles.
Make (2) blocks each:
Block #6: Fabric F 3” square; Fabric K 3” x 4-1/4” rectangles and 3” x 10-1/2” rectangles.
Block #7: Fabric E 3” square; Fabric D 3” x 4-1/4” rectangles and 3” x 10-1/2” rectangles.
Sew 3” centers to (2) 3” x 4-1/4” rectangles as shown in Fig. 4. Then add the 3” x 10-1/2” rectangles to each side as shown. Set aside until next step is completed.

HALF-SQUARE SET-IN BLOCKS:
These blocks are to “set” the other blocks on point, so they will only be part of the square. They are made from 3” squares, 4-1/4” x 6-3/4” rectangles and 4-1/4” x 10-1/2” rectangles in the following combinations:
Make (2) blocks each:
Block #8: Fabric C 3-1/4” square; Fabric L 4-1/4” x 6-3/4” rectangles and 4-1/4” x 10-1/2”
rectangles.
Block #9: Fabric I 3-1/4” square; Fabric D 4-1/4” x 6-3/4” rectangles and 4-1/4” x 10-1/2”
rectangles.
Block #10: Fabric H 3-1/4” square; Fabric J 4-1/4” x 6-3/4” rectangles and 4-1/4” x 10-1/2”
rectangles.
Following Fig. 5, sew the 3-1/4” square to one 4-1/4” x 6-3/4” rectangle with ends matched up. Sew the 4-1/4” x 10-1/2” rectangle to the end of the first two pieces. The edge of this block will need to be trimmed diagonally; make sure to leave a 1/4” seam allowance on the trimmed long edge, also shown in Fig. 5.

SECOND SURROUNDING ROW:
Make 2 sets of Row 1, putting blocks in the following order:
– Half Block #8 to Block #5 to Block #4 to Block #7
Make 2 sets of Row 2 with blocks in the following order:
– Half Block #10 to Block #6 to Block #5 to Block #4 to Half Block #9
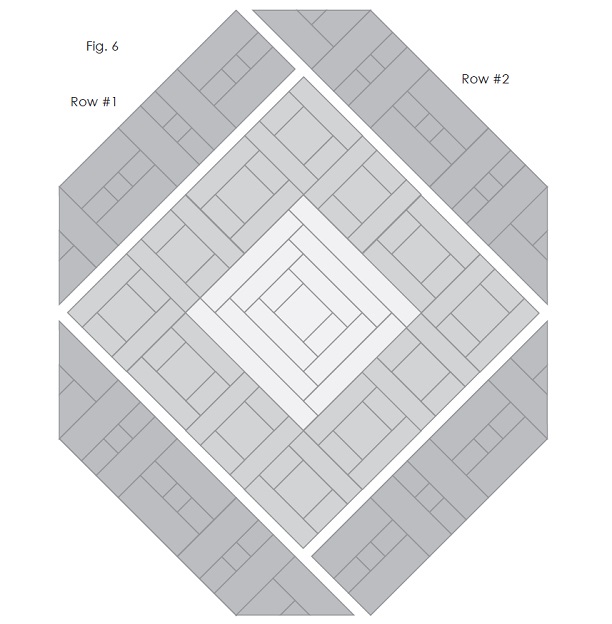
Sew Rows 1 to left top and right bottom of quilt center. Next, sew Rows 2 to right top and left bottom of quilt as shown in Fig. 6.
MAKE THE TRIANGLE CORNERS:
Using 8” square blocks, pair the following combinations:
(4) Fabric B to Fabric C
(2) Fabric A to Fabric D
Lay squares, right sides together, and mark a line diagonally across the square on top. Sew 1/4” away from each side of the line. (See Fig. 7)
Cut sewn squares in half along the marked line, open and press. This will make the 12 half square triangle blocks.

Take the remaining 6 squares of Fabric A and cut them in half diagonally. Assemble the corners according to Fig. 8.

ADD CORNERS TO THE QUILT:
Sew pieced corners to all corners of the quilt according to Fig. 9.
FINISHING THE QUILT:
Sew the Backing rectangles together along their 60 edge, and press the seam open.
Layer the Backing, batting and quilt front, with the fabrics’ Right Sides facing outward. Baste and quilt as desired, and trim the excess Backing & batting.
Join the Binding strips end-to-end, press to make double-fold binding, and use this to bind the quilt.
We hope you have enjoyed this week’s How To’s Day! If you decide to give this quilt pattern a try, we’d love to see. You can send your photos to info@camelotfabrics.com or tag us on Instagram! Have an excellent rest of the day!
October 29, 2015 at 2:21 pm, Amy Caldwell (@See_Amy_Sew) said:
I adore this collection. Can’t wait til I can afford all the fabrics for this quilt!! My b-day is Nov. 1st, so maybe a few hints to the family will pay off…LOL Thank you for sharing this awesome tutorial.