How To’s Day: Baby Blocks Quilt by Larene Smith
August 18th, 2015 by Camelot Fabrics
Hi everyone,
Happy Tuesday! I hope you all are having a fantastic, National Soft Ice Cream Day! Get yourself a delicious chocolate or vanilla soft serve (we love the duo kind!), kick back and relax, and enjoy today!
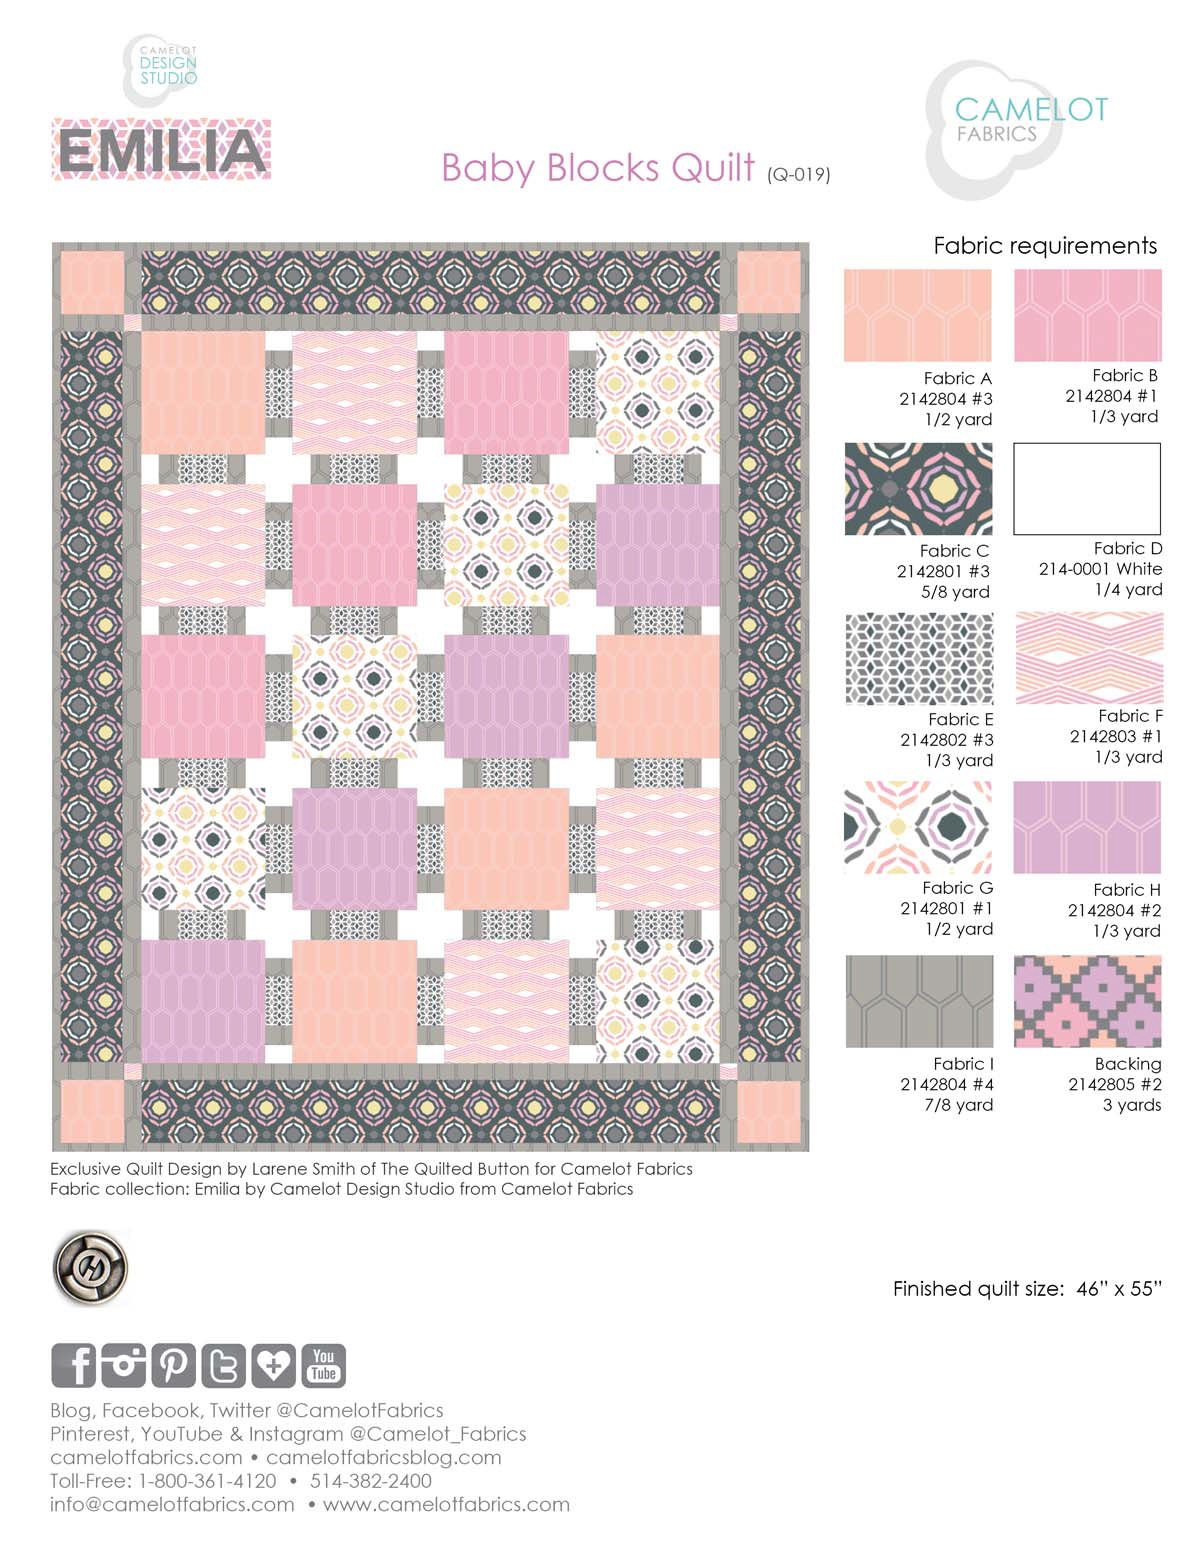
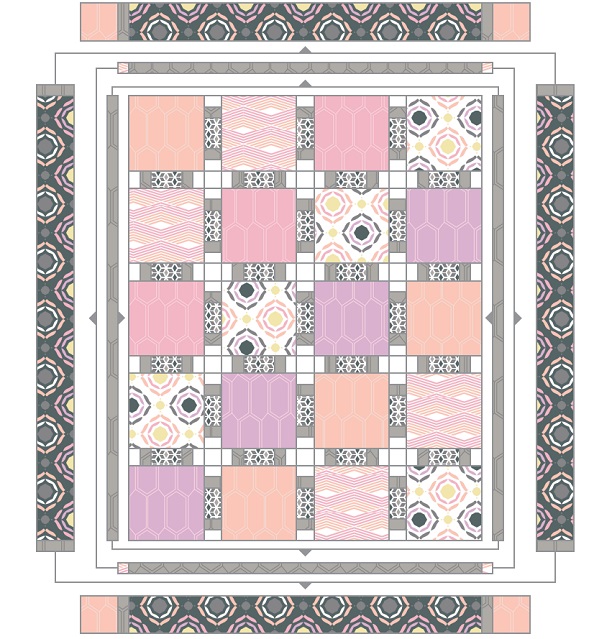
On to our How To’s Day! Today we are featuring our Baby Blocks Quilt by Larene Smith of The Quilted Button. Our Baby Blocks Quilt is a lovely block-by-block pattern of squares that create a clean and contemporary design, perfect for a modern nursery. The different “squares” allow for you to have fun with different fabric prints, to create visual interest. We chose to feature our feminine Emilia Collection, and chose like patterns in a diagonal design. The border is our darker medallion print, which gives the overall quilt a nice warmth.
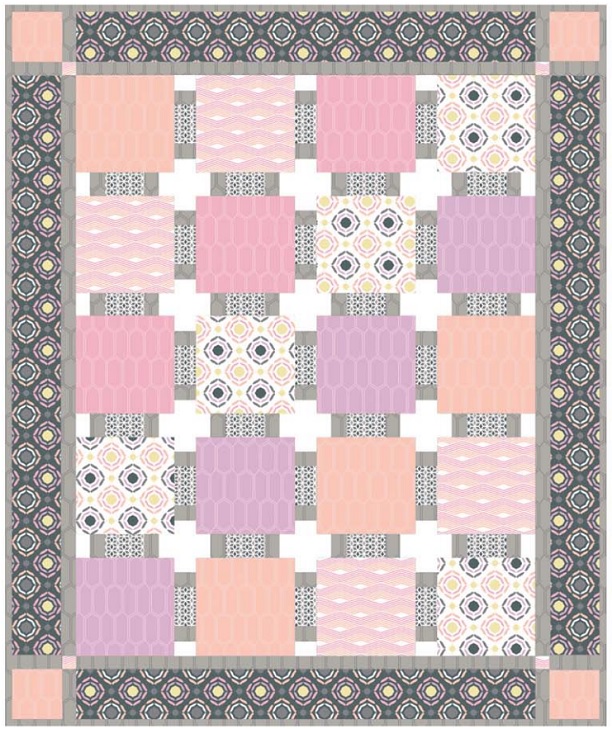
Such a gorgeous, feminine quilt that would be a perfect gift for a mama-to-be! Want to make your own Baby Blocks Quilt? Click MORE for the full tutorial.
BABY BLOCKS QUILT
Designed By: Larene Smith of The Quilted Button
Fabric Featured: Emilia by Camelot Design Studio
OTHER TOOLS & SUPPLIES:
– Rotary Cutter, Mat, Rulers, Straight Pins,
– Sewing machine, and threads to match your fabrics
NOTES:
All seams are sewn with a 1/4” seam allowance.
Please wash, dry & iron your fabric before beginning, and trim selvages.
WOF = Width of Fabric.
Press seams open as you go.
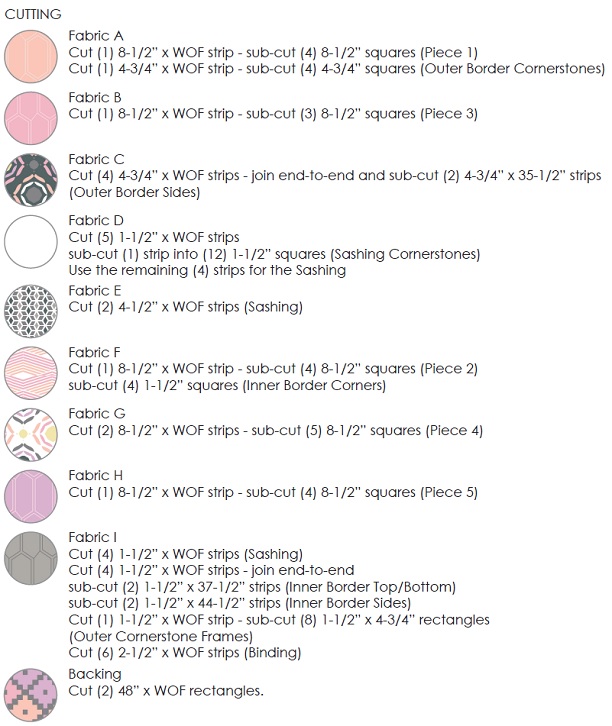
PREPARING & SASHING:
1. Sew a Fabric I Sashing strip to either side of a Fabric E Sashing strip as shown.

2. Sew a Fabric D Sashing strip to each side of the E/I Sashing unit.
3. Cut the resulting Sashing unit into (31) 8-1/2” x 1-1/2” rectangles.

4. Sew a Fabric D Sashing Cornerstone to one end of a Sashing rectangle as shown. Repeat to make (12) such units.

5. Join (4) Sashing units from Step 4 end-to-end; sew a Sashing unit to the final Cornerstone. Repeat to make (4) Sashing rows.

QUILT CENTER:
1. Sew the 8-1/2” squares together in rows as illustrated in the Assembly Layout, with a Sashing unit inserted between each pair of squares.

2. Sew the rows together (again, referring to the Assembly Layout), with a Sashing row between each pair of rows from Step 1.
BORDERS:
1. Sew a 1-1/2” x 44-1/2” Fabric I strip to either side of the quilt center.
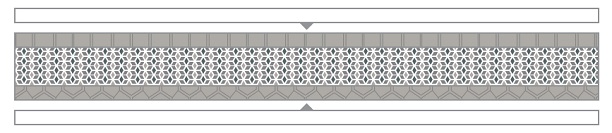
2. Sew a 1-1/2” Fabric F square to either end of each 1-1/2” x 37-1/2” Fabric I strip.
![]()
3. Sew the resulting Inner Border units to the top & bottom of the quilt center. The quilt center & borders should now measure 37-1/2” x 46-1/2”.
4. Sew a 1-1/2” x 4-3/4” Fabric I rectangle to either end of each 4-3/4” x 44-1/2” Fabric C strip.

5. Sew the resulting Outer Border units to either side of the quilt center.
6. Sew a 1-1/2” x 4-3/4” Fabric I rectangle to either end of each 4-3/4” x 35-1/2” Fabric C strip.
7. Sew a 4-3/4” Fabric A square to either end of the resulting units.

8. Sew the Outer Border units from Step 7 to the Top & Bottom of the quilt center, to complete it at 46” x 55”.
ASSEMBLY LAYOUT:
FINISHING THE QUILT:
1. Sew the Backing rectangles together along the 48” edges.
2. Layer the quilt top, batting & backing together; quilt as desired.
3. Bind the quilt with the Fabric I Binding strips.
I hope you have enjoyed today’s How To’s Day!! If you decided to give this quilt pattern a go, we’d love to see! You can always tag us on Instagram or send us photos by email. Have an incredible day!
Happy Sewing!
Comments are closed.