How To’s Day: Cascading Chevrons Pillow Tutorial
March 25th, 2014 by Camelot Fabrics
Hi everyone!
Happy Tuesday! How has everyone’s week been going so far? Still a little cold here, but at least we’ve been having longer & brighter days. Warmer weather is hopefully just around the corner. Have you entered our Beyond the Backyard FQ Bundle Giveaway yet? Today is the last day, so tell us what your favorite thing about Spring is on our Facebook post to enter! :)
On to this week’s How To’s Day! We’ve got another fantastic free project to share with you all. Today we are sharing our Cascading Chevrons Pillow Tutorial – an absolutely stunning, decorative pillow that is the perfect accessory for any home design. Today, decorative pillows are extremely popular and an easy way to spruce up any space but they can get really pricey. As well, finding the right pillow to fit your home décor, style, or color palette adds an additional challenge. With today’s tutorial, we have got the solution to all those problems and more!
Our chevron pillow is polished and contemporary, would fit the esthetic of any style (just by choosing different fabric prints!), pretty simple to make with our tutorial, and definitely cost-effective. We can imagine a sleek white couch or simple daybed adorned by a couple of our chevron pillows in bright, fun fabric choices. There are endless possibilities, but that’s the splendor of this tutorial!
We created our gorgeous Cascading Chevrons pillow using our Penelope Collection, which is the perfect Spring collection…and would look especially fantastic in a modern, cottage-inspired home. The pillow design and colors make us oh so happy and ready for the Spring season! :)
Click MORE to see the full tutorial!
Cascading Chevrons Pillow Tutorial
Supplies:
– Fat Quarter bundle of Penelope from Camelot Fabrics: 2140709FQB
– 20” square pillow form
– Right Angle tool*
– 24” straight edge ruler
– Basic sewing supplies:
– Sewing machine
– Iron & pressing surface
– Scissors & fabric shears
– Measuring tape
– Fabric marker
– Straight pins
– Coordinating thread
* If you don’t have a Right Angle tool, you can make your own. Cut a square approximately 4” x 4” from stiff cardboard, draw a line between (2) opposite corners as shown and cut along this line. Use one of the resulting triangles to measure 90º and 45º angles. 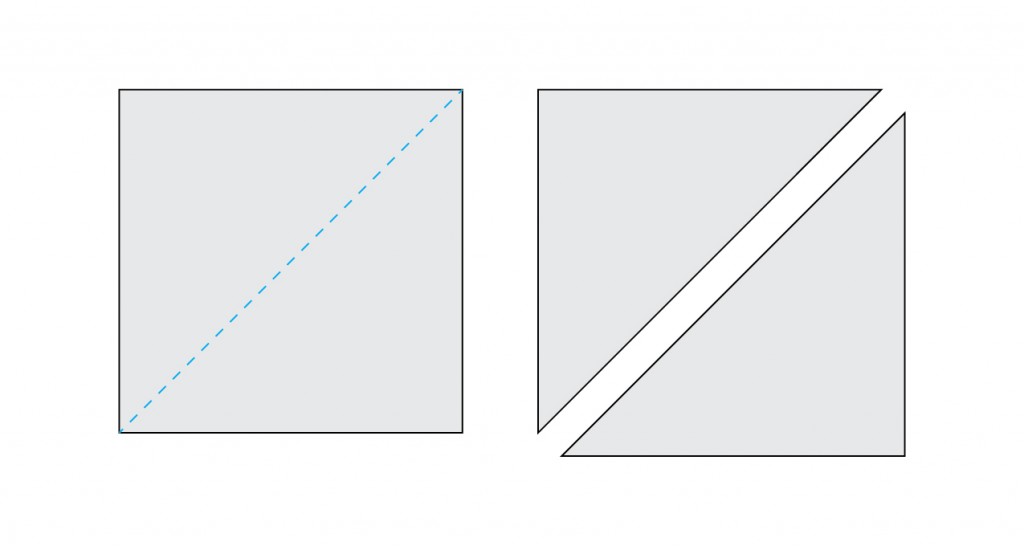
Cutting:
1. Cut (5) 1-1/5” x 22” strips from 2140708 #2 for the Edging.
2. Cut (1) 16“ x 20” rectangle from 2140707 #2 and (1) 16“ x 20” rectangle from 2140709 #3 for the Back.
3.Cut (2) 2-1/2” x 22” strips from each of (12) Fat Quarters, to be used as the Front pieces.
4. Trim one short end of each Front piece at a 45º angle as shown. Make sure that the two strips of each pair are cut with their slants running in opposite directions.

Making the Pillow Front:
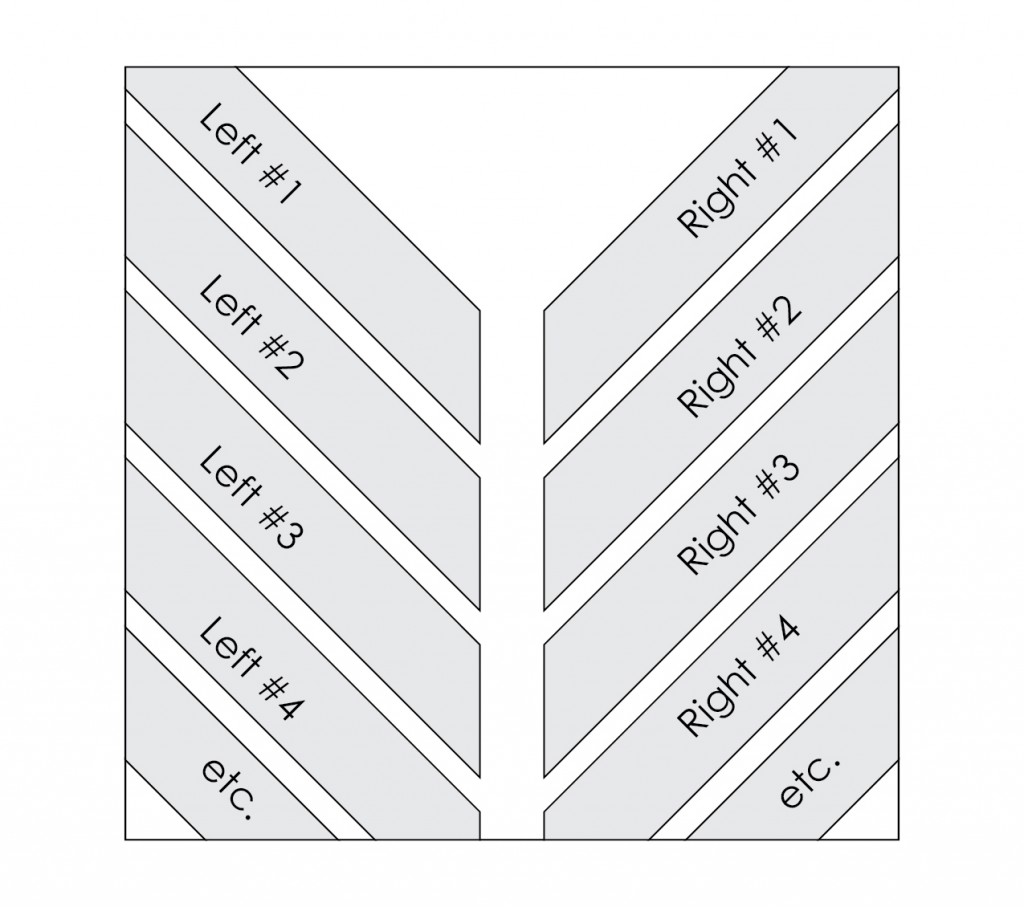
1. Divide your Front pieces into two piles: one for the Left pieces and one for the Right. If you’d like to reproduce our pillow exactly, please refer to the layout below for the order of the strips. If not, take a few moments to lay out all the strips of one side (or both) on a large flat surface, to determine which sequence of patterns looks best to your eye. Keep in mind that the strips toward the top and bottom of the pillow will only show in small parts, while the strips toward the center will show almost fully.

2. Place Left pieces #1 & #2 as shown, Right Sides together. Their slanted edges should cross 1/4” away from the right-hand sides. Sew the two pieces together with a 1/4” seam along the long right-hand edge.

3. Sew Left piece #3 to the second long edge of Left piece #2 as shown, in the same manner as you sewed the first two Left Front pieces together.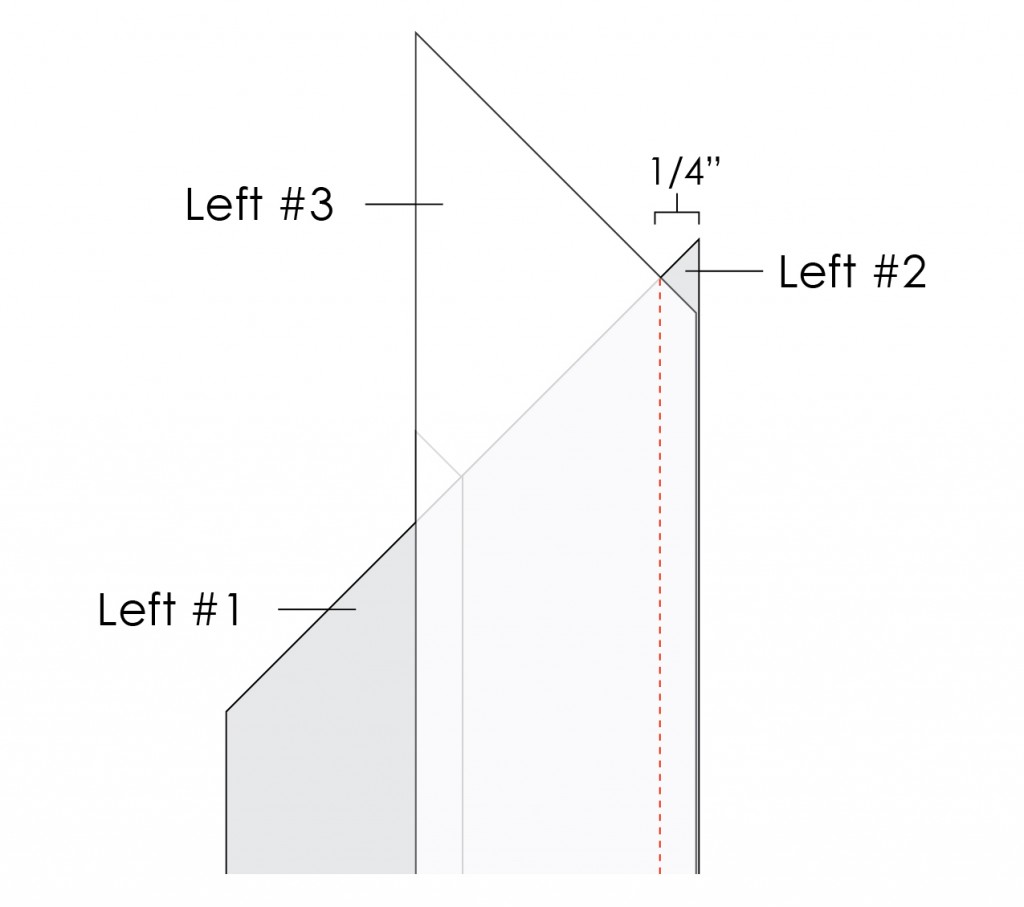
4. Continue sewing each successive piece to its precedent in the same way until all twelve Left Front pieces are sewn together.
5. Press all Left Front seam allowances toward the top of the pillow (Left #1)
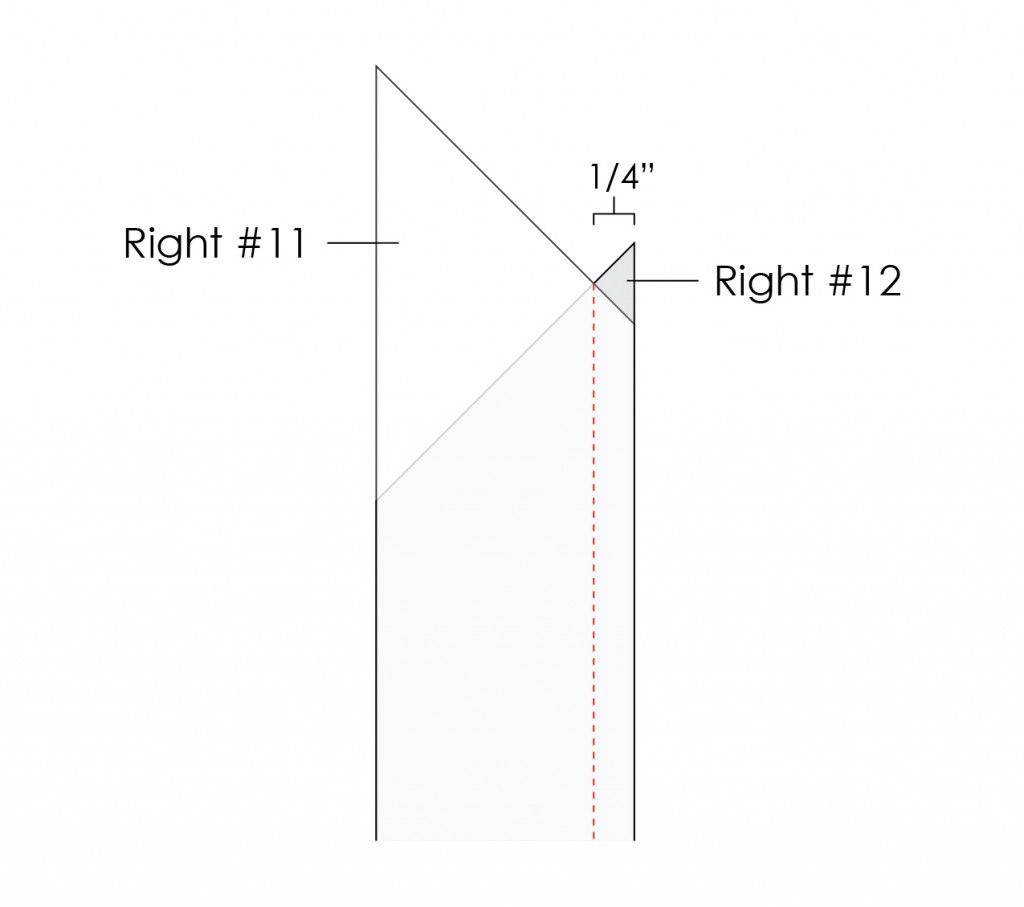
6. Place Right pieces #12 & #11 as shown, Right Sides together. Their slanted edges should cross 1/4” away from the right-hand sides. Sew the two pieces together with a 1/4” seam along the long right-hand edge.
7. Sew Right piece #10 to the second long edge of Right piece #11 as shown, in the same manner as you sewed the first two Right Front pieces together. 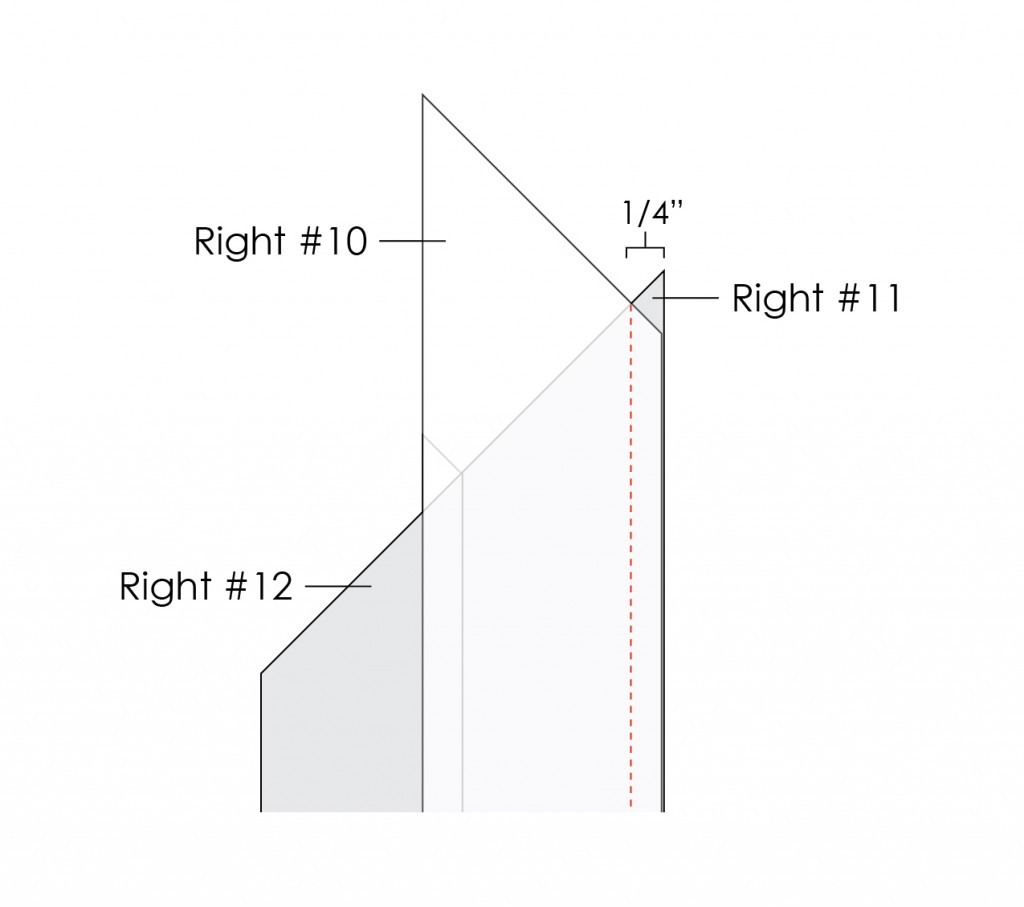
8. Continue sewing each successive piece to its precedent, in the reverse order from the Left side.
9. Press all Right Front seam allowances toward the bottom of the pillow (Right #12). 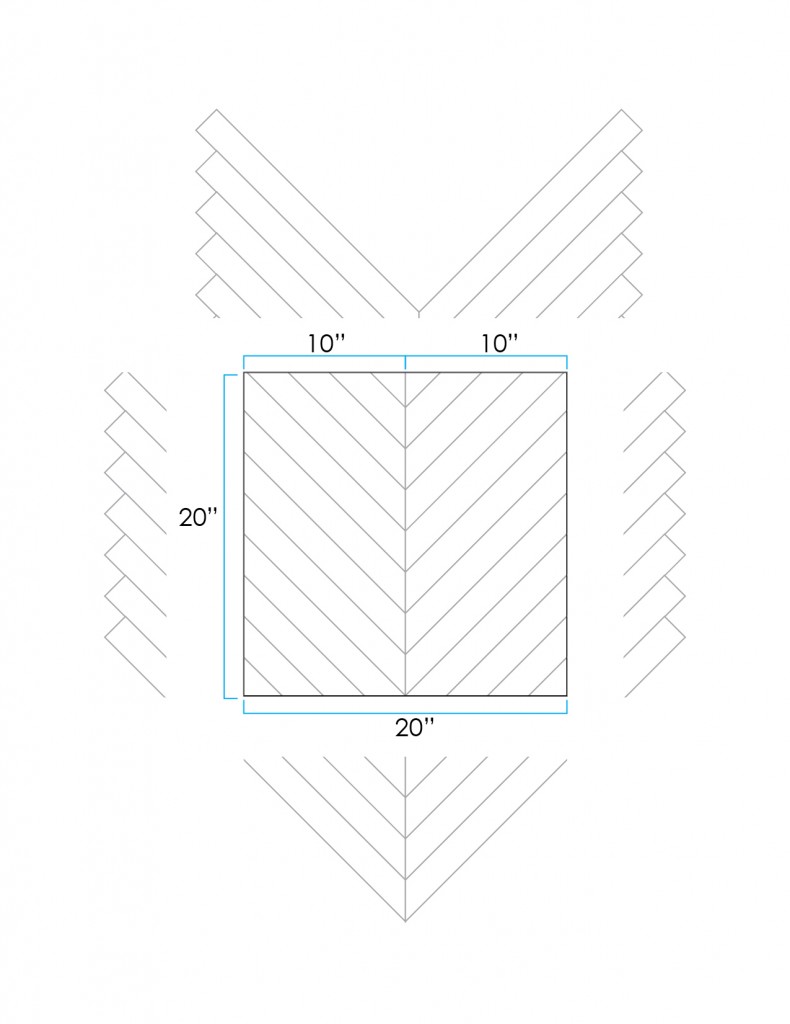
10. Place the two halves of the Front Right Sides together, with the center edges lined up. To align your diagonal seams perfectly, pinch each one in turn between your thumb & forefinger, and rub the two sides of the Front together gently until you feel the seams “lock” into place; secure with a pin.
11. Sew the two Front halves together with a 1/2” seam and press the seam open.
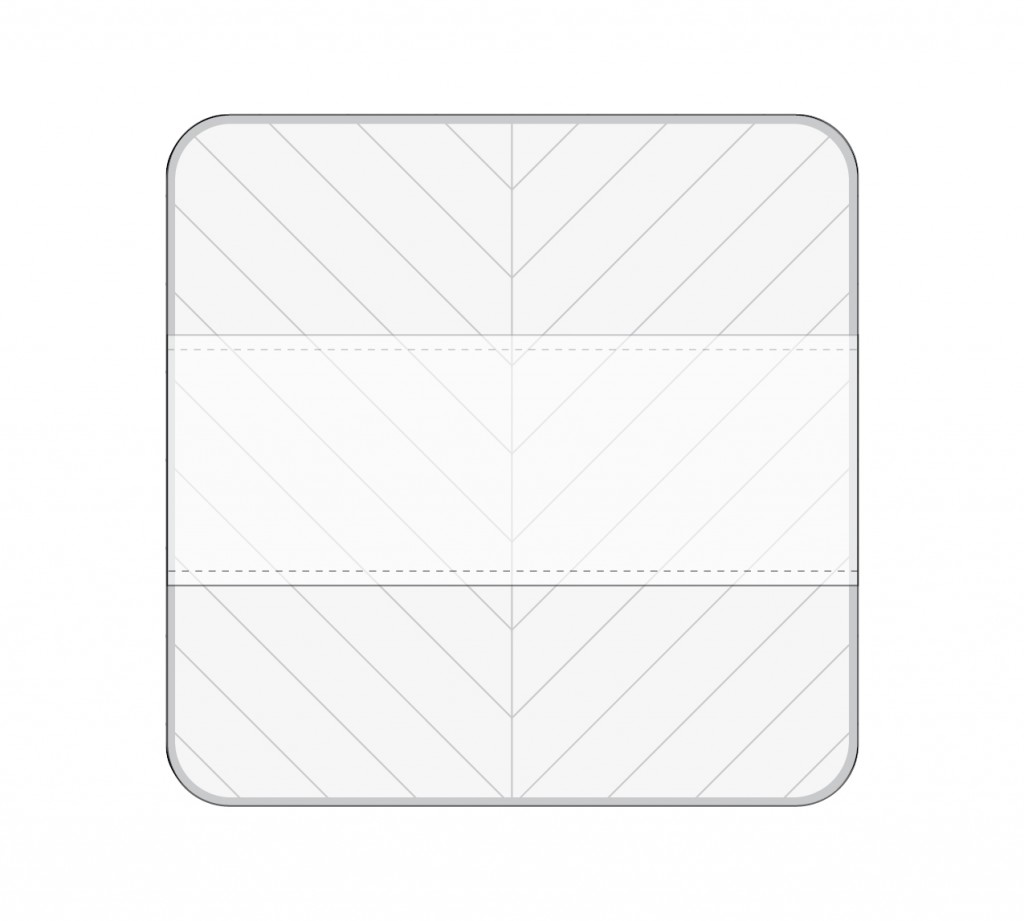
12. Draw a 20” square on the Wrong Side of you completed Front, centered on the seam from Step 11. You can use your Right Angle tool top make sure that the top & bottom edges of the square are perpendicular to the central seam. Cut out the square.
13. Use a large mug or small bowl to trace a curve into each corner of the square as shown; trim your corners along these curves. 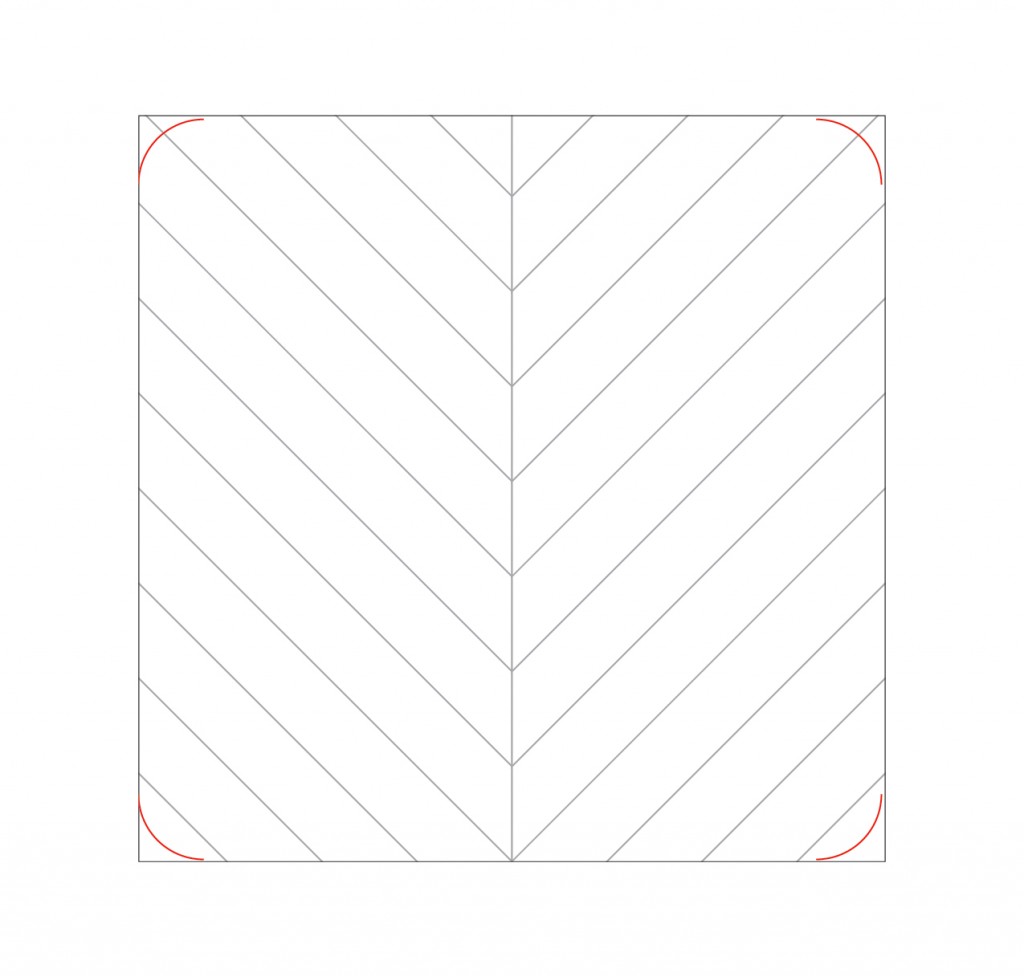
Assembling the Pillow:
1. Sew the Edging strips together at their short ends to make one long strip. Press the seams open.
2. Fold the Edging in half along its length, Wrong Sides together, and press. Fold & press a 1/2” hem on one short end.
3. Beginning your stitches 3” from the folded end, baste the Edging to the outer edge of the pillow Front’s Right Side with a 1/4” seam as shown. 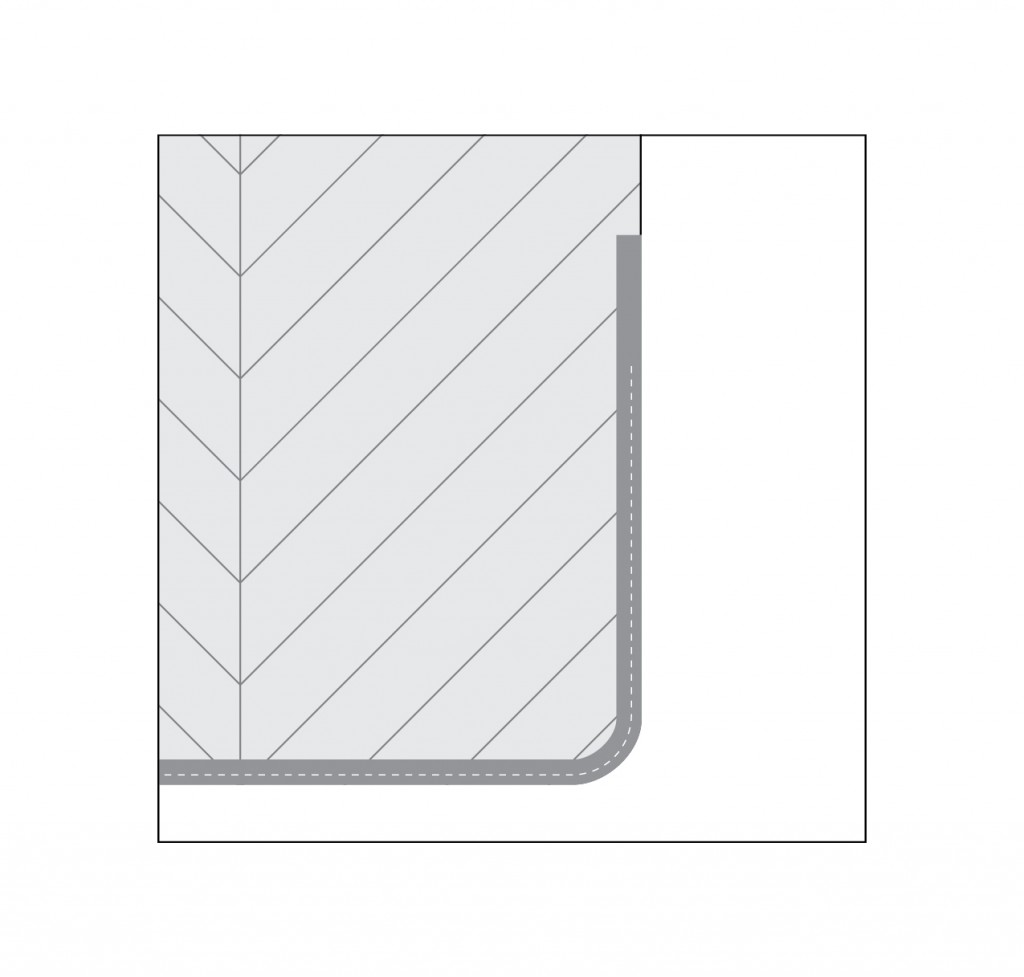
The Edging’s folded edge should be toward the center of the pillow Front, its raw edges against the raw edge of the Front. Take care not to allow it to bunch at the corners.
4. Sew until you approach the beginning of your Edging seam; allowing for 2” of overlap, snip off the excess Edging strip. Tuck the tail of the Edging into the fold of the hemmed end and finish basting the Edging to the pillow Front.
5. Press & sew a 1/4” rolled hem on the top 20” edge of one Back piece and the bottom 20” edge of the other Back piece. These will be your Lower & Upper Back pieces, respectively.

6. Trace & cut rounded corners on the raw corners of both Back pieces to match the ones on your Front piece.
7. Lay the Lower Back on top of the Front, Right Sides together, with the bottom & sides aligned and the hemmed edge toward the top of the work. Place the Upper Back on top of the Front & Lower Back, Right Side inward, with the top & sides aligned; this piece will overlap the upper part of the Lower Back. Pin all layers in place around the pillow’s outer edge.
8. Sew the Back pieces to the Front & Edging with a 1/2” seam allowance along the sides and a 1/4” seam allowance at the corners, to prevent the Edging from bunching.
9. Turn the pillow Right Side out through the gap between the Back pieces and fit it over your pillow form.
We hope you enjoyed this week’s tutorial! You can also get the PDF versions of all our free projects on our website. If you decide to try to out this tutorial or any of our projects, we would love to see! You can email us at info@camelotfabrics.com and can be featured in a future Fan Friday! Have a great day everyone :)
Happy Sewing!
Comments are closed.